Hardware errors leading to incorrect operation or absence of video cards in the task manager
At the hardware level, some common problems lead to errors in identifying video cards or to their constant crashes during operation. These include:
- weak power supplies that cannot provide enough power for video cards during mining. You need to understand that various power supplies have marginal efficiency indicators and can only provide limited power around the clock. For high-quality power supplies this is up to 80% of their declared power, and for cheap ones - from 50 to 70% of the rating data on the 12 volt line;
- low-quality risers. When using risers with poor contacts (both on the power line and on the data line), with low-capacity capacitors, low-quality USB cables, video cards may not be detected at all, or they may be detected by the system, but crash when the miner is running. To eliminate problems associated with risers, you need to choose only high-quality risers, preferably with a 6-pin power connector (Molex in extreme cases), use the shortest, thickest, shielded USB data cables possible;
- Sometimes users forget to connect all the power connectors to the video card and riser. In this case, the video card may be detected, but will be displayed in the device manager with errors;
- When connecting several power supplies to a mining rig, you should try to connect both the video card and its riser to one power supply. Under no circumstances should you connect power from different power supplies to the motherboard. This is guaranteed to lead to overflows and burnout of the electronic elements of the board.
In all cases related to troubleshooting in the operation of electrical and radio equipment and computer equipment, you must remember that:
THE MAIN CAUSES OF MALFUNCTIONS IN ANY ELECTRICAL DEVICES ARE THE PRESENCE OF EXTRA OR LACK OF NECESSARY CONTACTS.
Errors caused by incorrect driver installation
To correctly install drivers for AMD and Nvidia video cards, we recommend reading the article “Correct installation of GPU drivers for mining,” as well as specialized forums.
As a rule, in mining farms with several video cards the following errors occur due to incorrect installation of drivers:
- Error code 43 (error 43) – when installing AMD drivers on video cards with a flashed BIOS. This error can be easily fixed using the AMD/ATI Pixel Clock Patcher. In the Windows 7 operating system, when installing more than four video cards, this error may also occur with cards that are not flashed. To eliminate it, you need to use 6xGPU_mod, the latest version of which can be downloaded from Bitcointalk.
Error code 43 usually occurs when installing new drivers on the system, which the system itself can do during automatic installation of updates. In addition, drivers can be lost due to power failures, errors on the system media, exposure to viruses and other problems.
After such an update, error 43 may appear, and the hashrate of video cards may drop significantly. For AMD video cards, after installing the drivers, you need to use AMD-Compute-Switcher, and for Nvidia video cards, enable P0 state according to the method described in the article “Optimizing the consumption of Nvidia video cards during mining.”
If after applying the patcher and mod (for Windows 7) and rebooting the system, the error does not disappear, then perhaps the wrong BIOS was flashed on the video card, there was a failure when writing it, or the BIOS chip on the video card has failed. To resolve this error you need to:
- flash the correct BIOS (restore factory)$
- repeat the firmware process again and wait for the AtiFlash program to report success;
- switch to backup Bios (if available).
If it is impossible to restore the working state of the video card by flashing the correct BIOS or switching the BIOS switch to reserve, you need to change the BIOS chip in a service center, or look for another cause of the problem.
- Error code 12, which indicates a lack of resources in the system. To fix it, you need to check the BIOS settings of the motherboard, where necessary:
- disable everything unnecessary (for example, serial and parallel port);
- enable above 4g decoding;
- try switching the system to multi GPU mode;
- turn on/off the internal video card (this method works differently on different systems);
- set the operating mode of PCI-E devices to Gen 1 or 2;
- try updating the motherboard BIOS to the latest one.
Change the mining rig configuration
If your mining rig consists of different graphics cards, some of them probably have more memory than others. So, put these more advanced cards with more memory in the first x16 PCIe slot - also known as slot zero.
For example, if you have six video cards with 4 GB of memory and two with 8 GB, let one of the “eights” be GPU0, that is, place it in slot zero. Below is an image of the ASUS Z270-P motherboard.
ASUS Z270-P
Bottom line: install an 8 or 16 GB video card in slot zero.
Errors in miner configuration when specifying video cards
This type of error occurs when there is a missing or incorrect indication in the batch file to start mining of the video cards that should carry out the mining (both AMD and Nvidia).
For example, in the claymore dual miner program and other programs from this programmer, the NO AMD OPENCL found error sometimes occurs. It appears when you launch the mining program and indicates that no devices were found that support OPENCL technology. It may have different spellings in different programs, but its essence boils down to the impossibility of finding a device suitable for mining. If there are no hardware errors or problems associated with incorrect installation of drivers, the problem should be looked for in the miner configuration.
This error can also occur in other programs used for mining. For example, in the sgminer program a similar error is called clDevicesNum returned error, no GPUs usable. When starting the miner, a similar message appears:
[02:56:02] Started sgminer v0.1.1
[02:56:02] * using Jansson 2.11
[02:56:09] Specified platform that does not exist
[02:56:09] clDevicesNum returned error, no GPUs usable
[02:56:09] Command line options set a device that doesn't exist
Let us repeat once again that if the required video cards are displayed correctly in the device manager and do not have exclamation marks with error codes, then the BAT file is incorrectly configured. This happens on systems with different types of cards installed on the system (for example, integrated graphics card plus AMD graphics cards, or using AMD and Nvidia GPUs simultaneously and all three types of devices together). As a rule, to eliminate this error, you either need to correctly indicate the numbers of the video cards used in the miner, or indicate which platform (AMD or Nvidia) you need to use.
In the Claymore miner, this is the -platform command with a numerical value: 1 – use only AMD video cards, 2 – only NVIDIA, 3 – use both AMD and NVIDIA GPU (by default, the miner uses command 3, according to which both types of cards are used).
In Phoenix miner these are the -amd or –nvidia commands, respectively.
In sgminer (its various versions and similar programs such as cgminer), on mixed systems you may need to specify the --gpu-platform 1 or 2 option on the command line.
Usually, if the internal video card is not enabled, this miner works without specifying this parameter, but in this case, sometimes you may need to use the —gpu-platform 0 command.
How to start mining in RaveOS
After successfully launching the farm, you need to create a wallet, select a pool and a miner.
Creating a wallet in RaveOS
To create a wallet, go to the Wallets tab and select Add Wallet.
Creating a wallet in RaveOS
In the Wallet name field, enter the wallet field.
Creating a wallet in RaveOS
- Select a coin - select the coin that you are going to mine.
- Coin name — name of the coin.
- Please select pool - select a pool. We recommend registering on Binance, this is the best solution for mining ether. After selecting a pool, select servers, you can have several.
- Please, fill additional information - in this field enter the name of the mining account in the Binance pool. Read how to mine on Binance Pool on the website.
- Plese select miners - in this field we select a miner, or several miners. We recommend NBminer.
And click Save.
After creating a wallet, you can start mining in RaveOS.
We start mining in RaveOS
- To do this, go to the Dashboard tab
- Choosing our worker
- Click the Action button
- Select Mining
In the next window, select a wallet, coin, pool, server, miner and start mining.
Other errors that cause miners to malfunction
Let's look at other errors that sometimes occur when running mining programs:
- error OpenCL error -4 (0) - cannot create DAG on GPU - this error in the Claymore miner occurs when mining cryptocurrencies using the Ethash algorithm (Ethereum, UBIQ, ETC, MOAC and others). To eliminate it, you need to increase the amount of available virtual memory in the system, as well as use the latest versions of miners that can work with the latest DAG epochs;
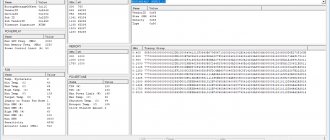
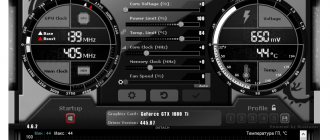
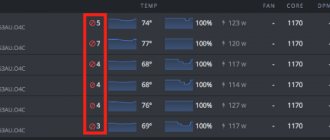
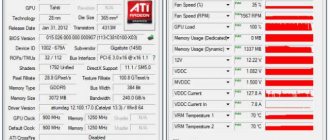
- WATCHDOG error: GPU hangs in OpenCL call appears when video cards are overclocked, low-quality risers, bad (very long) USB connecting cables. There is no need to squeeze all the juice out of video cards by increasing the frequency of memory and video cores, since downtime caused by overclocking will negate all income from such mining. The hwinfo program, which shows memory errors for AMD video cards, will help you understand where very high frequency values are set:
As a rule, when overclocking the memory, one of the video cards crashes, and when overclocking the core (or very strong downvolting), the computer freezes completely;
- a miner with an AMD GPU turns off with an error about the card temperature of 511 degrees (an NVML error appears on Nvidia cards: cannot get current temperature, error 15) - this problem occurs when there is poor contact between the video card and the riser, in which the signal about the temperature of the video card does not pass through, or There are problems with the power line. You need to change the riser and/or USB cable, clean their contacts, as well as the contacts of the video card connector, with a cotton swab dipped in alcohol. You can try changing the PCI-E connector on the motherboard or inserting the card directly into the motherboard connector. In addition, the video card can produce such an error if there is too much overclocking/downvolting, as well as poor contact (or too much load on the power supply) along the 12 volt line. In this case, you need to check all power connectors suitable for the card for burnouts, especially if various adapters/splitters are used, and also reduce the load on the power supply.
The computer does not see the video card - we solve the problem
Often the computer does not see the video card, although it is installed and previously worked normally. Most often this happens when reinstalling the operating system or updating hardware. You can determine the reason why the computer does not find the video card and how to fix it yourself. Let's figure it out.
The simplest method of checking system functionality. It is a visual study of a computer and its layout and connections between blocks. All blocks and connecting wires are inspected, their connections are made, whether there are any violations during the connection or not.
If the video card does not work and everything is fine with the connections, plug it into the network and reboot the computer. If the result is negative after rebooting, you should check the BIOS (Basic Input/Output System).
The information that the computer displays on the monitor when it reboots allows you to determine what actions need to be taken to solve the problem with the video card. If there is an inscription on the monitor - Press DEL to enter setup - press, following the rules according to the instructions (on laptops, instead of DEL, you need to press F2 to enter the BIOS). Next, go to the settings menu. In the settings we find the settings for the video card
- Graphic
- V > Video activation. VGA and Primary Display
The F10 key saves the settings. After the reboot, check how the video card is displayed in the list:
- Discrete card: AMD Radeon
- AMD Radeon Mobile Graphics
If after this the computer does not see the video card, you need to install it on another device to determine its functionality. If the video card is working properly, the motherboard may need to be replaced. During verification, different situations may arise:
- Video card overheating
- Triggering an emergency reboot
- Presence of viruses
- Outdated drivers
- Faulty video card
How to enable a video card on a laptop
The configuration of laptops from some manufacturers, and now almost all, includes two video cards (video adapters), discrete and integrated, with the ability to automatically switch.
A discrete video card is an analogue of desktop PC video cards.
The integrated graphics card is part of the processor or located on the motherboard.
Older versions of ATI discrete (AMD) cards are managed by the Catlyst Control Center utility.
Automatic switching requires drivers. By setting the “Display Mode” menu in the BIOS to “Switchable”.
How to disable the built-in video card
To disable the built-in video card using the BIOS or using Windows, go to computer management and select video adapters on the device manager tab. Click on the right button and select - disable.
To determine which video card, we find the definition in Google search. To disable the external adapter, we perform the same operations. To disable the integrated video card, go to the BIOS.
To go to the BIOS, you need to press: Del (for PCs), F2 or F10 (for laptops) before loading Windows.
In the settings responsible for the equipment, we have: Intergration Video, Primary Video Controller. Define Disable. But due to different BIOS versions, the names of the settings are different. You can also disable the video card on your laptop. The only difference is in the BIOS versions.
How to switch video card
If you have an AMD processor and an ATI/AMD video card, to switch the video card you need to install the Catalyst Control Center utility on both video adapters by driver.
Switching to a video card with more power occurs automatically, depending on what program is used, the amount of information, whether the network is connected or offline operation. Manual control is performed by the Catalyst Control Center utility also from the tray.
If the processor is Intel. ATI/AMD card, use Catalyst Control Center.
To automatically turn on or switch, the laptop manufacturer's website offers drivers. Enter the Switchable parameters in the BIOS in the Display Mode menu. The BIOS is loaded at the time of power on or reboot. If the moment is missed, then you need to wait until the Windows program loads and reboot again.
The main hotkeys are:
- F1- Lenovo
- F2- main BIOS key (Aser. Asus. Samsung. Sony. Simens. Panasonic. Dell. Lenovo.)
- F10-Hewlett. Packard. Dell.
- Esc- Toshiba
The laptop does not see the video card
Similar situations when the laptop does not see the video card arise when reinstalling the Windows operating system. To solve such problems, you must first remove all previously installed drivers so that the program does not conflict with newly installed software. In the download manager, find the video card, right-click on (properties). On the Driver tab (delete) and OK.
To remove programs previously installed with video card drivers. Open Control Panel (Programs and Features).
For an AMD Radeon card, remove everything related to AMD (for older video card models - ATI Catalyst).
For an nVidia video card - remove everything that mentions nVidia.
The same applies to Intel HD Graphics.
To resolve the issue of installing video card drivers, you need to go to the manufacturer’s website to find your device and the required operating systems.
Among the many offered, we find the necessary drivers for the video card and install them. After installing the drivers, restart the computer.
A similar method is used to determine and configure the computer when the computer does not see the Nvidia video card or when the video card is turned off.
Launching RaveOS
After burning the image to a hard drive or flash drive and inserting the worker token into the token.txt file, connect your image to the farm; read how to assemble and configure the farm on the website. The farm may or may not be connected to a monitor. It doesn’t matter, after starting the farm in the RaveOS web interface, you will see that your worker is online. If so, then you did everything right.
The computer does not see the discrete video card
This problem is often encountered by those who reinstalled operating systems when an error occurred during installation. The solution is possible if you reboot the OS, or boot from Livecd.
Another solution is possible when deleting all drivers that mention Nvidia, disable the folder called Nvidia. Clean the registry. Disconnect the Internet, antivirus, reboot and install the drivers again. BUT if the proposed manipulations do not help, you need to contact the service center. They will solve problems with repairs and adjustments.
Switch from Windows to Linux
Windows requires more video card memory than Linux - that's a fact. If you want to continue using a 4GB GPU, your choice of operating system will be extremely important. By the way, Phoenix and Claymore's are available for Linux.
We recommend using one of the special Linux distributions like HiveOS or SimpleMining OS. They have an easy to use interface for mining. In addition, HiveOS has pre-configured files for all 2Miners pools, also known as “flight sheets”. With it, the process of preparing for mining will be even easier.
HiveOS interface
Bottom line: use Linux.
Main reasons
The main reason why a user has to face such a situation is that the user installed it incorrectly.
This is relevant for a stationary device, since it is in this case that the user tries to periodically change the elements of the device.
If the computer does not see the inserted card, you should check whether it is installed correctly in the motherboard.
In this case, there is no reason to panic if you just remove the card and install it again correctly.
It is impossible not to mention more serious cases.
For example, this phenomenon can be caused by problems with the motherboard. So, it might just break.
It often happens that the video card connector is damaged. Self-diagnosis of such a problem is impossible.
So, when the user suspects that the motherboard is damaged, he should contact a specialist from the service center.
The wizard will refute or confirm the user's assumptions. Sometimes damaged connectors can be repaired. If this is not possible, completely change the board.
The computer does not see the video card for various reasons
Registration in RaveOS
To get started with RaveOS you need to register. Follow the link and go through the registration procedure.
Registration in RaveOS
Registration is standard, fill out your login, e-mail, password and confirm the password. After creating an account, you will be taken to the RaveOS Web management interface.
RaveOS main window
In our case, there are two workers and two rigs, everything will be zero.
We're done with registration, let's move on to downloading RaveOS.
Helping the video card come out of the shadows
Everyone knows that you should start solving any problem with a simple method.
This statement is also relevant if the computer does not see the card. It does not matter which video card is used: AMD Radeon or Nividia GeForce.
So, the easiest way to solve this problem is to check the status.
The user must ensure that the graphics card is installed correctly (in the correct position and location).
In addition, be sure to check whether the wires connecting the monitor to the system unit and the electrical network are securely connected.
If it turns out that there is no such problem, simply turn on the system again. If there is no result, turn on the system again or reboot.
When even the above steps do not produce results, check that the BIOS settings are correct.
This abbreviation is translated into Russian as “basic system for input and output.” It is this program that is responsible for connecting PC components, including the video card.
There are different ways to bring a video card out of the shadows
Why does the farm freeze and shut down?
With proper setup and the right equipment and equipment, everything should work without interruption. When assembling our first farm, for a very long time we could not understand why it turned off sometimes once, and sometimes several times a day. We found out that the power supply was operating at maximum load and was shutting down due to overheating. This article describes problems and solutions both from personal experience and from various Internet sources. Possible causes and their solutions are described below:
Tips for installing a video card
To begin with, it’s worth saying that the video card will not work if the appropriate drivers are missing.
If the device does not see the card even with branded drivers, there is a possibility that the reason is the incompatibility of the accelerator used with the motherboard.
The situation is similar with an outdated operating system or a clumsy unofficial build.
Often the computer does not see the installed video card if the video parameters are set incorrectly. Another reason is the presence of outdated firmware.
However, these are the root causes of a programmatic nature. After all, many users do not pay attention to whether the graphics adapter is installed correctly and whether it is connected to the motherboard using slots.
Today, most boards and card connectors are made in such a way that an error when inserting a video card is impossible.
It’s just that you often have to deal with physical damage to equipment, for example, dusty contacts.
You can install a video card in different ways
Disabling the built-in video card
To disable the built-in video card using Bios or Windows OS, go to the management of your personal computer and select the video adapter by going to the “device manager” . Next, click “disable” by right-clicking.
To determine which video card it is, do a Google search for the definition.
To turn off the integrated graphics card, go to the BIOS.
To do this, you need to press the Delete key before loading Windows. In the BIOS you need to find the Primary Video and Integration Video options.
Next we set Disable . However, the settings may vary depending on different BIOS versions.
Disabling the built-in video card is not difficult at all
The computer does not see the second video card
It often happens that the user installed two video cards in different slots using a special bridge, which is included with the motherboard.
But the device does not detect the second video card. In this case, you need to check whether everything is connected and whether the SLI mode is active.
One of the reasons why a user encounters a similar situation is that there are problems with drivers or device manager. So it won't hurt to check them.
If the reason is driver problems, remove them and try to clean them using a special program, for example, Driver Fusion 1.4.0 .
Also check if additional power is supplied to several video cards and remove additional programs. Alternatively, you can swap video cards.
In general, experts advise not to install two cards unless necessary. If the user needs them, then it is better to use a 1000 Watt unit, which is ideal for such cards.
Alternatively, check whether the video cards are connected using the same bridge. Most motherboards come with long bridges, but some gadgets don’t need them.
Finally, try connecting a different master video card. If there are no drivers, then the problem will be solved - it will find and install something.
It often happens that the computer does not see the second video card
The computer does not see the video card on Windows 7
It often happens that a user has installed Windows 7, but the computer does not see the video card, and the drivers are not installed.
In this case, you should download new drivers. If this does not help, you should install a new version of Windows.
If you downloaded the drivers from the official website, but they still do not install, and there is no mention of the video card in the manager, you should try different versions of Windows.
If the device is still recognized as a standard video adapter, you can try Windows XP - perhaps this will help solve the problem. But only if the card is old.
Also check the version of Windows 7 - 32-bit or 64-bit. After all, perhaps the user installs drivers from the thirty-two-bit version to the sixty-four-bit version or vice versa.
It would not be superfluous to check whether the additional power wires are connected to the video card. This is very easy to do - if the user forgot to connect them, the system will report this.
Also, a similar error often occurs if there is no additional power supply to the video card.
Often, after reinstalling Windows 7, the computer does not see the video card
The computer does not see the video card on Windows 8
Many users, having installed Windows 8, discover that the video card is missing from the device manager after loading. They notice that only the built-in video card remains and the drivers are not installed.
In such a case, you can try to remove unknown and problematic devices from the manager, for example, a discrete video adapter, which can be hidden under any name.
After this, you just need to reload the drivers in normal mode.
You can also try this option - by entering the BIOS, change the settings to “default” and exit, saving the data.
As a result, after restarting Windows, the user will see that the card appears in the device manager.
Here is another solution to a similar problem - unpack the standard drivers into another folder and select “Standard adapter” , “Update drivers” “Find drivers on the computer” . After this, specify the folder in which the standard drivers are located.
The problem when the computer does not see the video card on Windows 8 is easily solved
The computer does not see the video card on Windows 10
Often, after updating the operating system, problems arise with the equipment used, including video cards.
For example, often the new Windows 10 does not recognize graphics devices. But users who install Windows 10 from scratch do not have to face such problems.
The main reason why Windows 10 does not recognize the installed hardware is the lack of the required drivers to ensure the full functioning of video cards.
This often happens because video card manufacturers are sluggish and often fail to develop new software versions in time.
In addition, Microsoft often does not update the software to fit certain video card models.
Often users have to deal with the problem of being unable to install the necessary software for a graphics device.
If such a problem occurs, experts advise doing the following:
1. After activating the new Windows 10, restart your computer and enter the “Device Manager”, which will display the hardware. After this, reinstall the drivers for such equipment.
2. Pay attention to installing the required version of frameworks before you start downloading drivers.
3. A mandatory requirement is to connect an IGPU if the computer has several graphics devices.
4. Don't forget to check if there is software for your motherboard. It often happens that computer owners do not pay attention to this when loading Windows. It often happens that their installation is impossible because there is no suitable motherboard.
Try reinstalling your graphics hardware
The computer does not see the video card on Mac OS
If the Mac OS computer does not see the video card, but continues to work, this means that the adapter is functioning normally. Otherwise, the user would not be able to launch the gadget.
However, this is not a reason to calm down. In this case, you need to think about what other problems there are:
1. This often happens due to problems with the driver or its absence. The software often crashes when using a video game or heavy software. You can solve this problem by installing drivers, or updating existing software to the latest version.
2. If there is a problem with the motherboard, it is better to contact a specialist and carry out additional diagnostics to help fix the problem.
If the computer does not see the video card on Mac OS, this problem can be easily solved
The computer does not recognize the new video card
It often happens that the user purchased a new card, and after installation hears a beep after the computer starts. In this case, the monitor does not receive a video signal.
It often happens that the computer does not recognize the new video card.
In this case, the motherboard and the old video card work fine, and the BIOS of the motherboard used is flashed with the latest version downloaded from the official website.
But as a result, the video card is still not detected and the computer does not see the new video card.
In this case, you should check whether the integrated video is disabled and whether additional power is connected.
If there are no problems with this point, then the reason is that the technician was too clever with the power supply plug. After all, the old and new cards require different connections to work.
The fact is that the new card has more power, which means that much more resources will be required. In this case, when working with a new card, it is better to use a different plug.
Give back your old card and order yourself a new gadget. When installing, pay attention to how the card is connected to the power supply.