For several years in a row, video cards from AMD have managed to maintain their undisputed leadership in the cryptocurrency mining equipment market. Only the latest generation of video cards from Nvidia was able to match the performance of its competitors.
To increase the hashrate and ensure smooth operation of the farm, its owners should install Nvidia drivers that are most suitable for mining. You can also increase the profitability of mining by overclocking the frequencies of the chip and RAM using special utilities or flashing the BIOS.
What is the difference between Nvidia Profile Inspector and Nvidia Inspector
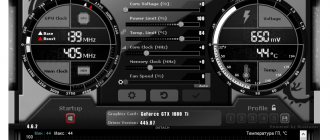
Nvidia Inspector is a utility for overclocking video cards, allowing you to modify the operating frequency of the video card chips, the voltage for the memory and GPU, and the cooling intensity of the video card.
Unlike Nvidia Inspector, the Nvidia Profile Inspector is a tool for configuring “fine” video card settings for specific applications in order to improve compatibility and improve performance. Nvidia Profile Inspector is positioned as an addition to Nvidia Inspector.
Equipment
In addition to the graphics accelerator, the package includes a CD with drivers and documentation, a set of additional communication cables and a warranty card. Also in this list there is a user manual, which describes in detail how to configure an NVidia video card for games and any other application tasks. In some cases, manufacturers include free games in the package. But, as a rule, these are premium solutions with high performance.
Program interface
Let's look at the program interface in more detail:
- Profiles - A drop-down list that displays Nvidia Inspector profiles. Allows you to select an already configured profile with the parameters you need for a specific application.
- Back to global profile (Home) / User modified profiles - return to the global (base) profile / select a profile from the list of user-modified profiles.
- Refresh current profile —refresh the current profile.
- Restore current profile to Nvidia defaults - restore the current profile to the default settings from Nvidia.
- Create new profile — create a new profile.
- Delete current profile — delete the current profile.
- Add application to current profile —add an application to which the profile settings will be applied.
- Remove application from current profile —remove an application from the current profile.
- Export user defined profiles —export user-configured profiles.
- Import user defined profiles — import user-configured profiles.
- Show the settings and values from CustomSettingNames file only - show only settings that have semantically correct names.
- Show unknown settings from Nvidia predefined profiles - show settings that do not have correct names and have user-overridden values.
- Show bit value editor —show the editor of the significant bit of a custom parameter. Allows you to see a list of all significant values of the current configuration bit and the descriptions corresponding to these values. Also allows you to set new values.
- Apply changes — apply the settings of the current profile.
The Export user defined profiles mode contains the following possible selection options (in the form of a context menu):
- Export current profile only —export only the current profile.
- Export current profile including predefined settings — export the current profile, including overridden settings.
- Export all customized profiles — export all customized profiles.
- Export all driver profiles (Nvidia Text Format) - export all driver profiles.
Import user defined profiles mode contains the following selection options (as a context menu):
- Import profile(s) — import profiles.
- Import (replace) all driver profiles (Nvidia Text Format) - import (replace) all driver profiles.
The list of parameters in the Nvidia Profile Inspector interface is divided into the following groups:
- 1 — Compatibility — a group of settings for the program’s compatibility with various driver functions.
- 2 — Sync and Refresh — group of synchronization and update settings. Includes frame limit, Vsync, full screen and windowed mode and more.
- 3 — Antialiasing — Antialiasing settings. A method for smoothing out jaggies when rendering an image with a video card.
- 4 — Texture Filtering — group of texture filtering settings.
- 5 - Common - group of general video card settings.
- 6 - SLI - a group of settings responsible for the functioning of several Nvidia video cards in rendering for the specified application.
- 7 - Stereo - presumably this is a group of settings responsible for generating a 3D image.
- 8 — Extra — additional profile settings.
- Other - settings that have semantically clear names and are not included in the groups described above.
- Unknown - settings that do not have semantically correct names.
Advanced options
Sometimes it is necessary to change specific options or manage individual parameters. This is especially true for detailed settings of the card for games.
Advanced adapter management is performed in almost all other menu items of the Nvidia utility. Particular attention should be paid to the “Manage 3D parameters” item, where the following values should be set:
- CUDA - GPUs: "Everything".
- V-Sync (Vertical Sync): Off.
- Vertical Sync Pulse: “Use 3D application setting.”
- Background Light Shading: Off.
- Maximum number of pre-prepared frames: select the option with the Nvidia sign.
- Stream optimization: “Automatic”.
- Power management mode: “Adaptive”.
- Antialiasing - Gamma correction: "Off".
- Anti-aliasing - options: “Off”.
- Antialiasing - Transparency: Off.
- Anti-aliasing – mode: “Off”
- Triple Buffering: Off.
- Multi-display/mixed GPU acceleration: “Multi-display performance mode.”
- Texture Filtering - Anisotropic Sampling Optimization: Off.
- Texture Filtering - Quality: "Highest Performance"
- Texture filtering - negative deviation UD: "On".
- Texture Filtering - Trilinear Optimization: "On".
- Anisotropic Filtering: Off.
- Enable Scalable Textures: Off.
- Expansion Limit: Off.
Anisotropic Filtering: Off.
Expensive video adapters do not need such detailed settings due to their power. For example, the NVIDIA GeForce GTX 1080 has 9 TFlops of performance, while the 1060 has 6 TFlops, which is a significant difference.
How to use Nvidia Profile Inspector
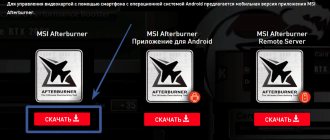
Next, let's take a closer look at how Nvidia Profile Inspector is configured. It should be noted that if Nvidia Profile Inspector does not open for you, then you need to make sure that the Nvidia driver is installed, and that its version is not out of date, and update if necessary.
Setting up an existing profile
To configure an existing application profile:
- We select the profile we need, focusing on the name.
- We change the profile settings we need.
- We save the changes made to the existing profile by clicking the Apply changes .
Create a new profile
To create a new profile, click on the Create profile in the panel, then enter the profile name:
After this, you can select the applications to which this profile will apply:
All that remains is to change the necessary parameters and apply the changes with the Apply changes .
Settings
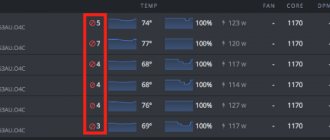
Let's look at setting parameters in Nvidia Profile Inspector using the example of the CUDA parameter - Force P2 State . Nvidia video cards can operate in several modes. These modes are called GPU Performance State Interface (P-State). There are a total of 16 modes from P0 to P15. The most productive mode is P0, the least productive mode is P15. Here is a list of main modes:
- P0/P1 - maximum 3D performance;
- P2/P3 - balanced 3D performance;
- P8 - HD video playback;
- P10 - playing DVDs;
- P12 - minimum power consumption in idle mode.
When CUDA - Force P2 State is enabled, the graphics card is forced to use the graphics card's P2 performance mode when performing CUDA calculations. By default this is enabled. By turning it off, we will allow the video card to work in more productive modes, for example P1 and P0. They can be useful when performing scientific calculations. In this case, of course, you need to make sure that the video card does not overheat.
To disable video card performance mode locking, select Global profile (for all applications), then find the CUDA – Force P2 State parameter in the Common section. In the second column, click on the On and change it to Off .
Then click the Apply Changes to apply the changes in the upper right corner of the program window. Now, when performing CUDA calculations, the video card will operate at maximum performance.
The lineup. Accelerator Specialization
Before setting up an NVidia video card for games, let’s look at the model range of current graphics accelerators from this manufacturer. Again, this company produces only discrete video subsystems. Currently, the 10XX series of video adapters is relevant. Devices within it are distributed as follows:
- The budget segment is occupied by solutions of the GT 1030 model. In terms of performance, such accelerators correspond to integrated accelerators. Therefore, you can purchase such a board only if the built-in video core breaks down.
- The niche of entry-level gaming adapters is occupied by the GTX 1050 and GTX 1050Ti series devices. In this case, technical specifications are improved and this increases performance. But the cost also increases significantly. Most modern toys with such accelerators will be available in HD or FullHD format. The picture quality must be set to an average level.
- The current mid-level graphics accelerators are the GTX 1060, GTX 1070 and GTX 1070Ti. These solutions are equipped with an increased video buffer capacity. Also, the parameters of this group of accelerators have been significantly improved. As a result, most games on such hardware will be available in FullHD or 2K resolution.
- Premium adapters are 1080 and 1080 GTX. In this case, you can play in 4K resolution. But the price of such solutions is really very, very high. In some cases it can reach $1000.
conclusions
Today you learned how to use Nvidia Profile Inspector. The possibilities of editing existing profiles and creating new profiles for specific applications were considered. The program interface was examined in detail. The utility's capabilities for changing GPU performance modes for specific applications were also outlined.
If you find an error, please select a piece of text and press Ctrl+Enter.
Related posts:
No related photos.
Rate this article:
( 5 ratings, average: 5.00 out of 5)
Tweet Pin It
about the author
entertainm30
I have a higher education in the field of computers. I know a little about free software. In my free time I spend my free time repairing equipment. I am the proud owner of a 3D printer. I think self-education is very important for today.
Mounting the graphics adapter
If the question is: “How to configure an NVidia video card on a laptop?”, then we skip this step. The adapter in mobile computers is soldered in and does not need to be installed. The same can be said about integrated video cores. They are included in the CPU and, as in the case of a laptop, there is no need to install them additionally.
But for stationary system units with discrete accelerators, this point is very important. Therefore, with the PC turned off, we remove the side panels from the case. Then you need to examine the motherboard in detail and find slots on it marked PCI-E in the 16X version. In one situation there may be only one, but on premium solutions there are usually several. In the latter case, we find the connector that has the lowest serial number: 0 or 1. After that, install the graphics adapter in this slot and snap all the latches. Also, do not forget to screw the metal plate.
If the graphics accelerator model is GTX 1060 or higher, then you need to connect an additional power connector from the power supply.
Now you can reassemble the system unit.
Connection
At the next stage, setting up the NVidia video card comes down to connecting the monitor. For these purposes, this group of devices is equipped with three types of ports. One of them, DVI, is obsolete and should only be used as a last resort. But DisplayPort and HDMI are equivalent. Therefore, we connect the wire from the monitor to any of them.
Some older monitor models do not have such connectors, but are equipped only with a VGA port. In this case, you need to install a special adapter to the DVI socket, and only then make connections between these two devices.
Also, don’t forget to connect the monitor’s power cord.