Overclocking a video card allows you to increase its performance by 5-10% absolutely free of charge. Some particularly successful models can show even greater gains.
Therefore, users are often interested in how to overclock a video card? In this article we will try to answer this question in as much detail as possible. Here you will learn how to overclock your graphics card using MSI Afterburner.
Please note that, theoretically, overclocking a video card can damage it. Therefore, you do everything described below only at your own peril and risk. We recommend taking special care when overclocking older or budget video cards with poor cooling systems. Also at risk are laptops, all-in-one computers and other compact systems.
How to display MSI Afterburner monitoring on screen?
To display the information of interest on the screen
Check the “Show in On-
Screen
Display” option.
c. In the “Properties” column you will see “in OSD” (in the menu). Select other information to display on the screen
in the same way.
Interesting materials:
Where can I connect e-SIM? How to connect a laptop via mobile Internet? How to connect an Xbox joystick to a computer? How to connect an Xbox to a computer? How to connect headphones to xbox 360? How can I connect a PS4 joystick to a computer? How can I connect a megabyte to Beeline? How to connect to the Internet in Phoenix for one day? How to enable monetization on YouTube? How to connect a DVD player and receiver to a TV at the same time?
Advanced settings
Clicking on the gear (settings) will open all MSI Afterburner settings.
- If your video cards are the same model, from the same manufacturer, then it is best to check the “Synchronize settings of identical GPUs” checkbox. This will help you (if you have a farm of several cards) to make overclocking settings for one card and apply it to all of them at once.
- We advise you to check all these boxes for more convenient work with MSI Afterburner.
You can use configuration files to apply locked and advanced settings.
To switch to configuration editing mode, you need to right-click on the MSI Afterburner shortcut and select “File Location”.
The folder with the installed program will open. We will see many files in it. We need to select the “Profiles” folder:
It contains configuration files:
You can edit them in any text editor in administrator mode. It is very convenient to use the standard Windows 7/8/10 Notepad or Notepad++ (it is even more convenient) for editing.
This folder contains the following files:
- MSIAfterburner.cfg – the main file of the basic configuration of the program (located in the “Profiles” directory along the path C:\Program Files (x86)\MSI Afterburner\Profiles);
- files with *.cfg extension starting with VEN_... describe overclocking and undervolting settings for each video card. The number of these files will be comparable to the number of your video cards.
Before you begin editing, it is wise to back up these configuration files to another folder in order to restore everything if something goes wrong.
If there are syntax errors in the configuration files, then both undervolting and overclocking will not work. And the sliders in the program interfaces will be blocked.
How to unlock core voltage
To unlock the voltage, you need to specify a unit in the following options in the main configuration file MSIAfterburner.cfg in the Settings section in administrator mode:
UnlockVoltageControl=1 (unlock voltage control)
UnlockVoltageMonitoring=1 (unlock voltage monitoring)
StartupDelay=0 (time delay for applying overclocking/undervolting)
ForceConstantVoltage=1 (“Forced constant voltage”)
Example:
For AMD
If you want to enable unofficial overclocking mode, then make or add changes to the following lines:
[ATIADLHAL] UnofficialOverclockingMode=1 UnofficialOverclockingEULA=I confirm that I am aware of unofficial overclocking limitations and fully understand that MSI will not provide me any support on it
Example:
For Nvidia
For Nvidia, in the MSIAfterburner.cfg file, you can change the voltage values when setting up overclocking/undervolting using the “Curve” curve (often called “curve”):
VFCurveEditorMinVoltage = 700 (minimum possible voltage, can be set to 650 mV)
VFCurveEditorMaxVoltage = 1250 (maximum possible voltage, in millivolts)
We define settings for each card separately
Files with the extension *.cfg with a name starting with VEN_1... allow you to apply overclocking and downvolting for each card.
Example
The syntax of these files is as follows:
[Startup] Format=2 PowerLimit=90 ThermalLimit=65 CoreClk=1100 MemClk=1925 CoreVoltage=750 [Settings] VDDC_Generic_Detection=1
The last line (VDDC_Generic_Detection=1) will force the program to access the video card controller through the nVIDIA voltage regulation module.
How can I understand which *.cfg file belongs to which card?
To do this, you can compare the bus number (BUS), which is indicated in the name:
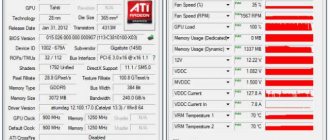
In the graphical interface you can find out the bus number by clicking on the i icon:
By comparing the bus identifiers of the desired card in the “Information” window with the bus in the name of the *.cfg file, we will understand that this is the same card if we have many of them in the system.
Now we can make further changes.
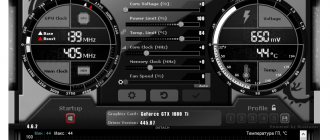
In the *.cfg configuration files for each video card, we will indicate the values of temperature limits (in degrees Celsius), Power Limit (power as a percentage), Core and Memory Clock (core and memory frequencies in megahertz), fan operating modes (Fan Speed) of the card and the frequency of their revolutions.
Using the graphical interface, we can also specify the autostart of the application and the desired overclocking profile, core voltage, fan parameters, etc.
It is better to turn off the option to synchronize the settings of identical GPUs because even cards from the same manufacturer usually have their own, unique potential for overclocking.
We recommend checking the “Run with Windows” option.
How to enable fan control
When mining, we recommend setting the minimum rotation speed to 40-60%. Next, we will select acceptable settings that allow the card to operate at the optimal temperature, and at the same time not increase noise and wear on the fan bearings.
Example:
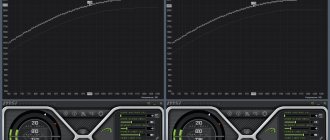
To automatically control the rotation speed of graphics adapter fans according to the configured rotation curve, you need to connect the “Auto” button in the graphical interface:
How to add MSI Afterburner to startup
To automatically apply overclocking options for all video cards, you need to set the necessary parameters and save them in the profile.
To automatically apply the profile, you need to click on the button with the Windows icon - “Startup”.
The personal settings of video cards will be used every time the farm or computer is started.
You also need to click on the “Options” gear and turn on the “Run with Windows” checkbox.
How to unlock the Core Voltage, Power Limit and Temp Limit sliders
Example of an inactive option:
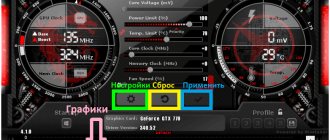
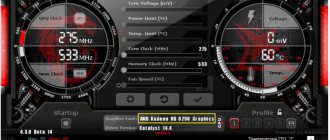
To unlock core voltage, acceleration and fan speed, you need to click on the settings gear:
Here we can tick the options we need - “Unlock voltage control” and “Unlock voltage monitoring”.
You can also unlock Core Voltage in *.cfg files for each video card separately by enabling the VDDC_Generic_Detection function.
Example:
[Settings]
VDDC_Generic_Detection=1
If there are no such lines there, then you need to insert them into each configuration file yourself.
The Core Voltage slider now becomes active.
Also, do not forget to check the “Unlock voltage control” and “Unlock voltage monitoring” checkboxes in the settings.
Overclocking the video memory of a video card
Step No. 4. Now we move on to overclocking the video memory (Memory Clock). We remember the maximum Core Clock value that we defined earlier and reset the settings using the “Reset” button.
Step No. 5. Again increase the Power Limit to the maximum and slightly increase the Memory Clock value (for example, by 50-80 MHz). Then we apply the settings.
Step No. 6. Test the stability of the video card first in the FurMark stress test, and then in games. Everything is exactly the same as in step No. 2. If there are problems, we reduce the memory frequency and test again.
Step No. 7. If no problems are found, then return to Step No. 5 and increase the memory frequency a little more. Then we test again (step No. 6). Then we repeat steps No. 5 and 6 until we find the maximum video memory frequency at which the video card works stably.
The resulting maximum video memory frequency can be further reduced by 10-20 MHz for complete confidence in stable operation.
Stage 1: Preparation
The first step is to carry out some preliminary procedures to successfully solve the problem under consideration.
- Of course, you first need to download and install MSI Afterburner directly. Also, to check the stability of the overclocked GPU, we will need the FurMark application.
- Install the latest drivers for your graphics adapter - this has proven to give better results.
Read more: Examples of driver updates for NVIDIA / AMD - Also pay attention to the version of Windows you are using - it is advisable that it be updated to the latest stable release.
Read more: How to update Windows
After completing these steps, you can proceed directly to overclocking.
In case of problems
If something went wrong and the image disappeared altogether, became distorted to the point of being impossible to reset, hung, and/or something else:
- Try rebooting or turning off the computer using the button on the case; usually, the next time you start it, it automatically resets to standard values;
- If this does not help and faulty profiles are automatically loaded at startup (although this usually does not happen without a special checkbox in the settings), then it will boot into Windows safe mode, removing the program from startup and/or deleting it there, and then booting in reverse mode.
In a nutshell, perhaps it’s something like this. That being said, let's move on to the afterword.
Saving video card overclocking results
In order for the current video card overclocking settings to work every time you start MSI Afterburner, you need to enable the “Apply ovecloking at system startup” option, which is located at the very bottom of the program window.
You also need to go to the settings and on the “Basic” tab, enable autoloading of the MSI Afterburner program.
In addition, it would be a good idea to save the current overclocking settings of the video card as a profile. To do this, click on the “Save” button, double-click on the profile and click “Apply”.
If necessary, graphics card overclocking profiles saved in MSI Afterburner can be activated using key combinations or automatically when launching games. To do this, go to the program settings and go to the “Profiles” tab.
Here you can specify key combinations for each of the 5 profiles, as well as select 2D and 3D profiles. The 2D profile is a profile that will work in normal mode, and the 3D profile is a profile for games and other 3D applications.
Important information
The overclocking process involves increasing the operating frequencies of the video core and memory modules, which leads to increased heat generation. Therefore, before starting the procedure, care should be taken to ensure high-quality cooling of the relevant components.
Read more: Proper computer cooling
It's also worth keeping in mind that overclocking with MSI Afterburner won't work for most non-gaming laptops, since the operating parameters of integrated cores are fixed at the hardware level, plus discrete mobile chips have similar limitations.
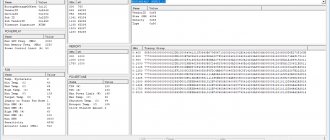
Overlay display
AfterburnerMSI can display statistics with the click of a button while playing a game or any other process. To configure this function, you need to click the “Settings” button and open the “Monitoring” tab:
Having selected all the characteristics of interest in turn, you need to check the box “Show in Overlay Screen Display” for each of them.
Now we need to configure the display of this overlay screen display. To do this, you need to go to the adjacent “OED” tab and assign quick launch keys for calling and removing the EOD:
In general, all you need is the top button (F9 in the screenshot), which will both call up and remove the EOD.
Safety
The natural question is whether this is dangerous. After all, we increase the indicators tested and recommended by the manufacturer. This is not entirely true. Sometimes it happens that manufacturers themselves recommend overclocking the video card a little when they realize that they have “cheaped up” and set the values too low.
Even when overclocking is not recommended by the manufacturer, it can still be done. All modern video cards are protected by various technologies, the meaning of which boils down to the following: when it overheats, it simply turns off and resets the overclocking values to the original level. The same thing will happen if you overdo it and set the acceleration values too high. The computer will restart and reset the video card settings you made.
Stress test
If you don’t have any powerful games at hand, but want to check the card’s performance, then you can take benchmarks or use hardware tests for testing. For example, MSI Kombuster, which monitors the temperature and overall load of the video card, would be a good utility.
Logging data during the test will allow you to overclock the card to an acceptable speed and continue working, taking care of cooling the device. But it is worth noting that the so-called stress test does not give such accurate results as a game test would give.
Overclocking the GPU of a video card
Now you can proceed directly to overclocking. The process of overclocking a video card using MSI Afterburner includes 3 steps:
- Overclocking the GPU (Core Clock).
- Overclocking video memory (Memory Clock).
- Overclocking the GPU and video memory together.
The first two steps allow you to determine the maximum overclocking values that can be used for the GPU and video card memory. And at the last stage it is checked how it all works together. At each stage and after each change in parameters, the video card is tested. If everything is fine, you can continue, but if problems arise, then you need to go back and reduce the acceleration.
Step #1: We will start by overclocking the GPU. To do this, set the Power Limit to maximum and increase the Core Clock by 40-50 MHz. After this, save the settings using the “Apply” button.
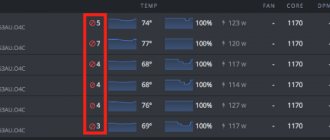
Step No. 2. We run stress testing of the video card in the FurMark program and observe for about 5 minutes. If there are no problems during stress testing (artifacts, crashes, freezes, overheating), then launch some heavy game and play for 30-60 minutes . At the same time, we regularly monitor the temperature of the video card. It is advisable that the temperature does not go beyond 80 degrees. If problems arise during stress testing, then slightly reduce the Core Clock and run the stress test again. If everything is fine, we test it in games.
Step No. 3. After the first successful increase in Core Clock, you can repeat the procedure. Again, increase the frequency of the graphics chip (this time by 10-20 MHz), click “Apply” and move on to step No. 2 (stress testing and then games).
Then we repeat steps No. 2 and 3 until we determine the maximum Core Clock frequency with which the video card can operate. It is very important to increase the frequency gradually and in small steps, testing after each step. This is the only way to correctly and safely determine the maximum overclocking at which the video card remains stable. After determining the maximum frequency, it needs to be reduced by 10 MHz just to get 100% stability.
Downloading and installing the program
Attention: You make all recommendations from this article, as well as from any other, at your own peril and risk, and therefore we are not responsible for your actions and the consequences of these actions, which, however, you have long been warned about.
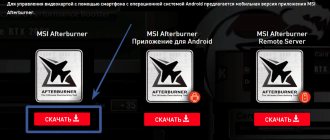
We will use the most famous tool in this area, which, as already mentioned, we previously mentioned in articles. Then we were talking about the topic of how to change the fan speed of AMD Radeon video cards. As you understand from the title and subtitle, we will talk about MSI Afterburner.
The program is completely free, supports the Russian language and provides complete tools for overclocking video cards. You can get it from this link or from the developer’s website.
Note: Before installing MSIA, as well as subsequent overclocking, it is recommended to update the drivers for your video card (the latest version can be obtained from the NVIDIA or AMD website).
The installation is extremely simple and I will not dwell on it (I will only say that it is not necessary to install Riva Tuner Statistic Server, but it can be useful for advanced diagnostics and overclocking, which we will consider in the next part of the article).
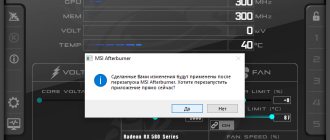
After installation, you will be prompted to launch this same MSI Afterburner, which can, in general, be done from the very beginning, having first closed everything valuable that is open and not saved, because:
You will be asked (or rather strictly recommended) to restart the computer to correctly determine the initial settings (we are talking about the frequencies of the memory and graphics processor of the video card, as well as a number of other parameters that could be changed at the driver level or third-party programs).
I recommend agreeing that the acceleration then proceeded most smoothly.
After rebooting the computer, actually launch the program using the shortcut that appears on the desktop or in the Start menu.
What is important to know and understand in the process
Next, to understand how to overclock a video card to the maximum, you need to know:
- By “a little” we often mean not even tens, but units of MHz, and the peak overclocking value is achieved precisely due to these units, and the frequencies are interrelated, both in a good and in a bad sense;
- Overclocking (or rather overheating, increasing voltages and other related nuances) can damage the video card (and not only it) and/or reduce its service life;
- No image distortions should appear anywhere and, ideally, never;
- Temperatures must be within normal limits, which is regulated by the appropriate slider and/or custom auto mode, which will automatically select the cooler rotation speed, depending on the temperature during overclocking and testing;
- It may turn out that the card is overclocked only by one of the parameters (i.e. only by memory or only by the processor), and when changing another parameter problems begin - this means that overclocking is possible only by this value, i.e. Core Clock (MHz) and Memory Clock (MHz), respectively;
- It is not recommended to touch other sliders at this stage (except, perhaps, “Power Limit”, and even then with caution), as this can significantly affect the life and operation of the video card.
Well, of course, it’s worth saying the following.