CCMiner stands for Crypto Currency Miner and is an open source cryptocurrency mining software designed specifically for NVIDIA GPUs compatible with CUDA technology. This software is available and runs on both Linux and Windows.
Introduction to CCMiner
In every mining guide, we first mention the specifications of the coins and then list all of their mining pools along with a sample launcher .bat file for the miner. An example configuration file looks something like this:
ccminer.exe –a x17 –o TYT_ADDRESS_POOL –u TYT_ADDRESS_KOWELKA -px
You can simply copy this ready-made sample code, edit the wallet address, pool address, and then start mining that particular coin. Along with these standard settings, we will add subtle launch options to get the best performance.
Console miner ccminer
Because all manuals of this kind are written to customize the program using the example of a specific coin or algorithm and completely forget to tell in detail about the miner itself, what algorithms it supports and describe all its capabilities. Therefore, we tried to collect for you all the information that will help you set up ccminer and start mining cryptocurrency.
Distinctive feature of CCminer for Nvidia
Although there are many other miner programs available for cryptocurrency mining, CCMiner is the most popular of them all. This popularity is due to the fact that most users have computers with video cards from NVIDIA. CCMiner is designed specifically for Nvidia users, which cannot be said about setting up CGMiner.
CCMiner for CUBA from nVidia
Among other things, this miner supports most algorithms of several cryptocurrencies at once, therefore you can now mine not only Bitcoin, but also other cryptocurrencies that are easier to mine.
The CCMiner setup guide is intended for novice miners; it will help you understand the entire process of setting up ccminer and you will learn what command line parameters the software supports. In addition, in this guide there are a couple of tips and a few tricks, even for advanced miners, that this program is capable of performing.
CCMiner for Windows and Linux
Since this miner is open source, all versions of ccminer, source code and download links are available on GitHub. For Windows, the source files are compiled by the developers themselves, which you can download and start mining right away.
ccminer for cuda on windows and linux
However, for Linux, you will need to download the source code and compile it yourself, which requires some technical ability and knowledge.
CCMiner where to download
Before continuing with the guide, you need to understand the most important part of it - choosing the right ccminer. Yes, there are many algorithms and ccminer supports enough of them to start mining cryptocurrency right now.
There are several versions of CCMiner, or rather from several developers. Popular ccminer developers are: tpruvot, KlausT and Alexis. The last two continued to work in their own direction on ccminer from tpruvot.
There is also a version of the ccminer miner for AMD, but unfortunately it is not very well optimized and produces less cryptocurrency, unlike Nvidia.
But why are there so many versions of one program and all from different developers? That's because ccminer is open source. Even you can develop the project in your own direction right now and release your own ccminer, if, of course, you have sufficient programming knowledge.
| Developer | Download link |
| Tpruvot | https://github.com/tpruvot/ccminer/releases/ |
| KlausT | https://github.com/KlausT/ccminer/releases |
| KlausT ccminer (CryptoNight) | https://github.com/KlausT/ccminer-cryptonight/releases |
| Tpruvot CCMiner CPU Multi | https://github.com/tpruvot/cpuminer-multi/releases |
| krnlx | https://github.com/krnlx/ccminer-xevan |
| alexis78 | https://github.com/alexis78/ccminer |
In addition, each new development of this miner includes bug fixes, leads to improved performance and the emergence of support for new algorithms compared to previous versions.
Make sure your Windows is 32-bit or 64-bit
The first thing you'll notice on the GitHub download page is the source code file along with two separate zip links.
- ccminer-x64, which is designed for 64 bit Windows
- ccminer-x86 for Windows 32 bit
Therefore, before downloading, check what system is installed on your computer.
ccminer for 32 and 64 bit windows
To find out the system bitness, click “My Computer” or “This PC” and open properties. It will display the type of system you are running. If it is 64 bit, download ccminer-x64, and if it is 32 bit, then download ccminer-x86.
To read: The best power supplies for mining
how to find out the bit depth of windows
When downloaded, CCMiner may be blocked in chrome as a threat or by your antivirus, in our case it is Avast. To bypass the download block, download ccminer through Opera or another browser. Also add the miner to the exclusion list of your antivirus.
This problem is the most common, but know that programs you download from GitHub are reviewed and tested and are considered safe.
Ok, before you see how to set up ccminer, we will list all the algorithms and coins that the miner supports.
Supported algorithms and coins CCminer
The new version of ccminer supports all major algorithms, including the latest ones such as x12, x16r (Ravencoin), x16s (Pigeoncoin) or allium (Garlic) and phi2 (LUX). Below is a list of algorithms and coins supported by ccminer v2.3.
-a, --algo=algorithm (specify the hash algorithm you need here)
| Algorithm for configuration in CCMiner | Algorithm name + (Coin name) |
| bastion | Hefty bastion |
| bitcore | Timetravel-10 |
| blake | Blake 256 (SFR) |
| Blake2s | Blake2-S 256 (NEVA) |
| blakecoin | Fast Blake 256 (8 rounds) |
| bmw | BMW 256 |
| cryptolight | AEON cryptonight (MEM/2) |
| cryptonight | XMR cryptonight |
| c11/flax | X11 variant |
| decred | Decred Blake256 |
| deep | Deepcoin |
| equihash | Zcash Equihash |
| dmd-gr | Diamond-Groestl |
| fresh | Freshcoin (shavite 80) |
| fugue256 | Fuguecoin |
| groestl | Groestlcoin |
| hmq1725 | Doubloons/Espers |
| jackpot | JHA v8 |
| keccak | Deprecated Keccak-256 |
| keccakc | Keccak-256 (CreativeCoin) |
| lbry | LBRY Credits (Sha/Ripemd) |
| luffa | Joincoin |
| lyra2 | CryptoCoin |
| lyra2v2 | VertCoin |
| lyra2z | ZeroCoin (3rd impl) |
| myr-gr | Myriad-Groestl |
| neoscrypt | FeatherCoin, Phoenix, UFO… |
| nist5 | NIST5 (TalkCoin) |
| penta | Pentablake hash (5x Blake 512) |
| phi | BHCoin |
| polytimos | Politimos |
| quark | Quark |
| qubit | Qubit |
| sha256d | SHA256d (bitcoin) |
| sha256t | SHA256 x3 |
| sia | SIA (Blake2B) |
| sib | Sibcoin (X11+Streebog) |
| scrypt | Scrypt |
| scrypt-jane | Scrypt-jane Chacha |
| skein | Skein SHA2 (Skeincoin) |
| skein2 | Double Skein (Woodcoin) |
| skunk | Skein Cube Fugue Streebog |
| s3 | S3 (1Coin) |
| timetravel | Machinecoin permuted x8 |
| tribus | Denarius |
| vanilla | Blake256-8 (VNL) |
| veltor | Thorsriddle streebog Old Whirlcoin (Whirlpool algorithm) |
| whirlpool | Whirlpool algo |
| x11evo | Permuted x11 (Revolver) |
| x11 | X11 (DarkCoin) |
| x12 | X12 (GalaxyCash) |
| x13 | X13 (MaruCoin) |
| x14 | X14 |
| x15 | X15 |
| x16r | X16R (Raven) |
| x16s | X16S |
| x17 | X17 |
| wildkeccak | Boolberry |
| zr5 | ZR5 (ZiftrCoin) |
| phi2 | (LUX) |
| allium | (Garlic) |
Keep in mind that not all ccminer algorithms available are ASIC resistant, so it is worth testing before choosing a permanent coin.
How to set up XMRig
Step 1 - Download the program
There are two options to download the program:
- Official website of the developer.
- On the GitHub website.
On GitHub releases, scroll to "Assets" and download the latest version available.
Unzip the downloaded file to a location convenient for you.
Step 2 - Set up the program
In the same folder as xmrig.exe, create a file monero.bat with the following contents:
xmrig -o pool.minexmr.com:443 -u 84XFxjQVYoJjQBeyfbcYBgJ1tw4cgywGyTp12nQw3mSKZctgMYuPGRH1y2LuBAS8yyT8ZX2NDS3CXbfFAxdX QJwAGMoMDSq -k —tls pause
Simply replace XFxjQVYoJjQBeyfbcYBgJ1tw4cgywGyTp12nQw3mSKZctgMYuPGRH1y2LuBAS8yyT8ZX2NDS3CXbfFAxdXQJwAGMoMDSq with your Monero wallet address.
A file with the .bat extension is created in any text editor.
Step 3 - Launch the miner
After creating or editing the monero.bat file, simply double-click it, a terminal window will appear and you will start mining!
The bottom line displays the hashrate.
Video Guide
subscribe
Mine on a CPU? Read about setting up Cpuminer-Opt.
Setting up for Nicehash
There are two ways to use Nicehash:
- Use the Nicehash shell itself.
- Use the XMRig console only.
Let's consider the second option. To do this we need to create a .bat file with the following text:
- xmrig - indicates that this particular program is being launched. There is no need to change this.
- randomx – the parameter specifies which algorithm will be used for mining. If you want to mine Ravencoin using the kawpow algorithm, then write kawpow.
- -o — after this parameter the pool address is entered. Indicate the one you want to use to mine cryptocurrency.
- :3380 - immediately after the address put a colon and indicate the port number.
- -u — enter the address of the cryptocurrency wallet. You can open it on a cryptocurrency exchange or through crypto wallet programs. Enter the address of your Nicehash wallet instead of 3P7qADz69quhfyK5e9kvfno6Jyjq4Rcocx.
- .rig1 is the name of your device. This is necessary for the convenience of tracking statistics. You can specify any value.
Example:
xmrig -a randomx -o randomxmonero.eu.nicehash.com:3380 -u 3P7qADz69quhfyK5e9kvfno6Jyjq4Rcocx.rig1 —coin monero pause
At the end of the body file, we recommend adding the pause command. It will pause the program if an error occurs. Otherwise, the software simply closes. With pausing, you can see the type of error or incorrectly written syntax and fix the problem.
If you use the Nicehash shell itself:
To reduce the number of threads when mining, you need to follow these steps:
- Open the Benchmark tab.
- Select your processor and XMRig.
- Click on the settings gear.
- Find the “Extra Launch Parameters” text field and enter —threads=N, where N is the number of threads you want to use.
- Click the “Enable only this Algorithm” button.
Example using 8 threads:
--threads=8
An example of reducing CPU usage:
--cpu-priority 0
The --cpu-priority command is responsible for specifying the priority under which the miner will operate in the OS. Available values:
- 0 - low,
- 1 - below average,
- 2 - average,
- 3 - above average,
- 4 - high,
- 5 — real time (maximum).
Video: Mining on the Monero Processor (Random X algorithm) on Nicehash and Pools.
subscribe
Setting up CCminer
Now you know how to create a batch file. Learned some basic command lines for ccminer. All we have to do is configure ccminer so that it can start mining the cryptocurrency you need right now.
First create a .txt text file and copy the following line into it (this is an example): ccminer-x64.exe -a x17 -o stratum+tcp://yiimp.eu:3777 -u DKTBZJ8QqhWs1vTmMcfbLAVo6Z5j71ixPj.u2btc -pc=XVG pause
Be sure to change the algorithm of the mined coin in this line (we use Verge XVG as an example). Change the link to your pool, and also insert your wallet. Then save it as a .bat file, for example startVerge.bat .
Explanation of lines: The example we gave above is your batch launch configuration file ccminer-x64.exe.
- ccminer-x64.exe – initiates the launch of your miner
- -a x17 –, this parameter is responsible for the mining algorithm
- -o stratum+tcp: –, URL:port of your pool where you will mine cryptocurrency
- -u –, in this line you write your wallet and after the dot the login of your employee.
- -p –, here you specify the password of your worker (not the wallet!), the standard password on all pools is “,x”,
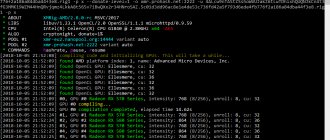
How to compile CCMiner for Linux using Ubuntu as an example
Here are instructions for compiling ccminer using the Ubuntu operating system as an example. Compilation instructions are provided for video card architectures from Nvidia for Maxwell and all others. Download the .deb and follow the instructions from here.
installing CUDA Toolkit
You need to download the .deb from the nvidia developers site and follow the instructions to install the CUDA Toolkit.
- Go to the CUDA Toolkit download page using the link above.
- Select the operating system, in our case Linux,
- Architecture x86_64 or ppc64le
- Ubuntu OS distribution and supported version 16.04
- Next, select the installation type deb (local) or deb (network)
The difference between the deb local and deb network installation type is that by downloading and installing the first option, you install all components at once.
Because of this, the file is large.
When installing deb network, only the most necessary components will be installed, while the rest will be loaded in order.
Instructions for deb (local)
`sudo dpkg -i cuda-repo-ubuntu1604-9-2-local_9.2.148-1_ppc64el.deb` `sudo apt-key add /var/cuda-repo-<,version>,/7fa2af80.pub` `sudo apt- get update` `sudo apt-get install cuda`
Instructions for deb (network)
`sudo dpkg -i cuda-repo-ubuntu1604_9.2.148-1_ppc64el.deb` `sudo apt-key adv —fetch-keys https://developer.download.nvidia.com/compute/cuda/repos/ubuntu1604/ppc64el/7fa2af80 .pub` `sudo apt-get update` `sudo apt-get install cuda`
Then run these commands:
Compiling ccminer on Maxwell architecture (SP-MOD)
echo 'export PATH=/usr/local/cuda/bin:$PATH' >,>, ~/.bashrc sudo apt-get install build-essential libcurl4-openssl-dev git automake git clone https://github.com/ sp-hash/ccminer.git cd ccminer/ ./autogen.sh ./configure CFLAGS='-O3 -Wall -march=native' make ./ccminer
Setup for Nvidia (CUDA) and AMD (opencl)
If you want to mine on video cards too, then enter the key -cuda to use Nvidia cards
Example for Nvidia:
:start xmrig -a randomx -o pool.supportxmr.com:5555 -u 4FBSiJSfXqPiiir33MpaZ9cqP4f4RsEyNChUQtfpMA95XtgJvWYyhcdRZ5KPhbWznBh2PGiFAtEYQZ3FynQVhsGj51wnp1ZeQvEA8VtNVH.rig 1 -px —donate-level=1 —cuda —coin monero goto start
Use the --opencl switch to use AMD.
Example for AMD:
:start xmrig -a randomx -o pool.supportxmr.com:5555 -u 4FBSiJSfXqPiiir33MpaZ9cqP4f4RsEyNChUQtfpMA95XtgJvWYyhcdRZ5KPhbWznBh2PGiFAtEYQZ3FynQVhsGj51wnp1ZeQvEA8VtNVH.rig 1 -px --donate-level=1 --opencl --coin monero goto start
Video: Setting up the xmrig miner for mining Monero on a video card
subscribe
This completes the setup of the batch file. Below we will provide commands for more advanced configuration of the program.
Setting up the config.json file
The settings in the batch file may not be sufficient to obtain maximum efficiency. It's worth using the configuration file. In the folder it is called config and has a .json extension. It is analogous to a body file for launching a program. This procedure is necessary to achieve the desired performance.
Open the config.json file in any text editor and edit the pools attribute as follows:
Here's the complete line of code:
{ "api": { "id": NULL, "worker-id": NULL }, "http": { "enabled": false, "host": "127.0.0.1", "port": 0, "access -token": NULL, "restricted": true }, "autosave": true, "background": false, "colors": true, "title": true, "randomx": { "init": -1, " init-avx2": -1, "mode": "auto", "1gb-pages": false, "rdmsr": true, "wrmsr": true, "cache_qos": false, "numa": true, "scratchpad_prefetch_mode ": 1 }, "cpu": { "enabled": true, "huge-pages": true, "huge-pages-jit": false, "hw-aes": NULL, "priority": NULL, "memory -pool": false, "yield": true, "asm": true, "argon2-impl": NULL, "astrobwt-max-size": 550, "astrobwt-avx2": false, "argon2": [0 , 1, 2, 3], "astrobwt": [0, 1, 2, 3], "cn": [ [1, 0], [1, 1], [1, 2] ], "cn-heavy ": [ [1, 0], [1, 1] ], "cn-lite": [ [1, 0], [1, 1], [1, 2], [1, 3] ], "cn -pico": [ [2, 0], [2, 1], [2, 2], [2, 3] ], "cn/upx2": [ [2, 0], [2, 1], [ 2, 2], [2, 3] ], "rx": [0, 1, 2], "rx/wow": [0, 1, 2, 3], "cn/0": false, "cn -lite/0": false, "rx/arq": "rx/wow", "rx/keva": "rx/wow" }, "opencl": { "enabled": false, "cache": true, "loader": NULL, "platform": "AMD", "adl": true, "cn/0": false, "cn-lite/0": false }, "cuda": { "enabled": false, "loader": NULL, "nvml": true, "cn/0": false, "cn-lite/0": false }, "log-file": NULL, "donate-level": 1, "donate- over-proxy": 1, "pools": [ { "algo": NULL, "coin": NULL, "url": "pool.minexmr.com:443", "user": "84XFxjQVYoJjQBeyfbcYBgJ1tw4cgywGyTp12nQw3mSKZctgMYuPGRH1y2LuBAS8yyT8ZX2ND S3CXbfFAxdXQJwAGMoMDSq", "pass" : "x", "rig-id": NULL, "nicehash": false, "keepalive": false, "enabled": true, "tls": false, "tls-fingerprint": NULL, "daemon": false , "socks5": NULL, "self-select": NULL, "submit-to-origin": false } ], "retries": 5, "retry-pause": 5, "print-time": 60, " health-print-time": 60, "dmi": true, "syslog": false, "tls": { "enabled": false, "protocols": NULL, "cert": NULL, "cert_key": NULL, "ciphers": NULL, "ciphersuites": NULL, "dhparam": NULL }, "dns": { "ipv6": false, "ttl": 30 }, "user-agent": NULL, "verbose": 0 , "watch": true, "pause-on-battery": false, "pause-on-active": false }
When you launch the program, the following information will be displayed:
GeForce card model @ 2300/2920 MHz 16x39 8x25 arch:52 SMX:13
This means that 16 threads per 39 blocks are used, bfactor is 8x, and bsleep is 25. The architecture is 52 with an SMX 13 multiprocessor. Data varies depending on the video card or processor model. They display the video adapter settings.
They must be adjusted experimentally to obtain optimal performance. For example, if the PC freezes when mining a token, then reduce the amount of threads used and bfactor. For each individual video card in the farm, you can enter data separated by commas. In this case, an index is indicated, which is the identifier of the system being used.
Video: Mining on CPU. How to start a monero miner? How to create a wallet?
subscribe
How to Set Up CCMiner – A Complete Guide for Beginners
Novice miners, especially those who mine cryptocurrency using MinerGate GUI or NiceHash, think that this is the easiest way and there is no need to look for another. If you are one of them, then know that your cryptocurrency mining methods are easy to use, but you are severely limited in options in terms of profits and cryptocurrency rates.
CCMiner is not difficult to set up as such; in fact, the only thing that scares you is the lack of a graphical interface and a good guide for setting up the miner.
Here we will show you how to set up and start using CCMiner today. That is, we will explain to you the basic functions of the command line, show you how to create a .bat launch file for Windows and launch the miner.
Basic Command Line Options
You have chosen the coin you need, created your first cryptocurrency wallet for this coin. We used the Verge coin (XVG) in this example, which uses the X17 algorithm as its search.
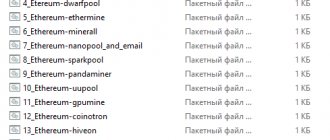
- After you download the miner and unpack it, you will find the files that are shown in the picture below. Some versions will have ccminer.exe, and some will have ccminer-x64.exe.
unpacking the ccminer archive In addition, the unpacked archive will already have files for quick launch, which you need to edit and substitute your values. - To mine coins using the selected algorithm, we will not run the exe file. Instead, we will create our own batch .bat file (we will show you how to do this), which will launch ccminer with the parameters and settings we need.
- Before setting up a miner for a specific coin/algorithm, let's first break down and understand the basic commands that you can enter into your batch file.
- Create a new text document in your miner's folder and name it help.txt, then paste the following configuration into help.txt: ccminer-x64.exe —helppauseAttention. Change the file name ccminer-x64.exe to the file that is located in your miner folder. If it matches, there is no need to change anything.
- After that, in notepad, go to “File >,> Save As”, and change the file name to help.bat and “File Type”, select “All Files”, save in the same folder as the miner. If you did everything correctly, it should look like the image below.
creating a batch file for ccminer - Now open the help.bat file you created. It will show you the basic command line options that you can enter into your batch file.
To read: Why is it better to mine on a GPU? The answer is obvious
We have prepared a complete list of commands for ccminer. And besides, they were translated into Russian. See special teams in our table.
| Team | Meaning |
| -a, --algo=algorithm | Algorithm selection |
| -d, --devices | Returns a comma-separated list of CUDA device IDs to work with. |
| -d, --devices | Returns a comma-separated list of CUDA device IDs to work with. |
| -i, --intensity=N[,N] | GPU threads per call 8-25 (2^N + F, default: 0=auto) Decimal and multiple values allowed for fine tuning |
| --cuda-schedule | Set device thread scheduling mode (default: auto) |
| -f, --diff-factor | Difficulty divided by this factor (default 1.0) |
| -m, --diff-multiplier | Multiply difficulty by this value (default 1.0) |
| -o, --url=URL | Mining server URL |
| -O, --userpass=U:P | username: password for the mining server |
| -u, --user=USERNAME | Username |
| -p, --pass=PASSWORD | password |
| --cert=FILE | certificate for mining server using SSL |
| -x, --proxy=[protocol http / https://]ip[:port] | connection via proxy |
| -t, --threads=N | number of miner threads (default: Number of nVidia GPUs in your system) |
| -r, --retries=N | number of retries when network call fails (default: infinite) |
| -R, --retry-pause=N | pause time between repeats in seconds (default: 15) |
| --shares-limit | maximum ball before exiting the program. |
| --time-limit | Maximum time for mining before exiting the program. |
| -T, --timeout=N | network timeout, in seconds (default: 300) |
| -s, --scantime=N | upper bound on the time spent scanning the current job when long polling is not available, in seconds (default: 5) |
| --submit-stale | ignore outdated job checks, may create more rejected shares |
| -n, --ndevs | cuda device list |
| -N, --statsavg | number of samples used to display hashrate (default: 30) |
| -no-gbt | disable getblocktemplate support (check height in solo) |
| --no-longpoll | disable X-Long polling support |
| --no-stratum | disable X-Stratum support |
| -q, --quiet | disable output of hashmeters for each line |
| --no-color | disable color output |
| -D, --debug | enable debug output |
| -P, --protocol-dump | verbose reset of protocol-level actions |
| -b, --api-bind=port | IP: port for miner API (default: 127.0.0.1:4068), 0 disabled |
| --api-remote | Allow remote management, such as a pool, enable --api-allow = 0/0 |
| --api-allow=... | IP/mask of allowed api clients, 0/0 for all |
| --max-temp=N | Mine if the GPU temperature is less than the specified value |
| --max-rate=N[KMG] | Mine if the hashrate is less than the specified value |
| --max-diff=N | Mine if net difficulty is less than a given value |
| --max-log-rate | Interval to reduce hash logs (default: 3) |
| --pstate=0 | will force GeForce 9xx to work in P0 P-State |
| --plimit=150W | set gpu power limit, allow multiple values for N-cards on Windows, this setting uses percentages (eg OC tools) |
| --tlimit=85 | Set gpu temperature limit (windows only) |
| --keep-clocks | prevent clock reset and/or power limiting on exit |
| -hide-diff | Hide balls and difficulty |
| -B, --background | running the miner in the background |
| --benchmark | run offline |
| --cputest | debugging hashes from processor algorithms |
| --cpu-affinity | set a process to match a specific mask of the CPU core(s) |
| --cpu-priority | set process priority (default: 0 idle, 2 normal to 5 highest) |
| -c, --config=FILE | download a configuration file in JSON format can be from a url with the https:// prefix |
| -V, --version | display version information and exit |
| -h, --help | display help text and exit |
| -l, --launch-config | gives the startup configuration for each kernel in a comma-separated list, one per device. |
Scrypt algorithm parameters
| Team | Meaning |
| --no-autotune | disable automatic configuration of kernel startup parameters |
| --texture-cache | a comma-separated list of flags (0/1/2) defining which CUDA devices should use the texture cache for development. Kepler instruments may be useful. |
| -L, --lookup-gap | Divides the memory requirement by hash memory by this factor, storing only every Nth value in the scratchpad. Default value: 1. |
| --interactive | a comma separated list of flags (0/1) defining which CUDA device should run at the interactive frame rate (because it controls the display). |
| -l, --launch-config | gives the startup configuration for each kernel in a comma-separated list, one per device. |
To read: Geforce GTX 1050 ti for mining
CryptoNight special parameters:
| Team | Meaning |
| -l, --launch-config | gives the startup configuration for each kernel in a comma separated list, one per device |
| --bfactor=[0-12] | Launching CryptoNight cores in small parts from 0 to 12. Standard 11. |
Wildkeccak parameters:
| Team | Meaning |
| -l, --launch-config | gives the startup configuration for each kernel in a comma-separated list, one per device. |
| -k, --scratchpad url | Url is used to load the cache. |
Detailed setup of xmrig proxy
Xmrig-proxy (miner proxy pool) is an additional transmission channel between miners and pools. Xmrig-proxy not only takes on the role of a mining pool, but also takes on the responsibility of a miner. Xmrig-proxy receives tasks from the pool and then assigns them to miners to perform calculations (in this sense, it takes on the role of a mining pool).
Once the calculation is complete, miners send the shares to xmrig-proxy, then xmrig-proxy sends the data to the mining pool.
So, under what circumstances should you use xmrig-proxy?
- Miners with a large number of devices can use xmrig-proxy to centrally manage hashing power.
- When a certain IP address has many miners connected and sending shares (solutions) too often, the pool will consider this as a DDoS attack and that IP address will be blocked by the mining pool. At this time, you can install a proxy.
- The mining pool is located far away and an agent has been added to improve network connectivity.
Guide for using xmrig-proxy:
- Download the XMRig Proxy version and unzip it.
- After unpacking, you will see two files: xmrig-proxy.exe and config.json (there will also be secondary files: SHA256SUMS and start.bat).
Right click to edit the config.json file. For editing, use the Notepad++ editor. The mining port can be used as default, if you have special needs, you can change it yourself. After modification, save and exit. - Double-click xmrig-proxy to launch it and start the proxy pool service. Look at the interface like the following picture, it means your agent has been launched successfully. You may have to allow it to run. Click “Allow access”.
- After successfully launching Xmrig-proxy, we need to change the mining pool address to the IP address: port of the machine on which xmrig-proxy is located. The rest do not need to be changed.
Change the "url" parameter to your IP:
Then run xmrig as shown below:
You will see all the miners on the network:
How to check hashrate
The XMrig proxy miner allows you to check the hashrate, results and status of video cards. There are two ways to view the data:
- Via the console.
- via API.
By default, the hashrate is displayed every minute. You can use the print-time command to change this value.
In the miner window you need to press the following keys:
- H – to display the hashrate value.
- E – to show the performance of the graphics adapter.
- P – to press pause.
- R – to resume operation.
If the program sends shares to the pool, the accepted notification is displayed. If there are problems with the configuration, the system returns rejected.
MSR Mod
MSR Mod is hardware prefetchers that solve fundamental performance problems. The RandomX algorithm accesses memory randomly, so prefetching simply doesn't work.
Sometimes prefetching can be disabled in the BIOS. For Intel, this is usually the Hardware Prefetcher setting and the adjacent Cache Line Prefetch. However, some MSRs cannot be disabled even in the BIOS. All the places where prefetching can help, there are already explicit prefetch instructions in the code.
The solution is to configure prefetches using MSR registers at the OS level.
If you are running the latest version of XMRig as root (Linux) or administrator (Windows), the miner automatically configures all MSR registers. If everything is ok, the miner has received all the necessary privileges and your processor supports them, you will see a line like below in the miner log.
msr register values for "intel" preset has been set successfully (16 ms)
Some hardware/software configurations also require Secure Boot to be disabled for the MSR mod to work, check issue #1891 on github.
Supported processors:
- Intel (Nehalem, Westmere, Sandy Bridge, Ivy Bridge, Haswell, Broadwell and newer).
- Ryzen (all Zen-based processors: Ryzen, Threadripper, EPYC).
XMRig by default restores the original MSR values on exit, changes are not saved anyway, rebooting the computer always resets any changes.
Performance Tuning
There are 2 options available for configuration in the “randomx” object:
- "rdmsr"
- "wrmsr"
rdmsr Option: Use "rdmsr": false to disable restoring initial MSR values on exit.
WRMSR option: "wrmsr": true (default) enable MSR feature or "wrmsr": false disable MSR feature.
WRMSR number: "wrmsr": 15 Available for Intel only. The Intel default of 15 is generally good, but may not be better, see discussion #1433 on github for details.
WRMSR array: Very advanced format for fine tuning. Use with caution. Preset values supplied with the miner:
- "wrmsr": ["0x1a4:0xf"] Intel preset.
- "wrmsr": ["0xc0011020:0x4480000000000", "0xc0011021:0x1c000200000040:0xffffffffffffffdf", "0xc0011022:0xc000000401500000", "0xc001102b:0x200 0cc14"] AMD Ryzen (Zen3).
- "wrmsr": ["0xc0011020:0x0", "0xc0011021:0x40:0xffffffffffffffdf", "0xc0011022:0x1510000", "0xc001102b:0x2000cc16"] AMD Ryzen (Zen1/Zen2).
- "wrmsr": ["0xc0011020:0x0", "0xc0011021:0x60", "0xc0011022:0x510000", "0xc001102b:0x1808cc16"] Special tunable value for first generation Zen processors (with known hardware bug) to disable opcache and enable MSR mod .
The “huge pages” parameter also greatly improves performance.
Watch the video:
Video: Optimizing xmrig for monero coin. Let's dig monero to the fullest!
subscribe
The CPU Affinity parameter also increases performance.
CPU Affinity is a software attachment (binding) of specific computing processes to processor cores.
Example command in a batch file:
--cpu-affinity 0x155
Use an online calculator to find the CPU Affinity parameter values for your processor.
Ethminer: CUDA Mining Error: Illegal Memory Access Detected
This is my experience with 7 x ASUS GeForce DUAL-GTX1060 - O6G (edit: currently 9) on a Win10 setup on an ASRock H110 Pro BTC+ with ethminer 0.12 (and Claymore as a short test) I only tested 2 cards at first, but this equates to 7 (I'll add at least 2 more soon, possibly up to 5). I tested one ethminer process for all GPUs and a separate process for each GPU, and with combinations like 1 + 6, etc. The best result was when running separate processes for each GPU - only one card fails if it fails. . When some GPU starts to fail, it usually fails again within a minute, so there is no point in restarting the process again (I haven't tested whether rebooting will give a better result... I just started testing, so I haven't gotten that far - I need to configure several things with delayed launch of Asus GPU Tweak II and its subsequent shutdown, read more about the reason below).
There is always one card (usually the same one) where ethminer gives an error message. "CUDA error in function 'ethash_cuda_miner::search' on line 346: undefined startup error" With two GPUs it was on card0, with 7 now (usually) on card1.
The monitor is now connected to the integrated Intel GPU, so theoretically RDP shouldn't affect the outcome, although I need to investigate this a bit more (I've used RDP before when checking/testing things, so I'm not entirely sure if that affects the outcome). I think I'm being pretty conservative with the OC, and I've lowered the memory speed by 200 (to 9,300) from the recommended for optimal hash rate/power consumption (65% - 65 degrees) just in case (reported 22.9MH/s/card ). The cards are an "OC" model, so I can't reduce the GPU speed below the "min" value specified in the GPU settings interface (1.607). FYI I'm using Asus GPU Tweak II - a pain in the ass due to some glitches like resetting my settings every time something goes wrong with the GPU and the GPU tweak running in the background which means that I run it once at the beginning and close it afterwards to prevent this (edit: adding a new card resets the values to defaults, so the values need to be set every time the GPU config changes + when something breaks e.g. , OS freezes).
If one card fails, all the others work reliably (at least for 8 hours, my longest test). Trying to use Claymore on a faulty card results in the error being transferred to card2 and the hash rate for Claymore is around 19 MH/s. In other words, the alternative of 6 ethminers + 1 Claymore will not work either.
I'll post some updates after I test a few more things like what happens without using RDP or Teamviewer which I used on another system to reboot where I have 1 x AMD Vega 64 + 1 x Asus GTX 1060 6G (not OC) and where 1060 usually drops every 24-48 hours, so I used Teamviewer to access the computer from abroad. I'm not sure if Teamviewer itself could be the source of any problems (I'm running it on my 7xGPU rig too).
I haven't used RDP since the last reboot and so far it's been running without issue for 45 minutes, which is promising.
I also used one "rig" with two ASUS GeForce DUAL-GTX1060 - O6G on MacPro (2011) with Ubuntu 16.04 + ethminer Rock stable (is this correct English? ;)) For several weeks, although I was unable to adjust the memory / graphics speed CPU (set power only), so it has an average of 35.4 MH/s. I plan to eventually move these 2 GPUs to an ASRock rig. If I figure out how to tune memory/GPU speed in Linux, I'm planning/hoping to ditch Windows, so any advice is welcome. I googled a few that I couldn't get to work with (to be honest, I haven't spent that much time on it yet - I had a few other things to do).
Edit 1. 2 hours later: no RDP => no error (it seems).
I just connected the 8th GPU and will be back with an update. Unfortunately, I no longer have PCIe power connectors available, and it looks like the secondary power supply is trying to be smart and won't supply current to the GPU/SATA without a threshold load on the ATA power connector... or my new power supply isn't working (unlikely, but I'm not entirely sure yet).
So far there are clear indications that the said error is (directly) related to an RDP error with/for ethminer.
Edit 2: After connecting the 8th GPU, the system became unstable again (without RDP connected), so a few tweaks later (memory speed up to 9,100) + a couple of reboots became stable again (for one hour). Then I found a way to connect the 9th GPU scramble with all the cables I have: type4 to 4 x AMP MATE-N-LOK + Molex to PCIe power / Molex to sata power. At the same time, I ordered 20 PCIe power splitter cables from AliExpress for $1.29 each, so in 3-4 weeks I can build another 12-13 GPUs with one power supply for each (1.200 W).
Anyway, back to the install: the first Windows got stuck because I started the first miner too early (before GPU Tweak could shut down completely - impatient I know :)). Reset button and after logging in and starting the miners, the 9th began to complain about the “out of memory” error. A little later, the settings with swap values ended at 35,000 / 45,000 MB - min / max, and I was able to launch even the 9th miner. After 20 minutes there are still no errors, an average hashrate of 22.6MH/s is reported. If it stays like this I would be more than happy 
Edit 3. 50 minutes later - still no errors Question: There are suggestions to choose between GTX1060 "normal" or "OC". I ordered 10 OC because the "normal" ones were out of stock and the estimated delivery time was a few weeks. The price was a few dollars cheaper, although I would have stuck with the "normal" ones if they were available at the same time. Now I'm no longer sure what to choose over ETH mining.
Eit 4. After 15.5 hours there are no errors, counting continues. Current stated hashrate: 22.4-22.5, average 20.3 - 24.2 MH/s (average 9: 22.4 MH/s) I even reduced the memory speed for the card without OC, and its ethminer process hasn't crashed yet (resulting in a slight change in hassrate, although it may have been higher on average since then, currently: 23.8 MH/s) So case closed on my end.
Edit 5. ethminer on card9 gives an error after 23:27 the first time and the second time after about 22 hours. After the second time, I decided to use RDP to restart the miner and see if that would trigger the earlier error (to compare to the situation without running RDP). I'll get back to you with an update. Update edit 5. Same card dropped next time 60:56h later (RDP used 2-3 times).
Edit 6. 7 days later and still working...
Review
Main features:
- Open source code provided for study.
- Has high work productivity.
- The miner officially supports Windows.
- Supports the RandomX algorithm, which is used by the popular digital coin Monero.
- The program also works with the NiceHash service.
- Besides RandomX, the software also runs on CryptoNight.
The program uses the CUDA plugin for the miner. Used in certain versions of the program. It is optional and therefore not included in the main software. Moreover, this technology is demanding on the compiler version, and therefore conflicts often arise with the processor code.
What is EWBF's Cuda Equihash Miner
EWBF's Cuda is almost the most popular miner for the Equihash 144.5/Zhash algorithm. Suitable for Nvidia video cards. Competitors include miniZ and Funakoshi.
At the moment, the most current version is EWBF Miner v0.6, which is suitable for Equihash 144.5, 210.9, 192.7 and 96.5 algorithms. There is also a special EWBF's Cuda Zcash for simple Equihash, that is, Zcash and Zclassic. In this case, select option 0.3.4b.
There are enough innovations in EWBF's Cuda Equihash Miner v0.6. The main ones:
- Fixed an issue with the api socket not closing on exit;
- increasing the timeout for authorization and subscription;
- increased performance on algorithms 144.5, 192.7 and 96.5;
- using less VRAM for algorithm 144.5.
Doesn't start?
The efficiency of mining digital tokens depends on the correct settings of the miner. If you enter the parameters incorrectly, the program simply will not start or will generate an error. However, when using an advanced configuration: setting the parameters of the video card, core frequency, etc., there is a risk of faster wear of the equipment.
If launch is still not possible, visit thematic forums. Most problems have already been discussed and have a solution. The main thing is to enter the query correctly into the search engine. You can also see all the information on GitHub. There you can consult with other users.
Algorithms
| Name | Memory | Version | Description | Notes | |
| cn/upx2 | 128 KB | 6.12.0+ | CryptoNight-Femto (variant of CryptoNight V2 for Uplexa). | ||
| argon2/chukwav2 | 1 MB | 6.4.0+ | Argon2id (Chukwa v2). | CPU only | |
| cn/ccx | 2 MB | 6.2.0+ | Conceal (CCX) | ||
| kawpow | — | 6.0.0+ | KawPow (Ravencoin) | GPU only, not supported by xmrig-proxy | |
| rx/keva | 1 MB | 5.9.0+ | RandomKEVA (RandomX variant for Keva). | ||
| astrobwt | 20 MB | 5.8.0+ | AstroBWT (Dero). | ||
| cn-pico/tlo | 256 KB | 5.5.0+ | CryptoNight-Pico (Talleo). | ||
| rx/sfx | 2 MB | 5.4.0+ | RandomSFX (RandomX variant for Safex). | ||
| rx/arq | 256 KB | 4.3.0+ | RandomARQ (RandomX variant for ArQmA). | ||
| rx/0 | 2 MB | 3.2.0+ | RandomX (Monero). | ||
| argon2/chukwa | 512 KB | 3.1.0+ | Argon2id (Chukwa). | CPU only | |
| argon2/ninja | 256 KB | 3.1.0+ | Argon2id (NINJA) | CPU only | |
| rx/wow | 1 MB | 3.0.0+ | RandomWOW (RandomX variant for Wownero). | ||
| cn/fast | 2 MB | 3.0.0+ | CryptoNight variant 1 with half iterations. | ||
| cn/rwz | 2 MB | 2.14.0+ | CryptoNight variant 2 with 3/4 iterations and reversed shuffle operation. | ||
| cn/zls | 2 MB | 2.14.0+ | CryptoNight variant 2 with 3/4 iterations. | ||
| cn/double | 2 MB | 2.14.0+ | CryptoNight variant 2 with double iterations. | ||
| cn/r | 2 MB | 2.13.0+ | CryptoNightR (Monero's variant 4). | ||
| cn-pico | 256 KB | 2.10.0+ | CryptoNight-Pico. | ||
| cn/half | 2 MB | 2.9.0+ | CryptoNight variant 2 with half iterations. | ||
| cn/2 | 2 MB | 2.8.0+ | CryptoNight variant 2. | ||
| cn/xao | 2 MB | 2.6.4+ | CryptoNight variant 0 (modified). | ||
| cn/rto | 2 MB | 2.6.4+ | CryptoNight variant 1 (modified). | ||
| cn-heavy/tube | 4 MB | 2.6.4+ | CryptoNight-Heavy (modified). | ||
| cn-heavy/xhv | 4 MB | 2.6.3+ | CryptoNight-Heavy (modified). | ||
| cn-heavy/0 | 4 MB | 2.6.0+ | CryptoNight-Heavy. | ||
| cn/1 | 2 MB | 2.5.0+ | CryptoNight variant 1. | ||
| cn-lite/1 | 1 MB | 2.5.0+ | CryptoNight-Lite variant 1. | ||
| cn-lite/0 | 1 MB | 0.8.0+ | CryptoNight-Lite variant 0. | ||
| cn/0 | 2 MB | 0.5.0+ | CryptoNight (original). | ||
DSTM v0.6.2 – ZCash/Equihash CUDA Miner (DOWNLOAD)
DSTM v0.6.2 ZCash/Equihash CUDA Miner — Compatible with devices having Compute Capability 5.0 and above, ie It should work fine on Maxwell / Pascal GPUs. Supports each server using the stratum protocol. If you have problems with specific pools, please. report them here.
DevFee 2%
- OS support: Windows / Linux
- Device support: Nvidia GPUs
Is the virus or program safe?
XMRig is not malware. This is a legal program for mining cryptocurrencies.
However, many malware creators and large botnet operators embed xmrig-cuda.dll into their malware to use other people's computers to mine cryptocurrency without their permission. This is why antivirus software treats XMRig as malware due to the large number of computers infected with malware associated with it.
Total:
- If you downloaded the program yourself from the official source on Github or the xmrig.com website, then there is nothing to worry about.
- If you have never downloaded this program yourself, delete it immediately.
Therefore, some antivirus scanners consider the program to be malicious because antiviruses do not distinguish between intentional (conscious) mining and hidden mining (when cryptocurrency is mined without your knowledge). In the latter case, you need to remove the program from the system.
How to delete?
If the virus has recently started acting, then go to the system folder and look at the modification date of the files, you will find it. You can delete it manually like this: Shift+Delete.
If you downloaded the program yourself, then simply delete it as you usually delete files.
Video: xmrig cpu miner - Virus miner
subscribe
Common problems
Users may experience various problems with the miner from time to time. Some are related to drivers, others to features of the algorithm.
For example, an error with the algorithm looks like this: wrong algo, use randomx miner. It occurs when the wrong algorithm syntax is entered or it was not possible to change it. The problem may also appear due to overclocking of the video card.
The low difficulty share problem indicates an incorrectly selected port pool. The tasks come with the wrong difficulty. Select a pool based on your equipment. Please note that for a farm with high-performance cards, medium-performance processors, and just one card or home computer, different categories of ports are issued.
The cryptonight_extra_cpu_finak error indicates that the system is overloaded. Therefore, it is necessary to reduce the size of threads and blocks.
EWBF's Cuda Equihash miner performance
Nvidia video cards produce the following hashrates depending on the algorithm. By the way, 144.5 is known for Bitcoin Gold and BitcoinZ. It consumes about 1.63 GB of VRAM.
GeForce GTX 1050ti - about 18 S/s; GeForce GTX 1060 - about 30 S/s; GeForce GTX 1070 - about 45 S/s; GeForce GTX 1080 - about 50 S/s; GeForce GTX 1080ti - about 75 S/s.
Let's move on to the less popular ones. 210.9 is known because of Aion. It uses about 1.2 GB of VRAM.
GeForce GTX 1050ti - about 75 S/s; GeForce GTX 1060 - about 130 S/s; GeForce GTX 1070 - about 190 S/s; GeForce GTX 1080 - about 210 S/s; GeForce GTX 1080ti - about 320 S/s.
192.7 is represented by the ZERO coin. It requires about 2.5 GB of VRAM.
GeForce GTX 1050ti - about 8 S/s; GeForce GTX 1060 - about 15 S/s; GeForce GTX 1070 - about 22 S/s; GeForce GTX 1080 - about 24 S/s; GeForce GTX 1080ti - about 35 S/s.
The most famous option on the 96.5 algorithm is MinexCoin (MNX). We are preparing about 1.6 GB of VRAM.
GeForce GTX 1050ti - about 7.8 KS/s; GeForce GTX 1060 - about 14 KS/s; GeForce GTX 1070 - about 20 KS/s; GeForce GTX 1080 - about 25 KS/s; GeForce GTX 1080ti - about 37 KS/s.
Versions
6.16.2
- Fixed a crash on processors that support VAES and run xmrig compiled by GCC.
6.16.1
- added support for the gr (GhostRider) algorithm for RTM/Raptoreum mining;
- VAES optimization - not supported by xmrig-6.16.1-linux-x64.tar.gz due to old compiler, use xmrig-6.16.1-linux-static-x64.tar.gz instead.
- RandomX Benchmark.
- KawPow Release Notes
- Stay tuned for updates, follow on Twitter - https://twitter.com/xmrig_dev
- Setup Wizard
- Control panel for miners
- To support NVIDIA CUDA mining, use any regular version with the CUDA plugin.
Features:
To get help, just run ZM without any arguments
Code:
ZM 0.6.2, dstm's ZCASH/Equihash Cuda Miner Usage: zm —server hostname —port port_nr —user user_name [—pass password] [options]… zm —cfg-file[=path] Stratum: —server Stratum server hostname prefix hostname with 'ssl://' for encrypted connections — eg ssl://mypool.com —port Stratum server port number —user Username —pass Worker password Options: —help Print this help —list-devices List available cuda devices —dev Space separated list of cuda devices to use. If this option is not given all available devices are used. —time Enable output of timestamps —color colorize the output —logfile [=path] Append logs to the file named by 'path' If 'path' is not given append to 'zm.log' in current working directory. —noreconnect Disable automatic reconnection on network errors. --temp-target =dev_id:temp-target[,dev_id:temp-target] ... In C - If set, enables temperature controller. The workload of each GPU will be adjusted continuously such that the temperature stays around this value. It is recommended to set your fan speed to a constant value when using this setting. Example: —temp-target=0:65,2:70 —intensity =dev_id:intensity[,dev_id:intensity] … Reduce the load which is put on the GPU — valid intensity range ]1.0-0.0[. Example: —intensity=0:0.893,2:0.8 —telemetry [=ip:port]. Starts telemetry server. Telemetry data can be accessed using a web browser(http) or by json-rpc. If no arguments are given the server listens on 127.0.0.1:2222 — Example: —telemetry=0.0.0.0:2222 Valid port range [1025-65535] —cfg-file [=path] Use configuration file. All additional command line options are ignored — configuration is done only through configuration file. If 'path' is not given use 'zm.cfg' in current working directory. —pool =hostname,port_nr,user_name[,pass] Setup additional failover pools. Example: zm --server servername.com --port 1234 --user username