GitHub:
Recently we thought of publishing mining software tutorials and so far we have created a beginner's guide for XMR STAK and XMRig . Although there are several other mining applications, CCMiner is the most popular choice, especially for NVIDIA users. Moreover, it is an all-in-one miner that supports mining most cryptocurrency algorithms, and here it is; A complete beginner's guide to ccminer. This guide will help you understand the entire ccminer setup process and explain the command line options you can use in the miner. Additionally, we've added some tips and tricks that this miner is capable of, so let's get started.
GitHub
CCMiner - CUDA Miner
CCMiner stands for Crypto Currency Miner and is an open source software designed specifically for CUDA-compatible NVIDIA GPUs. This software is available and runs on both Linux and Windows.
Since this miner is open source, all versions, source code and download links are available on GitHub. For Windows, the source files are compiled by the developers, which you can download and use right now. However, it is not available for Linux. You need to download the source code and compile it yourself, which requires some technical ability.
A guide on how to compile ccminer for Linux (Ubuntu/Fedora), macOS.
Here in this tutorial, we will be using Tpruvot CCMiner for NVIDIA , which is the standard version and is updated very frequently.
CCminer supports algorithms and coins:
The new version of ccminer supports all major algorithms, including the latest ones such as x12, x16r (Ravencoin) and x16s (Pigeoncoin). Below is a list of algorithms and coins that ccminer supports
-a, --algo=ALGO specify the hash algorithm to use
bastion Hefty bastion bitcore Timetravel-10 blake Blake 256 (SFR) blake2s Blake2-S 256 (NEVA) blakecoin Fast Blake 256 (8 rounds) bmw BMW 256 cryptolight AEON cryptonight (MEM /2) cryptonight XMR cryptonight c11/flax X11 variant decred Decred Blake256 deep Deepcoin equihash Zcash Equihash dmd-gr Diamond-Groestl fresh Freshcoin (shavite 80) fugue256 Fuguecoin groestl Groestlcoin hmq1725 Doubloons / Espers jackpot JHA v8 keccak Deprecated Keccak-256 keccakc Ke ccak- 256 (CreativeCoin) lbry LBRY Credits (Sha/Ripemd) luffa Joincoin lyra2 CryptoCoin lyra2v2 VertCoin lyra2z ZeroCoin (3rd impl) myr-gr Myriad-Groestl neoscrypt FeatherCoin, Phoenix, UFO… nist5 NIST5 (TalkCoin) penta Pentablake hash (5x Blake 512) phi BHCoin polytimos Politimos quark Quark qubit Qubit sha256d SHA256d (bitcoin) sha256t SHA256 x3 sia SIA (Blake2B) sib Sibcoin (X11+Streebog) scrypt Scrypt scrypt-jane Scrypt-jane Chacha skein Skein SHA2 (Skeincoin) skein2 Double Ske in (Woodcoin) skunk Skein Cube Fugue Streebog s3 S3 (1Coin) timetravel Machinecoin permuted x8 tribus Denarius vanilla Blake256-8 (VNL) veltor Thorsriddle streebog whirlcoin Old Whirlcoin (Whirlpool algo) whirlpool Whirlpool algo x11evo Permuted x11 (Revolver) x11 X11 (DarkCoin) x12 X12 (GalaxyCash ) x13 X13 (MaruCoin) x14 X14 x15 X15 x16r X16R (Raven) x16s X16S x17 X17 wildkeccak Boolberry zr5 ZR5 (ZiftrCoin)
Please remember that not all of these algorithms are ASIC resistant, so please do your own research before choosing a coin .
How to set up and use CCMiner on Windows
To get started: place the miner on your desktop or in any directory where you want to run the miner from, and then unzip it. Then, after downloading or unpacking, your miner will be flagged by Antivirus, which is the most common problem for all mining programs. The ones you download from GitHub are verified and tested. They are safe, so just add exceptions to the file path before using the miner.
In Avast: Settings >> General >> Exclusions
Setting up CCMiner
Users can simply copy the example code, edit the wallet address, pool address, and then start mining that specific coin. Along with this, we will add some fine tuning tips to achieve maximum mining performance.
Example configuration file
ccminer.exe –a x17 –o –u -px
Beginners, especially those using mining pools or the Nicehash mining interface, stick with it, thinking it is easier. If you are one of them, then understand that although it is easy to set up, your options are limited, especially in terms of profit and mining currencies. CCMiner is not complicated at all. In fact, compared to other mining software, ccminer is easy to set up. Here we will show you how to set up and use CCMiner. That is, we will explain all the basic functions of the command line, creating a Windows batch script file and running the miner. OK, let's begin!
We assume that you have chosen your coin for yours and your wallet address is ready. In this example, we will be using the Verge coin, which uses X17 as its mining algorithm.
1. After unzipping the miner, you will find files similar to the image below (depending on the version). In some versions you will see the file ccminer.exe, and in others you will see ccminer-x64.exe. Some releases also include sample command files to help you get started quickly.
2. To mine any coin or algorithm, we are not going to run an exe file. Instead, we'll create a .bat file (we'll show you how to create one) and configure it accordingly. This way you can add any number of coins that you would like to mine. There are no restrictions on creating batch files in the miner.
3. Before setting up a miner for a specific coin/algorithm, we will first understand the basic commands that you can enter into your batch file.
4. Now in your miner folder, create a new text document called help.txt. Next, insert the following config into help.txt.
Note: Change "ccminer-x64.exe" to "ccminer.exe" if that is the actual name of the executable.
ccminer-x64.exe --help pause
5. After that, go to File > Save As and select Save As as All Files (this is important). Then name the file as help.bat as shown in the image below. This is it! You have learned how to create a batch file and this is the step you need to follow to create multiple batch files for different coins.
6. Now open the help.bat file you created and it will return all the basic command line options that you can enter into your batch file configuration. Just go through this and it will give you the basic idea about ccminer usag.e.
You now know how to create a batch file and have also learned some basic command lines to enter into your miner. Now to set up a miner to start mining any coin using ccminer, the procedure is similar.
First create a .txt file and enter the following command line (example) which we used for the coin face. Be sure to change your wallet address and pool connection information (explained below). Then save it as a .bat file. Example: xvg-yiimp.bat
ccminer-x64.exe -a x17 -o stratum+tcp://yiimp.eu:3777 -u DSqoGnVrVruJyKvWpEWxX8SCjKqBpwu6Vu.gtx970 -pc=XVG pause
Explanation:
The example configuration file above is basically what you would need to create for any coin, and here is the explanation.
- ccminer-x64.exe - launches the miner application
- - a x17 - tells the miner which algorithm to use
- -o stratum + tcp: - URL and port of the mining server
- -u is basically your wallet address for a specific coin. The .Gtx970 you see next to the wallet address is the username. You can enter anything there just for your identification (see Employee Information).
- -p - usually this is x or a blank or a specific coin symbol in case the pool supports more than 1 currency using the same algorithm. In this case its c = XVG which is the coin face symbol.
Pool connection information (strate connection and port) - Where can I get this information?
While you know how to create a wallet address for a specific coin, where do you get the pool connection information? To get pool connection information, you must first select a mining pool. For any given coin there will be a combination of PPS and PPLNS mining pools. Select the right one and on the home page you will find information about the strat server and ports. Copy it and this information will be listed next to -o in your .bat configuration file.
Example: ccminer-x64.exe -a x17 -o stratum+tcp://xvg-x17.suprnova.cc:7477
Advanced setup options
Performance:
-i, --intensity - sets the mining intensity. The default is 0. These values are selected by selecting parameters and comparing the results obtained. For finer tuning, decimal values are allowed.
-t, --threads=N — set the number of threads (by default, the number of GPUs in your farm)
--cpu-priority — set priority. 0 - inactive, 2 normal, 5 - highest)
—cpu-affinity set the affinity to the main cpu core using the mask 0x3 for cores 0 and 1
Temperatures, power consumption and overclocking:
--tlimit=85 allows you to specify a temperature limit.
—max-temp=N — start mining only if the temperature is less than the specified value.
--plimit=180W allows you to set a power consumption limit.
—mem-clock=3505 set memory overclocking
--mem-clock=+500 set memory adjustment
—gpu-clock=1150 set to overclock the video card core
Pool connection parameters:
-o, --url=URL set server (pool) address
-P set the user password for the pool (not used on all pools)
-r, --retries=N — set the number of retries if the connection fails
-R, --retry-pause=N — set a pause in seconds between connections (default 15 sec)
-T, --timeout=N — set the network connection timeout (300 by default)
Event log and interface:
-P, --protocol-dump allows you to write the event log.
--max-log-rate interval to reduce log (default: 3)
-d, --devices — displays video card identifiers separated by commas. The report occurs from 0.
-n, --ndevs — display a list of cuda devices
--no-color — disable color display
--hide-diff hide current block and net difficulty (old mode)
Working with the API:
-b, --api-bind=port port for miner API (default: 127.0.0.1:4068), 0 disabled
--api-remote enable remote control
--api-allow=...IP/mask of allowed api client(s), 0/0 for all
Other settings:
—cuda-schedule — sets the scheduling mode for device threads (default is auto)
-f, --diff-factor - divides the difficulty by this factor (default 1.0)
-m, --diff-multiplier - multiplies the difficulty by this factor (default 1.0)
—cert= — certificate file for a pool with SSL support
--shares-limit — set the maximum mined shares before exiting the program
--time-limit — set a time limit in seconds before exiting the program
-s, --scantime=N set the upper limit of the scanning time of the current job, in seconds (default: 10)
--submit-stale ignore stale validation jobs, may create more rejected shares
-N, --statsavg number of samples used for power calculation (default: 30)
--no-gbt disable getblocktemplate support
--no-longpoll disable X-Long-Polling support
--no-stratum disable X-Stratum support
--no-extranonce disable extranonce subscription to stratum
-q, --quiet disable hashrate output
-D, --debug enable debugging messages
—max-rate=N[KMG] mine only if the net hash rate is less than the specified value
—max-diff=N mine only if the difficulty is less than the specified value. Can be configured with --resume-diff=N to set the mining resume value
--led=100 set the logo LED level (0=disable, 0xFF00FF for RVB)
-B, --background run the miner in the background
—benchmark will launch a video card test
--cputest run CPU test
-c, --config=FILE load configuration file in JSON format
-V, --version show version information and exit
-h, --help show help and exit
You can find the remaining advanced settings in the archive in a file with instructions in Russian.
What is a worker and how to configure it?
While the above configuration is the same for all coins and applies to all mining pools, there are some pools that require registration. For example: Supernova and for such pools the miner configuration is slightly different, and this is one of the cases where you will be asked to configure the working data.
Instead of entering the wallet address directly next to -u, you will need to enter the pool login and work information. To do this, you first need to register in a specific pool and create a worker, which will be used by the miner to log in to the system.
ccminer -a x17 -o stratum+tcp://xvg-x17.suprnova.cc:7477 -u Weblogin.Worker -p Worker password
If you go to the mining pool's home page, you can find instructions on how to set up the miner.
| STRATUM: | stratum+tcp://xvg-x17.suprnova.cc |
| PORT: | 7477 |
| Username: | Webblogin.Worker |
| Password: | Worker Password |
Workers are nothing more than your miners. For example miningrig1, miningrig2 or you can also list them based on cards like gtx1080ti or gtx1070 etc.
Fast start
- Download program
- Unzip to any convenient location
- Change wallets to your own (the program is completely ready for use)
- Select a pool (the name of the pool can be found in the finished .bat file)
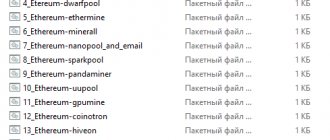
The contents of the program folder are as follows:
There are instructions in Russian and .bat files that start the mining process with a double click. The name indicates the coin and the pool. You only need to change the wallet to your own.
Let's look at the contents of the batch file to understand which commands are responsible for what.
Decoding the contents of the batch file
- The ccminer command specifies which application will be launched. Let's leave it as is. It is important that this file is located directly in the folder with .bat files
- -a x16r algorithm for the mined coin. For Ravencoin we leave x16r, but for example for the Pigeoncoin coin we would indicate x16s
- rvn.suprnova.cc pool address. The construction -o stratum+tcp:// is required before the address
- :6667 after the pool address we put a colon and indicate the pool port
- -u rgzrgz_leo after the -u command we indicate Worker Login or the address of your digital wallet of the mined coin. In our case, the Suprnova pool requires Worker Login, not a wallet address
- .rgzrgz_leo put a period and indicate the password of our worker. It is created when registering on the pool in the My Workers section
- -pd=28 A very important command. d=28 allows you to set a fixed difficulty on the pool. It is selected by dividing the power of your farm by 2. Example: we have 2 video cards in the system, with a capacity of 56 MH/s. 56/2=28. This is the value we indicated
- ,c=RVN put a comma and indicate the token of the mined coin. Some pools only determine which coin you want to mine based on the token. So it is highly recommended to fill out this command
- —tlimit=85 allows you to set the temperature limit for video cards. Selected depending on video cards, their specifications and cooling architecture
- —max-temp=87 The command means to mine only if the temperature of the cards is below the specified value. It is very useful to indicate these commands, because even though it is extremely rare, force majeure does happen: the fan has failed or Msi Afterberner, which controls temperatures, has not started and the cards will overheat and may fail. This setting can save cards and disable mining in cases of rising temperatures
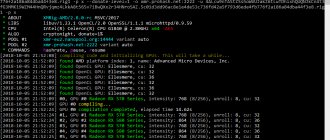
Let's try to launch our .bat file with the desired coin by double-clicking on it.
example of the program running on GTX 1080 Ti video cards
We have reviewed the most important commands for starting the cryptocurrency mining process. With these settings, the farm should work stably, not freeze and not issue rejections (incorrect decisions), for which, by the way, the pools do not pay for the work.
However, for the sake of completeness of the review, we will consider all possible commands of the program, and also try to give some tips on improving performance and solving problems.
Extras: Tips and Tricks
Before this part, we covered all the basic details needed to set up ccminer. We hope you now have an idea on how to install and use ccminer. Now let's move on to some additional settings you can enter in your miner configuration.
What is intensity and why is this setting needed?
Intensity is a setting that you can enter anywhere (usually at the end) in your miner configuration.
- Example:
ccminer-x64.exe -a x17 -o pool address -u wallet-address.worker-name -pc = XVG -i 20
So what is it and when is it needed? When you start saving, you may feel like your computer is freezing; especially when you are using your main graphics card. So, by reducing the intensity, you can reduce the load on the GPU, which will make the experience more responsive. This way, you can perform other activities or even perform intensive work while your computer is still running. Additionally, this option is also useful for improving mining performance. Increase or decrease these settings to see which works best for you.
Intensity basically tells the miner how many calculations to assign to your GPU. In most cases, to keep your PC running, it's best to leave it at the default setting, which sets the intensity to automatic.
How to force CCMiner to only mine using certain GPUs - excluding certain GPUs from mining
This is one of the common questions we see on forums. How do I configure ccminer to only use 1 GPU and play the other? With a simple command line you can exclude any GPU from mining, but remember that mining is an intensive process, so don't put a lot of load on your GPU or CPU while mining (eg Gaming). Always know the safe GPU temperature and also when mining using CPU, remember to keep an eye on the CPU temperature which makes you safer.
In ccminer, to exclude one GPU or use only certain GPUs, use the following command in your batch file.
-d 0,1,2,3,4,5
Where 0 is GPU #1 and 2, 3, 4, 5 and 6 respectively. For example, if you have a 3 GPU mining rig and only want to use the 1st and 2nd GPU for mining, use -d 0,1. You can use a different GPU for a different coin or algorithm by specifying -d 2 in its command file.
Problem solving
The program freezes at startup
If the program freezes at startup, then try reducing the intensity a little -i 19. You can also try lowering the priority of the program process -cpu-priority 2.
The program crashes
If the program crashes after some time, do the following:
- increase the swap file
- remove environment variables from legacy miners. System properties / advanced system settings / environment variables - remove variables from old programs. Do not delete system variables! Remove only those starting with GPU_FORCE and reboot the system
- reduce overclock
- check all contacts from the risers and power supply (with the system turned off). Sometimes it helps to swap the riser.
- Make sure the power supply is sufficient for the load. Different mining algorithms consume different amounts of electricity
If you still have any questions, please feel free to leave your comments.
Troubleshooting CCminer
Errors such as miner crash, shutdown, unauthorized memory access, GPU #0: CUDA error "unknown error" are some of the most common errors. Not only in ccminer, but in any mining software. Basically, to avoid such errors, first make sure that you are using the latest NVIDIA drivers. Also, sometimes the app will crash right after opening, in which case make sure you don't overclock your GPU too much. Always start with the default clock settings when your GPU is developing a new algorithm. Increase it gradually from there. A proper GPU clock speed and the latest drivers should resolve most mining-related issues.
In addition to this, sometimes the command window keeps closing instantly without any notification and this may be due to a misconfiguration. To find out what's wrong, simply add PAUSE to the end of the batch file and then start the miner. Now the miner will remain open for you to understand why it is not working. There must be an invalid GPU argument specified there or something similar. If this is the case, take the necessary measures and try to start the miner again.