The asus prime z270-p motherboard is capable of connecting up to 8 video cards simultaneously, where 6 cards will be connected via a 2xPCI-E x16 riser, 4xPCI-E x1 and 2 cards via an M.2 riser.
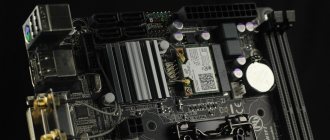
| Socket | Memory | Number of M.2 slots | Slot type M.2 | Expansion slots |
| LGA1151 | DDR4 DIMM, 2133-3866 MHz 4 memory slots | 2 | Socket 3, M Key, 2242/2260/2280 | 2xPCI-E x16, 4xPCI-E x1 |
The asus prime z270-p motherboard is capable of connecting up to 8 video cards simultaneously, where 6 cards will be connected via a 2xPCI-E x16 riser, 4xPCI-E x1 and 2 cards via an M.2 riser
The disadvantage of this board is that you will not be able to power so many cards if one of them is directly installed in the motherboard. A video card installed in the motherboard blocks access to connecting the riser to the nearby PCI-E x1 connector.
For a rig of 6-8 cards, all video cards must be mounted on risers.
ASRock H81 PRO BTC R2.0
- On the tab Advanced open folder Chipset Configuration
- Set Primary Graphics Adapter to OnBoard (default PCI Express)
- PCIE2 Link speed parameter set to Gen2 (default is Auto)
- OnBoard HD Audio value set to Disabled (default is Auto)
- Restore on AC/Power Loss parameter set to Power On (default is Power Off)
- On the tab Advanced open folder Storage Configuration
- Hard Disk SMART value set to Disabled (disabled by default)
- On the tab Advanced open folder USB Configuration
- Set Intel USB3.0 Mode to Disabled (enabled by default)
- On the tab H/W Monitor open folder USB Configuration
- CPU Fan 1 & Settings value set to Standard Mode (default is Standard Mode)
- On the tab Exit
- Click Save Changes and Exit . Then Ok to save.
Motherboards for mining with 6 video cards
A very controversial decision, on the one hand, you can connect an even number of video cards, on the other, it is very difficult to find a standard power supply with so many connectors. You can use two units, but this is not entirely advisable; most often they use a server power supply with wiring for 6 video cards.
Motherboards from ASRock for 6 video cards
- ASRock Fatal1ty B250 Gaming K4
- ASRock FM2A88X+ BTC
- ASRock A88M-G 3.1
- AsRock H61DEL
- ASRock Z97 Extreme 4
- ASRock Z170 Extreme
- ASRock z270 Extreme 4
- ASRock Z270 Killer SLI
Motherboards from ASUS for 6 video cards
- ASUS M5A97 LE R2.0
- ASUS M5A97 R2.0
- ASUS P8B75-V
- ASUS P8H67
- ASUS SABERTOOTH 990FX
- ASUS STRIX Z270H Gaming
- ASUS TUF Z270 MARK 2
- ASUS X87-pro
- ASUS PRIME B250-PLUS
- ASUS PRIME H270-PLUS
- ASUS SABERTOOTH 990FX
- ASUS Sabertooth Z97 Mark 2
- ASUS STRIX Z270H Gaming
- ASUS TUF Z270 MARK 2
- ASUS X87-pro
- ASUS Z170-A
Motherboards from BIOSTAR for 6 video cards
- BIOSTAR H81A BTC
- BIOSTAR TB85 Ver. 6.x
- BIOSTAR TB250-BTC
- BIOSTAR TB350-BTC
Motherboards from GIGABYTE for 6 video cards
- GA 970A-D3
- GA 970A-DS3P
- GA 990FXA-D3
- GA 990FXA-UD3
- GA G1 Assassin
- GA H61M-S2V-B3
- GA h210-D3A
- GA MA770T-UD3
- GA X58A-UD3R
- GA Z170-GAMING K3
- GA Z270P-D3
Motherboards from MSI for 6 video cards
- MSI 970A G43
- MSI H67MA-E45
- MSI Z-170A PRO
- MSI B250 PC MATE
- MSI H67MA-E45
- MSI Z270 SLI Plus
- MSI Z270 Gaming Plus
- MSI Z270 Gaming PRO
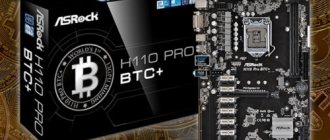
ASRock H110 Pro BTC+ Bitcoin
- On the tab Advanced open folder Chipset Configuration
- Set Primary Graphics Adapter to OnBoard (default PCIE2)
- 7 parameters PCIE1 Link speed, PCIE2 Link speed, PCIE3 Link speed, PCIE4 Link speed, PCIE5 Link speed, PCIE6 Link speed, PCIE7 Link speed set to Gen2 (default is Auto). It is worth noting that there are 7 parameters, and 13 slots. Therefore, one PCIE parameter is set for 1-2 slots.
- OnBoard HD Audio value set to Disabled (default is Auto)
- Restore on AC/Power Loss parameter set to Power On (default is Power Off)
- On the tab Advanced open folder Storage Configuration
- Hard Disk SMART value set to Disabled (disabled by default)
- On the tab Advanced open folder USB Configuration
- Set Intel USB3.0 Mode to Disabled (enabled by default)
- On the tab H/W Monitor open folder USB Configuration
- CPU Fan 1 & Settings value set to Standard Mode (default is Standard Mode)
- On the tab Exit
- Click Save Changes and Exit . Then Ok to save.
Specifications
The motherboard is produced in the ATX form factor for personal computers (30.5 cm x 22.1 cm) on electrical insulating material - textolite. The motherboard supports the architecture of 14nm processors of the 7th and 6th generation Intel, as well as Turbo Boost Technology 2.0 acceleration technology.
The power subsystem and chipset (Intel Z270 chipset) are covered with radiators, and they do not interfere with the processor socket. The expansion card has 4 slots for RAM. The slots are designed by ASUS - Q-DIMM with one latch for quick and safe replacement of RAM. The maximum amount of memory that can be installed on the motherboard is 64 GB. The Digi+ ASP1400 BT PWM controller is responsible for control and is cooled by an aluminum capacitor.
The network card supports Realtek Gigabit LAN in conjunction with the 8111H LANGuard network controller. There are 8 USB 3.0/2.0 ports on the motherboard: 4 of them are located in the middle of panel 4 on the rear panel. There are also 6 USB 2.0/1.1 ports: 4 located in the middle of the panel and two on the rear panel.
The motherboard has an integrated graphics processor with support for Intel HD graphics. The motherboard has several VGA ports:
– supports DVI-D with a resolution of 1920 x 1200 at 60 Hz. Interface for outputting a digital signal without the need to convert analog to digital;
– HDMI 1.4b with max. resolution 4096 × 2160 24 Hz / 2560 × 1600 at 60 Hz. The interface is used to transmit video data in HD resolution and multi-channel audio.
The integrated graphics processor with a memory capacity of 1 GB supports: HD graphics and media management, playback of three-dimensional stereoscopic video materials, hardware acceleration technologies for encoding and decoding video content.
ASUS Prime H270-PLUS
- Press F7 .
- On the tab Advanced open folder System Agent (SA) Configuration
- set VT-d value Enabled (disabled by default)
- Set Above 4G Decoding parameter Enable (the default is Disable).
- On the tab Advanced in an open folder System Agent (SA) Configuration open folder DMI/OPI Configuration
- DMI Max Link Speed value set to Gen3 (default is Auto)
- On the tab Advanced in folder System Agent (SA) Configuration open folder PEG Port Configuration
- PCIEX16_1 value set to Gen3 (default is Auto)
- On the tab Advanced open folder PCH Configuration. Open the folder in it PCI Express Configuration
- PCIe Speed value set to Gen3 (default is Auto)
- On the tab Advanced open folder APM Configuration.
- Restore AC Power Loss value set to Power On (default is Power Off)
- On the tab Advanced open folder OnBoard Devices Configuration.
- HD Audio Controller parameter set to Disable (enable by default)
- set M.2_1 Configuration and M.2_2 Configuration values PCIE (default is Auto)
- Press F10 . Then Ok to save.
If the system does not see 1 video card?
- Check that you have tightly connected all cables and the riser (with the system completely turned off)
- Try swapping the risers in the PCI-e slot (with the system completely turned off)
- Check in the BIOS if you have set all the parameters correctly
After all the settings with the BIOS, we connect 1 video card. We install drivers for each (It is best to download the driver from the official website).
Download the miner. Install msi afterburner after downloading the program from the official website. We check the visibility of all video cards in afterburner, set the overclock, launch the batch file (miner).
ASUS Prime Z270-A
Almost the same settings as ASUS Prime H270-PLUS, but there are differences. The appearance is the same.
- Press F7 .
- On the tab Advanced open folder System Agent (SA) Configuration
- set VT-d value Enabled (disabled by default)
- On the tab Advanced in an open folder System Agent (SA) Configuration open folder DMI/OPI Configuration
- DMI Max Link Speed value set to Gen3 (default is Auto)
- On the tab Advanced in folder System Agent (SA) Configuration open folder PEG Port Configuration
- PCIEX16_1 value and PCIEX16_1 set to Gen3 (default is Auto)
- On the tab Advanced open folder PCH Configuration. Open the folder in it PCI Express Configuration
- PCIe Speed value set to Gen3 (default is Auto)
- On the tab Advanced open folder APM Configuration.
- Restore AC Power Loss value set to Power On (default is Power Off)
- On the tab Advanced open folder OnBoard Devices Configuration.
- HD Audio Controller parameter set to Disable (enable by default)
- set M.2_1 Configuration and M.2_2 Configuration values PCIE (default is Auto)
- On the tab Boot
- Set Above 4G Decoding parameter Enable (the default is Disable).
- Set Setup mode parameter Advanced Mode (the default is EZ Mode).
- Press F10 . Then Ok to save.
Why does a miner need to configure bios?
Setting up the BIOS should be given paramount importance at the initial stage of mining. The performance of the mining farm and the stability of its operation depend on how correctly the parameters are set. By default, the BIOS is set by the hardware manufacturer to standard values. However, cryptocurrency mining has significant differences from the standard use of computer technology. If the BIOS parameters are set incorrectly, the farm may not work stably and with low performance.
ASUS Prime series motherboards are, first of all, an enhanced power supply system, the ability to install more powerful cooling equipment, and convenient settings. Together with the latest generation Intel Core processors, Prime Z490 motherboards will be a reliable foundation for obtaining a high-performance mining system for cryptocurrency production.
Biostar TB250-BTC and Biostar TB250-BTC PRO
- On the tab Advanced open folder ACPI Settings
- Restore on AC Power Loss parameter set to Power on (Power off by default) - in one of the BIOS versions
- On the Chipset set the Mining mode parameter Above 6x VGA (the default is Above 6x VGA)
- On the tab Chipset open folder PCH-IO Configuration
- HD Audio value set to Disable (default is Disable)
- open the PCI Express Configuration 7 parameters PCIe1 speed, PCIe2 speed, PCIe3 speed, PCIe4 speed, PCIe5 speed, PCIe6 speed, PCIe7 speed set Gen1 (the default is Gen1).
- On the tab Chipset open folder System Agent (SA) Configuration
- Set Primary display parameter Internal (the default is Auto)
- set VT-d value Enable (enable by default)
- PEX16_1 Max Link Speed parameter set to Gen1 (default is Gen1)
- On the Save&Exit , click Save Changes and Reset . Then YES to save.
Motherboards for mining with 6, 8, 12 video cards - rating 2022
The required number of connectors on a motherboard does not guarantee support for the corresponding number of video cards.
The question arises: how not to make a mistake when purchasing equipment for a farm? To help novice miners, we have compiled a list of the best boards for cryptocurrency mining. The presented motherboards have been tested and are guaranteed to be suitable for assembling mining rigs. Some boards do not have enough pci-e connectors to install the required number of video cards; to solve this problem, you can use various types of adapters, the most popular: m2 to pci-e, 1 pci-e to 3 pci-e, etc.
Don’t forget to buy the best risers for mining so that your assembled rig doesn’t sit idle waiting for missing parts. If the remaining components are already in stock, it is easier to purchase risers from local bulletin boards; downtime will cost more.
Gigabyte H110-D3A Bitcoin Edition and Gigabyte GA-B250-FinTech
- On the tab Peripherals
- Set Mining mode parameter Enable (disable by default)
- Set Above 4G Decoding value Enable (the default is Enable).
- parameter
- On the tab M.IT open folder Miscellaneous Settings
- Max Link Speed value set to Gen2 (default is Gen2)
- On the BIOS , set the Windows 8/10 Features option Enabled if you plan to install Windows (the default is Disabled)
- In the Chipset , set the VT-d value Enable (the default is Enable)
- In the Power , set the AC BACK value Always on (the default is Always off)
- On the Save&Exit , click Save Changes and Reset . Then YES to save.
Let's get started
Setting up bios for mining on Asus (z270, px 570, z390, prime z490 and others) is quite simple and does not require any special knowledge. Any user can perform it if he strictly adheres to the recommendations below.
Go to bios
You must begin setting up the BIOS by going to its main menu. There are two ways to complete this task:
- When the computer starts, press and hold the Del or F2 key for a few seconds (the desired key is often displayed on the PC screen). Login to BIOS.
- The second option will be relevant for Windows 1:
- in the “Start” menu, click the “Shutdown” command;
- press Shift and then “Reboot”;
- in the menu on a blue background, go to the “Diagnostics” section - then “Advanced Settings” - then “UEFI Firmware Settings”;
- The PC will automatically load the BIOS menu.
In some BIOS modifications, you will need to activate Advanced Mode to access the settings.
Enable above 4g decoding
For the DaggerHashimoto algorithm to fully work, it is necessary that Above 4G Decoding, which ensures wider operation of the processor with RAM, is in the activated state. To do this, when setting up the BIOS, you should set Above 4G Decoding to Enabled.
Reduce pci express slot speed
The speed of PCI Express is directly dependent on the stability of its operation: the higher it is, the lower the stability. When mining, the PCI Express throughput parameter can be lowered without losing profitability. Therefore, PCI-e x16 Link Speed should be set to gen1.
Disable the built-in video card
When setting up the bios for mining, it is recommended to disable the built-in video card, which is not involved in cryptocurrency mining, but periodically leads to system failures because it conflicts with the dedicated card. To free up resources for mining, the built-in graphics can be disabled. To do this, set the Internal Graphics setting to 0 MB or Disabled.
Tips for use
When using 200 series motherboards for mining virtual currencies, the miner must be aware of the features of the models. Motherboards provide the user with ample opportunities to customize the farm's cooling system. The more graphics adapters installed on the board, the more efficiently the resulting assembly should be cooled. Depending on the model, motherboards allow you to connect up to 4 case fans (not counting the processor cooler).
Features of 270 motherboards include the ability to overclock RAM - however, due to the lack of need to use RAM in calculations, this is not recommended. It is not advisable to overclock the central processor. Overclocked elements will increase the TDP of the farm and reduce the cooling efficiency without increasing the hashrate of the equipment.
Energy consumption
The issue of energy consumption is one of the most pressing for mining. Video adapters already consume a lot of electricity, increasing the payback period due to increased utility costs. To determine the costs when choosing a specific video card, you can get acquainted with the TDP indicators of popular 200 series models under different operating conditions:
- Z270 Mark 1 and Z270 Extreme4 boards consume no more than 40 W in normal mode, the maximum power consumption for the series is 46.7 W;
- when tested in benchmarks, power consumption indicators reach 140–160 W;
- when connecting 6–8 video adapters, the miner should expect that the motherboard will spend at least 120 W in part-load mode and up to 160 W at maximum load.
This information is used when choosing a power supply for a mining farm, adding the performance of the motherboard to the overall performance of the video adapters.
Disabling unused USB and SATA connectors on the motherboard will help reduce power consumption. The savings will reduce the TDP of the farm by only a few watts, but taking into account the round-the-clock operation of the farm, the benefit will be more noticeable.
Connecting graphics cards
Compared to other models in the Z270 family, the Z270-P has one of the best price/GPU ratios. The board can handle up to 8 GPUs, which is ideal for a rig. Safety and durability
Bios modifications to run 6x – 8x graphics cards
There are also features that will help you resell the board at a higher price, such as audio output lighting, audio shielding with a dedicated audio board and premium Japanese audio capacitors.
ASUS 5X Protection III, which includes ASUS SafeSlot Core (reinforced PCIe slots), LANGuard, surge protection, stainless steel output with 3X corrosion resistance and ASUS DIGI+ VRM.
Motherboards for mining with 7 video cards
Middle segment in terms of cost and number of connectors. The best option for building farms using a synchronizer and two power supplies. Separately, it is worth noting a board from ASRock called H81 Pro BTC, which appeared at the very height of mining on video cards and has already gained popularity among miners all over the world.
Elitegroup fee for 7 cards
Boards from ASRock for 7 cards
- ASRock H81 PRO BTC
- ASRock Fatal1ty Z270 Gaming K4
Boards from ASUS for 7 cards
- ASUS Z170 PRO
- ASUS Z170 PRO GAMING
- ASUS Z87-PRO V EDITION
- ASUS M5A97 LE R2.0
- ASUS P8Z77-V
- ASUS STRIX Z270H Gaming
BIOSTAR board for 7 cards
Board from GIGABYTE for 7 cards
Boards from MSI for 7 cards
- MSI Z170A Gaming Pro Carbon
- MSI Z170A Krait Gaming 3X
- MSI Z170A Krait Gaming R6 Siege
- MSI Z87 Mpower
- MSI Z87-G45 GAMING
- MSI Z97 GAMING
- MSI Z97-G45 GAMIN
How to setup
All settings must be made with 1 video card inserted into the PCI-e slot of the motherboard.
First, follow the link to the official Asus website https://www.asus.com/ru/Motherboards/PRIME-Z270-P/HelpDesk_Download/ and download the drivers: Lan, Utilities, Chipset, Bios (select the latest version).
Install all drivers (except BIOS). We dump the BIOS onto a formatted flash drive in Fat-32 format. If this is not possible, you can update the existing BIOS in the motherboard settings using a wi-fi or lan connection.
We reboot, go into the BIOS, press the F7 key -> tab -> asus ez flash 3 utility -> then select “install from a drive” (or search and install via the Internet) -> find a flash drive in the left corner, in devices -> select it -> select the firmware file “PRIME-Z270-P-ASUS-...” -> and press “YES” twice -> after reinstalling and rebooting, press F1, go into the BIOS -> press F10 “Save & exit” and press “Yes” "
Next, we set the necessary settings for optimal operation of a farm with 6 - 8 video cards (with one video card connected to the motherboard):
- Go to Bios
- Mode → Advance → System Agent Configuration. We enter the Above 4G Decoding section and select Enabled. This function allows the motherboard to see more than 4 video cards.
This scheme will help you run 6 video cards through a PCI-e riser.
If you want to install 8 video cards via the M2 connector, you need to do additional steps in the BIOS:
advanced -> onboard devices configuration -> M.2_1 Configuration -> select PCI-E
Useful, but not mandatory, actions that can be performed for better farm efficiency:
- Advanced/ apm configuration/ restore ac power loss/ select “power on”. This allows the system to turn on automatically after turning on the unit.
- Advanced/ onboard devices configuration/ hd audio controller/ select “disabled”. Will allow you to load the system less by turning off audio for smoother operation with 6-8 video cards.