In order for the process of obtaining virtual coins to be profitable and effective, it is not enough to acquire powerful and productive equipment; you need to be able to configure it correctly. At the same time, the profitability of mining depends on many components. One of the key roles is played by properly selected, highly efficient and reliable equipment. Asus motherboards, according to most miners, are an ideal option for mining a wide variety of types of cryptocurrencies. For example, the asus prime z490 motherboard can simultaneously connect up to 8 video cards. Correctly setting up the BIOS for effective asus mining is the stage that needs to be given attention first.
General scheme for setting up the BIOS for mining
The algorithm for setting BIOS values will have certain differences depending on the type of equipment used. However, there are a number of general provisions that are equally applicable to any type of technology. Setting up bios for mining on Asus follows the following general scheme:
- The first step is to set the audio and USB 3.0 ports to the Disable state.
- Next, the speed of the processor cooler is adjusted. The default value set is 100%. It is better to set the automatic adjustment mode.
- PCI-e slot speed switches from automatic to Gen.
- In the Standard SMOS Features category, the No Errors position is enabled.
- Due to the negative impact on the speed of operations, the HDD SMART option is disabled (should be set to Disabled).
- Activating the AC Back Function, which is responsible for the automatic start of the mining farm.
- Check and update, if necessary, the latest version of the driver (available for download from the manufacturer’s official website).
- Checking the boot and stability of the system with the configured parameters.
The above points reflect the basic BIOS settings. Certain parameters may differ for different motherboards.
Table of motherboards for mining
Finally, let's look at the rating of motherboards for mining 2022 in one table:
| Motherboard | Socket | Number of PCI-e slots | price, rub. | |
| 1 | ASRock H110 Pro BTC+ | LGA 1151 | 13 | 17 500 |
| 2 | B250P Mining Expert | LGA 1151 | 12 | 10 000 |
| 3 | ITZR B250-BTC-Gladiator | LGA 1151 | 12 | 11 400 |
| 4 | BTC-T37 | BGA1023 | 8 | 10 000 |
| 5 | MSI X470 Gaming Plus Max | AM4 | 6 | 8 800 |
| 6 | Gigabyte Z390 UD | LGA 1151v2 | 6 | 9 300 |
| 7 | Asus TUF B360-Plus Gaming | LGA 1151v2 | 6 | 8 400 |
| 8 | MSI B450-A Pro Max | AM4 | 6 | 7 700 |
| 9 | ASRock B450 Pro4 R2.0 | AM4 | 6 | 6 900 |
| 10 | MSI Z390-A Pro | LGA 1151v2 | 6 | 8 900 |
| 11 | Gigabyte B450 Aorus Pro | AM4 | 4 | 9 000 |
| 12 | Gigabyte GA-970A-D3 | AM3+ | 5 | 3 500 |
How to set up bios for mining
Setting up the BIOS for cryptocurrency mining on the asus z270 is carried out according to the following algorithm:
- When the system boots, press F7.
- In the Advanced section, open System Agent (SA) Configuration and change the VT-d value from Disabled to Enabled.
- In the same Advanced tab in the System Agent folder, open the DMI/OPI Configuration folder and change the DMI Max Link Speed option from Auto to Gen3.
- In the Advanced section in the System Agent (SA) Configuration folder, open PEG Port Configuration and switch the PCIEX16_1 and PCIEX16_1 parameter to Gen3.
- Advanced – PCH Configuration folder – open PCI Express Configuration and PCIe Speed also change to Gen3 (default is Auto).
- Advanced – APM Configuration folder: change the Restore AC Power Loss value to Power On (set to Off).
- Advanced - OnBoard Devices Configuration folder - HD Audio Controller parameter: switch to Disable (Enable by default). Switch 2_1 Configuration and M.2_2 Configuration to PCIE.
- Open the Boot section and set the Above 4G Decoding parameter to Enable (set to Disable). Setup mode to Advanced Mode (default EZ Mode).
After completing all the above settings, press F10, and then Ok for the setting to take effect. The BIOS is configured in the same way for the asus prime z490 and px 570 motherboards (with minor differences).
BIOS Guide
Before using the BIOS interface, we recommend downloading your motherboard's user manual and reading the introduction to the BIOS interface.
How to find the User Manual
Enter the device name in the search bar on the MSI official website.
For example, type "MPG Z390M GAMING EDGE AC" and press Enter.
Click the Manual link under the device name.
Select a file in the desired language and download it by clicking on the arrow icon.
Right-click on the downloaded file and select the Extract All menu item.
Click the Extract button.
Open the extracted PDF file.
Find the BIOS Setup section in the file.
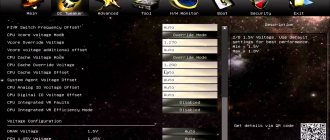
Introduction to the BIOS Interface
EZ MODE - Simplified mode
Advanced MODE - Advanced mode
In advanced mode, the BIOS interface is divided into six parts: Settings, Overclocking, M-FLASH, Overclocking profiles, Hardware monitoring and Board overview.
SETTINGS - Settings
System Status: overview of the computer system status
Advanced: advanced settings
Boot: settings related to booting the computer
Security: Security settings
Save and Exit: saving settings and exiting the BIOS interface
System Status - System status
Setting the system date and time, identifying drives, information about the DMI interface.
Advanced - Advanced settings
PCI Subsystem Settings
Settings for PCIe protocol, latency, multi-processor graphics configuration.
ACPI Settings
Configure the power indicator and high processor temperature notifications.
Integrated Peripherals
Settings of built-in controllers (network, SATA, sound).
Integrated Graphics Configuration
Settings related to the integrated graphics core.
USB Configuration
Built-in USB controller settings.
Super IO Configuration
Configuring COM port parameters.
Power Management
Energy saving settings (ErP).
The computer's reaction to a temporary power outage.
Protection against voltage surges.
USB power settings in S4/S5 states.
Windows OS Configuration
Windows 10 Authentication Settings (CSM/UEFI).
MSI Fast Boot Feature.
Information about the GOP protocol.
Secure Boot.
Wake Up Event Setup
The computer wakes up from sleep mode based on a signal from the network or peripheral devices.
Secure Erase+
The Secure Erase feature only applies to SSDs running in AHCI mode.
Boot
Configuring computer boot options. Specifying the order in which boot devices are polled:
Enable boot configuration settings
Enable boot mode settings
Boot order priorities
Hard drive priorities
Security
Password for the BIOS interface, TPM module settings, notification of opening the computer case:
BIOS password settings
TPM module settings
Set chassis intrusion warning
Save And Exit
Save or discard changes made to BIOS settings. Exiting the BIOS interface:
Save and cancel BIOS changes
Exit BIOS settings
Overclocking
Overclocking automatically and manually, Power voltage settings, Advanced processor parameters:
CPU advanced parameter settings
CPU features
Number of active cores, Hyper-Threading technology, virtualization, temperature monitoring, power saving options, etc.:
When a conversation begins about the technical side of the process of mining virtual money, the vast majority of users first of all remember video cards. And this is logical, since GPUs are the main elements of farms with 8 or 6 cards. However, we should not forget about such a component as the motherboard, which provides communication between all components. When analyzing the nuances of mining MSI Z270-A PRO with 8 cards, it is necessary to take into account the features of some BIOS settings.
A high-quality mother board ensures stable operation of the rig when mining Cardano and any other virtual coin, including top ones. This applies to both solo crypto mining and participation in pools.
Why does a miner need to configure bios?
Setting up the BIOS should be given paramount importance at the initial stage of mining. The performance of the mining farm and the stability of its operation depend on how correctly the parameters are set. By default, the BIOS is set by the hardware manufacturer to standard values. However, cryptocurrency mining has significant differences from the standard use of computer technology. If the BIOS parameters are set incorrectly, the farm may not work stably and with low performance.
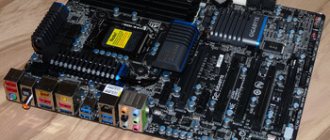
ASUS Prime series motherboards are, first of all, an enhanced power supply system, the ability to install more powerful cooling equipment, and convenient settings. Together with the latest generation Intel Core processors, Prime Z490 motherboards will be a reliable foundation for obtaining a high-performance mining system for cryptocurrency production.
Description and technical specifications
Some parameters of motherboards from the Z270 series may differ significantly. The main characteristics considered the main ones when mining cryptocurrencies are similar:
- all motherboards support Intel Core processors with Socket 1151 and up to 64 GB of DDR4 3800 or 3866 MHz memory (4 RAM sticks can be installed);
- all models support simultaneous connection and operation of up to 8 video cards - both Z270 P and Z270 A Pro are equally suitable for mining and cost about 8-10 thousand rubles;
- Each board has the same ATX form factor and is 30.5 cm long.
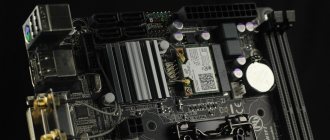
The part is suitable not only for mining virtual currency, but also for assembling a gaming PC. The manufacturer has provided LED backlighting, HDMI or DisplayPort connectors, providing several image modes for gaming monitors from MSI and other brands. The boards provide audio playback, Internet access and simultaneous connection of several SATA drives.
Let's get started
Setting up bios for mining on Asus (z270, px 570, z390, prime z490 and others) is quite simple and does not require any special knowledge. Any user can perform it if he strictly adheres to the recommendations below.
Go to bios
You must begin setting up the BIOS by going to its main menu. There are two ways to complete this task:
- When the computer starts, press and hold the Del or F2 key for a few seconds (the desired key is often displayed on the PC screen). Login to BIOS.
- The second option will be relevant for Windows 1:
- in the “Start” menu, click the “Shutdown” command;
- press Shift and then “Reboot”;
- in the menu on a blue background, go to the “Diagnostics” section - then “Advanced Settings” - then “UEFI Firmware Settings”;
- The PC will automatically load the BIOS menu.
In some BIOS modifications, you will need to activate Advanced Mode to access the settings.
Enable above 4g decoding
For the DaggerHashimoto algorithm to fully work, it is necessary that Above 4G Decoding, which ensures wider operation of the processor with RAM, is in the activated state. To do this, when setting up the BIOS, you should set Above 4G Decoding to Enabled.
Reduce pci express slot speed
The speed of PCI Express is directly dependent on the stability of its operation: the higher it is, the lower the stability. When mining, the PCI Express throughput parameter can be lowered without losing profitability. Therefore, PCI-e x16 Link Speed should be set to gen1.
Disable the built-in video card
When setting up the bios for mining, it is recommended to disable the built-in video card, which is not involved in cryptocurrency mining, but periodically leads to system failures because it conflicts with the dedicated card. To free up resources for mining, the built-in graphics can be disabled. To do this, set the Internal Graphics setting to 0 MB or Disabled.
Advantages and disadvantages
Advantages of choosing boards from the ASUS Z270 series for mining:
- a good processor power subsystem with the ability to overclock the CPU;
- a wide range of models, making it easy to choose the appropriate option for mining by purchasing a more profitable MSI Z270 SLI Plus or one of the top versions;
- well equipped with ports and connectors for connecting peripheral devices;
- support for all models, from ASUS Prime Z270 A to Carbon Z270, from 6 to 8 video cards for mining;
- high performance and stability;
- a large number of connectors for connecting coolers;
- the presence of stabilizers, thanks to which mining on the ASUS Prime Z270 P and other models in the series does not lead to serious voltage drops.
The disadvantage of mining cryptocurrencies using motherboards from the 200 series is the need for a powerful power supply. Taking into account the power reserve when choosing, for example, 8 RX 570 video adapters, mining on the MSI Z270 Gaming M3 will require purchasing an 1800-2000 W power supply or two 1000-watt ones. This leads to a noticeable increase in assembly costs and energy costs. The downside is the cost of a motherboard for Z270 mining - even on ASUS models. Using the Z270 Krait Gaming will cost even more, without any visible benefits of using them for mining. The Carbon Z270 Gaming Pro has the highest price in the series (up to $200), which is recommended only for gaming PCs.
ASRock H110 Pro BTC+
An interesting motherboard designed for mining has gone on sale at a price of 129.99 USD. An excellent solution, even if you have a farm of 6-8 cards.
Peculiarities
- Supports 13 video cards, 8 AMD + 5 Nvidia;
- availability of additional power supply 2 MOLEX + 1 SATA;
- power and reset buttons;
- Complete protection against power surges.
Links:
Page on the manufacturer’s website Product page on NewEgg – price 129.99 USD Product page on Amazon – price 197.96 USD
Minuses
- Windows 10 may not cope well with supporting 13 video cards, especially if it is AMD+Nvidia, and frequent driver conflicts and crashes are possible. In this case, I strongly recommend using Linux systems.
- In the case of 13 video cards, you will have to think carefully about the design of the truss, since placing all 13 cards in a row will result in a rack that is too long, taking into account the distance between the cards, almost one and a half meters, in this case there will be problems with the length of cables and adapters. It will be necessary to place them in two rows in parallel, or in another way.
Biostar TB250-BTC PRO
An excellent mining solution is finally on sale at a discounted price of 129.99 USD.
Peculiarities
- support for 12 video cards;
- availability of additional power supply 2 MOLEX + 1 SATA;
- based on Intel B250 chipset;
- Full protection against power surges and other protections.
Minuses
Windows 10 may not cope well with supporting 12 on board the farm; alternatively, use Linux-based systems.
It is necessary to think over the design of the truss, since it will not be possible to fit all 12 cards in one row; the optimal placement is in two rows.