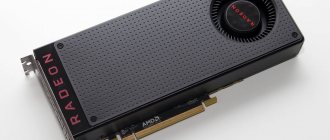
AMD began selling the Radeon RX 560 on April 18, 2022 at a suggested price of $99. This is a desktop video card based on GCN 4.0 architecture, with a 14 nm process technology. It has 4 GB of GDDR5 memory with a frequency of 1750 MHz, a 128-bit bus, which provides a bandwidth of 7 Gbit/s.
The card occupies 2 slots and is connected via PCIe 3.0 x8 interface. The length of the reference version is 170 mm. The card does not require additional power; the stated maximum power consumption is 75 W.
Do I need to update the BIOS of AMD video cards?
Why flash the BIOS of video cards?
Firstly, this is done in order to improve its performance. The frequency of the core and graphics can be significantly increased if you choose the right firmware. Secondly, the stability of the adapter is improved. Each new BIOS update or any other software solves old problems, eliminates minor errors and shortcomings. But this applies only to official software. Downloading amateur software is done only at your own risk.
And thirdly, sometimes video cards stop working normally and correctly. The user diagnoses hardware problems, but does not find them. It also checks the driver and makes sure that the latest version of the product is installed. There is only one reason for instability - problems with the BIOS, which can be solved by flashing the firmware.
Flashing via GUI
Bios firmware for video card
Launch ATIWinflash with administrator rights. Make sure that the video adapter you need is selected in the upper right corner of the program.
This is how the ATIWinflash program shows one single video card.
If the number of video cards in the system is more than 3, then the program will not be able to correctly display the entire list - the fourth and subsequent video cards simply will not fit in the window. In this case, you will have to use the firmware method via the command line (you can read about this in the same article below).
And this is how the ATIWinflash program shows four video cards - only three of them are visible, the fourth simply did not fit on the screen.
Having selected the desired video card, click on the “Load image” button and select the BIOS file with which we want to flash the video card.
And after that, click on the “Program” button.
After this, we wait until the video card firmware procedure is completed, which will be reported in a separate notification.
And then a reboot prompt will appear, which is necessary for the video card to work with the new BIOS.
AMD BIOS Update Tools
A very strange story of one video card or doubling the memory capacity on an rx 570 using bios firmware
Here are the top AMD BIOS update tools to flash VBIOS of your AMD Radeon graphics cards.
ATIFlash
This is the best and safest tool for updating BIOS of your AMD graphics card. This AMD VBIOS update tool has both a console/command line and GUI interface. You can use any one of them to update your AMD graphics card VBIOS. ATIFlash is previously known as ATIWinFlash but now it is renamed as ATIFlash only. This AMD VBIOS update tool can be run from windows and from bootable USB storage disk or drive. Just like NVFlash, you can backup your current VBIOS and update it to a newer one using the ATIFlash BIOS update tool.
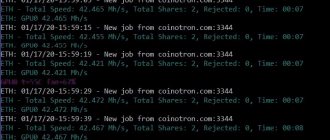
Hashrate on different algorithms
Most miners recommend mining currencies using the Ethash algorithm on the RX 560. But on the 560 version, 2 GB of ether is pointless, since the DAG file exceeds 3 GB.
You can achieve the following indicators when mining different coins:
- Ethereum Classic – 14/15 Mh/s;
- Ravencoin(RVN) – 6 Mh/s;
- HavenProtocol(XHV) – 450 H/s.
The choice of pool and coin remains only with the miner. But before making the final choice, it is better to contact people on the forum ( bits.media , bitcointalk or miningclub ), they can help and give practical advice.
Main mining pools:
- NanoPool;
- F2pool;
- Hashvault.
How to flash the BIOS “as it was.”
Updating bios on nvidia video card
Taking into account the obvious fact that this article, as a rule, will be read not to flash a new version of the BIOS, but to restore functionality in general, we will dwell on the various flashing methods.
Bios firmware on the programmer.
It’s banal and uninteresting - you break a pig with change, rip out the flash drive and go with a floppy disk and beer to the nearest repairmen who know how to fight with a programmer. If the flash drive is sealed, you will have to break another pig and carry the entire board. I can advise you to strain them and solder the block - in the future, if you wish, you can save on a third pig.
Hotswap (hot).
Another WORK payment is taken. As already mentioned, it does not have to be “exactly the same”, “on the same chipset”, “from the same company”. The main thing you should focus on is the type/labeling of the flash drive. There are two main "compatible" groups:
- “regular” (in particular, this includes all “rectangular” flash drives - in DIP32 housing) - 28xxxx, 29xxxx, 39xxxx, some 49xxxx
- “Hub” (all of them are only “square” in the PLCC32 package) - most of the 49xxxx series and “native” Intel 82802xx
Accordingly, if the recovery board has a “compatible” flash drive of the same (or larger) capacity, everything should work.
How to make a “hook” for flashing the BIOS to “hot”.
Industrial grip option for DIP32
Use your imagination - the main thing “during the process” is not to drop foreign conductive parts on the working board (and not to spill liquids). For mini devices in a DIP32 package it’s simpler. It is usually recommended to tie them with threads to make them easier to pull out. I would recommend finding something like a cable from an old COM port and placing it under the microcircuit - it will be easier to grip and the width just enough for the microcircuit and the thickness of the cable will prevent the flash drive from getting too stuck in the connector.
For “square” ones (PLCC32) it’s a little more complicated. You can continue to struggle with threads. If you have good access and your hands don’t shake, you can simply pry it out with a needle in the appropriate corners and carefully remove it. If you constantly do this (updating similar ones) or just want to “make sure” - glue some thing to the “back” of the flash drive so that you can easily remove/insert it: a piece of plastic will do, or even melt part of the rod for a glue gun... In general - this is already a matter of technology, as a last resort you can go and buy a special “extractor” for PLCC32.
"Grip" options for PLCC32
How to update BIOS for ATI video card?
So, let's say that the GPU-Z utility showed that the user has an Ati Radeon HD 7970 video card installed. This means that you need to download the archive with the new BIOS version for this device, unpack it using winflash, and then create a bootable USB flash drive. After this, you need to launch the RBE BIOS Editor program, select the “File” and “Load BIOS” items in the menu bar. In the “Informaiton” window, you can make sure that a new BIOS version was actually downloaded, and not some mp3 file. Next, you need to click the “Close Settings” button and check all the information about the frequency and voltage of the GPU. After this, you can close the program (no need to change anything).
The TechPowerUp utility will additionally allow you to manage active cooling settings and overclock the video card
Overclocking video card RAM for Ethereum mining.
AMD RX can increase its hashrate by changing timings and overclocking video memory. The stock memory of regular video cards operates at its own frequencies and also has its own maximum. There is no need to increase the clock frequencies to the skies, because stable operation of the farm is the key to a good income in mining.
The “Memory” table has a column with values, the bottom cell is the maximum frequency at peak load on the video card.
If the number is “1750”, then increasing this parameter to “2000” will be dangerous. It is dangerous in terms of the fact that the video card will freeze or generate errors. By trial and error, you can eventually find out what memory frequency is optimal for your video card, in my case it is “1900”.
If you have values in this cell above 1750 MHz, then you can safely raise the indicator to 1950 MHz, 2000 MHz and even up to 2100. And again, the optimal frequencies can only be identified with the help of tests.
What to mine on AMD RX 560
In the current period, the most profitable coin is Ethereum Classic. The hashing speed, depending on the model, is 14 - 15 MH/s. In a month, at this speed, you can earn $9.14, unless of course the ETC rate changes. It is not profitable to mine solo on the RX 560. It's better to pay attention to the pools.
On most pools the minimum withdrawal is 0.1 ETC. Working on one card, you will collect this amount within 48 hours. The payment interval is quite acceptable, and if you have 3 or 4 graphics adapters of this model, you will receive a reward every day.
It is less profitable to mine Dubaiccoin, Metaverse or other Ethash alts on the RX 560 4GB. As for dual mining, you can launch combined mining of Ziqilla and another Ethash coin. But traditional dual mining of cryptocoins of different algorithms using Claymore's Dual Miner program has long been unprofitable . On the 560 card from Gigabyte, after properly installing Windows and overclocking, you can get a speed of 14.5 MH/s. This figure is equal to the 1050 Ti video card. When choosing which card is more like the 1050 Ti or RX 560, Ether mining will be more profitable on the RX 560 due to savings on the initial cost of the farm.
The maximum ether mining speed that can be obtained on a farm from the RX 560 belongs to cards with memory from Samsung. In this case, the speed will be 15 MH/s. To do this, you need to update the BIOS and change the timings or run the Phoenix miner by writing the –mt 2 parameter in the batch file.
Mining Monero (XMR), RX 560 is no longer relevant, the coin has switched to another protocol. Mining RVN on KawPow is profitable, but the algorithm is very hot and energy-intensive. RX 560 have a weak cooling system without heat pipes; under normal conditions they are not needed for such low-power cards. But when mining coins using algorithms that require high energy consumption, the cards may not be able to withstand it. Better pay attention to one of the cryptoknight forks, called HavenProtocol (XHV). The coin has risen in price and become quite profitable, and when mining it, the cards will not heat up higher than 55C.
Video cards with 2 GB memory are unprofitable. Such cards bring very little profit. When purchasing, you need to forecast at least 1-2 years in advance so as not to constantly update the equipment.
Flashing via command line
The most useful ATIFlash commands are:
- atiflash.exe -i - will show a list of video cards installed on the AMD system. Useful for flashing the BIOS on a specific video card.
- atiflash.exe -p — reflash the video card with the specified BIOS number from the specified file.
- atiflash.exe -pa - flash ALL video cards with the specified BIOS file.
Examples of using:
- The system has one single AMD video card installed. In this case, everything is simple - we specify the flashing of all cards in the system, using a file with a modified BIOS (let's say it's called BIOS_mod_470.rom):
- The system has two different video cards installed - AMD Radeon R9 390 and AMD Radeon RX 470; you need to reflash the BIOS only for the RX 470:
We run the program with the -i parameter and look at the list of video cards in the system. We remember the number of the RX 470 video card.Seeing that the RX 470 (hidden behind the name Polaris10) has number 0, we indicate to reflash the video card number 0 with the BIOS_mod_470.rom file:
After entering the command to flash the BIOS, we patiently wait for the procedure to complete. Upon completion, the program will display the following message on the command line:
Restart System To Complete VBIOS Update.
Which means that to finish updating the BIOS of the video card, you need to restart the computer. After the reboot, you can consider the BIOS flashing procedure complete.
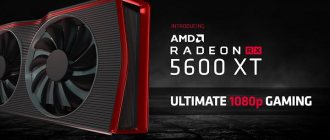
BIOS firmware for Radeon RX 5600 XT from different manufacturers
Perhaps someone has already acquired the latest Radeon RX 5600 XT video card from AMD. However, many may not be aware that three days before the launch, the company decided to increase the competitiveness of the device by increasing the GPU and memory frequencies through a BIOS update. Yes, this gave a good result, but most of the boards (it can be called the “First Wave”) with the original specifications had already been delivered to partners who were not able to make such an important update in the factory. By providing this opportunity to the users themselves who have already ordered their video cards.
Yes, for some, flashing the BIOS on the RX 5600 XT is a piece of cake, but for others it’s a problem due to lack of experience. However, manufacturers of custom solutions, taking this fact into account, offered to install an updated version of the BIOS using each one through their own software, which can significantly simplify the process for beginners in this matter.
Table of contents:
- New FA0 BIOS from Gigabyte
- Unleashed BIOS by PowerColor
- MSI Dragon Center
- New VBIOS Update from Sapphire
- Easy One Click Updater by ASRock
- BIOS from ASUS
Below are links to all available BIOS options and proprietary software for updating (if available) some well-known manufacturers of cards based on the RX 5600 XT.
New FA0 BIOS from Gigabyte
Late Tuesday evening, GigaByte posted on its website a vBIOS update for its Radeon RX 5600 XT Gaming OC video card (model: GV-R56XTGAMING OC-6GD). The new FA0 video BIOS version raises the card's TDP to 180 W (compare 150 W with the original specification), increases the gaming clock frequency to 1670 MHz, the boost frequency to 1750 MHz, and the memory frequency to 14 Gbps (effective for GDDR6), compared with the original 12 Gbit/s.
Important! The Gigabyte BIOS update package for the RX 5600 XT Gaming OC includes a Windows-based GUI updater that is much easier to use than manually updating the BIOS using ATIWinFlash.
DOWNLOAD: GIGABYTE RX 5600 XT Gaming OC New FA0 BIOS Update
Unleashed BIOS by PowerColor
The next AMD Radeon partner to offer a modified BIOS for its RX 5600 XT cards that allows you to increase clock speeds, increase TDP and outperform the RTX 2060 from NVIDIA is PowerColor. PowerColor takes the hassle (and risk) out of updating their cards using ROM and ATIWinFlash files by automating the process using batch files. Unfortunately, the PowerColor updater is DOS-based, which will require you to boot your computer into DOS and run the batch file.
Eligible models for PowerColor RX 5600 XT Unleashed BIOS are RX 5600 XT Red Devil (Model: AXRX 5600XT 6GBD6-3DHE/OC) and RX 5600 XT Red Dragon (Model: AXRX 5600XT 6GBD6-3DHR/OC). Both cards offer a dual-BIOS feature, where one BIOS is optimized for better performance and the other is “Silent” for low noise. It is assumed that the user runs the update program once for each BIOS. Follow the instructions in the PDF included with the BIOS update package, which includes instructions for creating bootable DOS media.
DOWNLOAD: PowerColor RX 5600 XT Unleashed BIOS
MSI Dragon Center
A last-minute change to the AMD Radeon RX 5600 XT specifications means that early adopters of the card may be stuck with the older (slower) specifications. The new specification is distributed through vBIOS updates. The likes of ASRock and Sapphire have released 1-click updates; MSI distributes its products through the centralized MSI Dragon Center application.
MSI Dragon Center integrates customization functionality (Afterburner functions) with Mystic Light (RGB LED control) and Live Update (software updates) into one interface. In addition to searching for video driver updates, Dragon Center can now download and update the video BIOS of Radeon RX 5600 XT graphics cards. Eligible cards include the RX 5600 XT Gaming X and RX 5600 XT Gaming.
DOWNLOAD: MSI Dragon Center
New VBIOS Update from Sapphire
Sapphire today released BIOS updates for its only Radeon RX 5600 XT product, the Pulse Radeon RX 5600 XT OC Edition. The updated BIOS increases the card's potential by significantly increasing engine and memory clock speeds and power limits, resulting in performance increases of up to 10%. Much like ASRock, Sapphire has automated the BIOS update process by shipping its BIOS ROMs via flashing and batch files.
Since the Pulse RX 5600 XT OC Edition comes with a dual-BIOS, one being the "performance" variant and the other being the "quiet" BIOS, the user needs to update both, and there are separate Windows batch files to run after manually switching between ROMs. The Sapphire BIOS update package contains a PDF file with detailed instructions for updating each ROM. Batch files eliminate the need to manually handle various flashing CLI arguments. Find the "New VBIOS Update" tab on the card's product page on the Sapphire website.
DOWNLOAD: VBIOS Update
Easy One Click Updater by ASRock
ASRock has released an updated BIOS for its three factory overclocked RX 5600 XT graphics cards and has taken it a step further by making it convenient for end users to now flash the BIOS in one click.
The ASRock RX 5600 XT vBIOS updater consists of an executable file and a Windows batch file. Clicking on the batch file with administrator rights starts an automatic update. This frees you from having to use a CLI based ATIWinFlash with a bare ROM image, getting all the arguments right and crossing your fingers.
DOWNLOAD: ASRock RX 5600 XT Phantom Gaming D3 | ASRock RX 5600 XT Phantom Gaming D2 | ASRock RX 5600 XT Challenger D
BIOS from ASUS
For ROG Strix RX 5600 XT O6G and TUF Gaming RX 5600 XT EVO OC video cards, see here.
How to configure a video card in the BIOS?
How to configure a video card in the BIOS?
In order to configure the video card on your computer, you need to enter the BIOS program. The BIOS program (basic input/output system, otherwise “basic input/output system”) is a very important element in the operation of a computer. It is written on a chip that is located directly on the motherboard. It is this program that allows you to configure, connect and disconnect various devices, including video cards, both built-in and external. Therefore, if you need to switch from a built-in video card to an external one or vice versa, you need to enter the BIOS settings.
Each motherboard uses its own, completely unique BIOS program, specially designed for this type of board. But the main settings of the I/O program are the same for all computers. You can enter the BIOS settings by pressing the Delete key when the computer boots. This is the most common way. Sometimes a different key or even a combination of several keys is needed. In order not to make a mistake when entering the BIOS, you need to carefully monitor the screen at boot time, where an inscription should appear indicating which keys you need to press. For example: Press DEL to enter SETUP. But the key can be F1, F2, or F10, and key combinations are also possible: Ctrl+Esc, Ctrl+Alt+Esc, Ctrl+Alt+S or others. After opening the settings window, you need to find the tab you need to change a particular parameter.
The “Graphics Aperture Size” tab (it may be called “AGP Aperture Size”) is intended for more efficient use of PC RAM by AGP graphics cards when displaying textures. The tab contains the following values: 32, 64, 128, 256 (for older versions possible: 4, 8, 16). The texture memory value of 128 or 64 MB is considered to be the most optimal.
The Palette Snooping tab allows you to synchronize the colors of the video card, as well as the images that are captured using the video editing card. In case of incorrect display of colors during video capture, you must use the Enabled option (which means “Enabled”). Otherwise this option must be disabled.
The Allocate IRQ for PCI VGA tab is designed to enable a dedicated interrupt. The Enabled position means the enabled state of the dedicated interrupt, Disabled means the disabled state. It is important to remember that video cards require a dedicated interrupt. Therefore, the optimal position for this option is the on position.
The Display Cache Window Size tab is intended to indicate the amount of system memory required by the integrated graphics core of the chipset. It is recommended to set the same value here as on the AGP Aperture Size tab.
The DVMT tab, as well as the identical DVMT 4.0 Mode, DVMT Mode, DVMT Mode Select, allow you to select the optimal option for reserving the system memory of the graphics core, corresponding to the equipment of your computer (this can be dynamic allocation, permanent allocation, or a combination of these two approaches) . The Fixed Memory Size tab determines the amount of system memory required by the DVMT graphics driver on a permanent basis. The possible values here are 128MB, 64MB, 32MB and 0MB (if the computer's RAM is no more than 512 MB). The DVMT/Fixed Memory tab or the identical DVMT/Fixed Memory Size and IGD DVMT/Fixed Memory tabs are a combination of the Fixed Memory Size and DVMT Memory Size options. The optimal values here will be from 64 MV to 128 MV.
The AIMM Display Cache Frequency module tab is intended to indicate the operating frequency of the module memory (100 MHz or 133 MHz). Other AIMM menu options include Paging Mode Control, RAS# Precharge Timing, RAS-to-CAS Override, or CAS# Latency), set the number of clock cycles for the module memory (RAS# Timing).
Specifications
GPU
Name GPU Polaris 21 Option GPU Polaris 21 XT (215-0908004) Architecture GCN 4.0 Manufacturer GlobalFoundries Process technology 14 nm Number of transistors 3000 million Crystal area 123 mm²
Graphics card
Release date April 18, 2022 Polaris generation (RX 500) Predecessor Arctic Islands Descendant Vega Launch price $99 Market price $99 Data bus interface PCIe 3.0 x8
Frequencies
Base frequency 1175 MHz Boost frequency 1275 MHz Memory frequency 1750 MHz
Memory
Memory capacity 4 GB Memory type GDDR5 Memory bus 128 bit Memory speed 7 GB/s Memory bandwidth 112 GB/s
Render Configuration
Shader units 1024 Compute units 16 Texture units 64 Raster units 16 L1 cache 16 KB L2 cache 1024 KB
Nominal capacity
Pixel fill rate 20.40 GP/s Texture fill rate 81.60 GT/s FP16 performance 2.611 teraflops FP32 performance 2.611 teraflops FP64 performance 163.2 GFlops
Graphics capabilities
DirectX 12 (12_0) OpenGL 4.6 OpenCL 2.1 Vulkan 1.2 Shader model 6.4
Graphics card design
Occupied slots 2 Length 170 mm Heatsink requirements 75 W Recommended power supply 250 W Outputs 1x DVI 1x HDMI 1x DisplayPort Additional power Not required Board number C994 Maximum temperature 62 °C Maximum noise 41.7 dB
Guide to video card firmware
Flashing a video card for mining is very easy using the ATIWinflash GUI application and one of the BIOS modification programs. It involves performing the following actions:
1. Saving the BIOS contained in the video card to a file for modification and backup. Copying the original BIOS to a safe place is necessary so that you can return the card to its original state in the event of unsuccessful firmware or for other reasons.
To do this, perform the following actions:
- Run the ATIWinflash application as administrator. To do this, right-click on the file icon and select the appropriate command;
- In the System Video Devices menu, select the desired video card;
- Click the Save button (the right button in the bottom row of three buttons) and indicate the path to save the file;
- Once the BIOS copying is complete, a success message will appear. The resulting file can be modernized, and the original can also be copied for backup.
2. Upgrading the parameters of the factory BIOS, which is done by flashing straps (timings) from low frequencies to higher ones.
As a rule, when modifying a BIOS file, memory timings are recorded from a frequency of 1500 or 1625 megahertz to all BIOS lines with higher frequencies. When using PolarisBiosEditor-1.6.7, modification of timings can be done automatically with one click of a button. To do this, perform the following actions:
- launch the Polaris BIOS Editor program;
- press the OPEN BIOS button;
- press the One click timing patch button;
- save the modified BIOS to the desired location by clicking the Save as button under a new name, for example RX570-mod.rom.
In addition, you can change other parameters of the video card, but it is more convenient to do this in the SRBPolaris BIOS editor program. They actually do not affect the mining speed, but can reduce power consumption (which can be successfully done in a mining or overclocking program directly in the Windows operating system and without flashing these values into the BIOS, which, if the values are chosen incorrectly, increases the risk of damage to the card).
3. Write a new version to the video card chip, which is done as follows:
- Run the ATIWinflash application as administrator. To do this, right-click on the file icon and select the appropriate command;
- In the System Video Devices menu, select the desired video card;
- Click the Load Image button (the left button in the bottom row of three buttons) and select the modified file;
- Press the middle Program (TM) RX470 Grap button and wait for the firmware to finish;
- Upon completion of flashing the new BIOS, a success message will appear and a prompt to restart the computer;
- Reboot the computer, if error 43 appears, then you need to run Atikmdag patcher, patch the drivers and restart the computer again.
- Checking the video card for stability. It consists of a test run of the mining program, checking voltage, frequencies and memory errors in HWinfo.
What is video card firmware, what is it for in mining
When using video cards from AMD, there is a practical opportunity not only to increase the frequency of the graphics processor and video memory, but also to use more subtle settings regarding the operating mode of the memory chips, as well as the power consumption of the video card . This is possible by changing the settings specified in BIOS , used by the operating system and application programs, which are read when the equipment is initialized immediately after turning on the computer.
Optimizing video card settings for mining, as a rule, consists of achieving the following goals:
- reduction of timings at which video memory chips operate, which allows increasing its performance without increasing the operating frequency;
- reducing the level of power consumption of the video card to a minimum (lowering the voltage on the graphics core, memory controller and reducing the power limit), while maintaining stability, which allows you to increase the profitability of mining by reducing electricity costs, as well as reduce the heating of components, which reduces wear.
Firmware for video cards for mining gives a significant increase in performance, for example, a firmware RX 570 produces 30-40% higher speed when mining ether than a similar non-flashed version.
In addition, knowledge of how the firmware for mining popular video cards, for example, RX480, allows, if necessary, to restore their functionality. When buying a used video card, it happens that it was flashed by a not very experienced miner and, as a result, produces errors that can be detected in various diagnostic programs, for example HWinfo (shows memory errors). Such a video card, as a rule, produces artifacts in the image and can cause the computer to freeze. To eliminate these problems, you may need to flash the native BIOS, which can be downloaded from the manufacturer’s website, or, in the case of significant memory degradation, you will need to flash a modified BIOS with reduced frequencies, which can eliminate problems with freezing, errors and artifacts.
Programs for flashing video cards
To flash video cards from AMD, you need the Atiflash , which allows for backup, and also makes it possible to update the BIOS of the video card to an improved version if it is released by the manufacturer.
The archive contains the ATIWinflash for working with video cards using a graphical shell and the Atiflash command line utility, which has broader functionality, but requires entering text commands.
To flash AMD video cards of the Polaris family, it is best to use the free utility SRBPolaris BIOS editor , which is available for download at bitcointalk.org/index.php?topic=1882656.0. This program allows you to set the parameters of video cards by copying timings from low frequencies to higher ones, change the operating frequency of the graphics processor, change consumption limits, voltage, and cooler settings.
Similar functions are performed by the Polaris BIOS Editor . It is very convenient to use version 1.6.7 , which can be downloaded from the developer’s page at https://github.com/vanities/PolarisBiosEditor-1.6.7 (you need to click on the Clone or download and select download.zip). After downloading, you need to unzip the program to a convenient location and use the PolarisBiosEditor.exe . The program contains a database of memory chips from the most popular manufacturers, including Elpida , Hynix , Samsung , and allows you to automatically flash the best timings.
After flashing video cards, you may need to patch the operating system drivers , which check the BIOS correctness, using the Atikmdag patcher (https://www.monitortests.com/forum/Thread-AMD-ATI-Pixel-Clock-Patcher). This is usually required for RX400 series video cards, which, after modifying the BIOS, are detected by the system with error 43 . After updating the mining firmware for newer video cards, for example, the RX 580 , this error, as a rule, does not occur .
After flashing the firmware, it is very convenient to control the video card parameters using the GPU-Z and HWinfo , which show voltages, frequencies, video card loading and much other useful information. The presence of overclocking can be checked in HWinfo by monitoring video memory errors. If there are a large number of these errors, you need to reduce overclocking by reducing the operating frequency of the video memory or flashing less aggressive timings.
Integrated and discrete video card: what is it?
So, today two types of graphics accelerators are actively used: integrated (Video-on-Board) and discrete.
With the first type everything is probably clear. The chipset is initially built into the motherboard, and it is impossible to replace it without special tools. Another thing is a discrete video card. What it is? In essence, this is an adapter that can be installed on and removed from the motherboard at any time quite simply, however, provided that the motherboard and processor support this type of adapter.
Typically, integrated cards have a smaller capacity compared to discrete cards. This is understandable, because the discrete adapter uses powerful graphics processors that require cooling. Therefore, almost all modern models use several coolers (coolers). And this is additional space, and you can’t just put them in a laptop. In general, such a pair is more often found in stationary PCs, but it is also used in laptops, and the volumes of memory and one and the other adapter are comparable in terms of indicators.
Booting from a flash drive into a DOS system
If you have already formatted the flash drive with Rufus, then you can start updating the BIOS, for this we will boot from the flash drive. It is recommended to always keep the BIOS file and the Nvflash utility for DOS in the same folder. Be sure to give it a name in Latin, for example, NVFL. Now we restart the computer and press the F8 key several times to mate. ASUS boards.
On other motherboard models, a key that will need to be pressed several times can be seen on the PC boot screen. Or you can set the boot priority from a flash drive (BOOT) in advance in the BIOS. We go into the BIOS using the Delete or DEL key, press it several times when starting the computer.
What is needed for the firmware?
Video cards from laptops cannot be flashed directly. The situation is the same with integrated graphics chips. They simply do not have their own BIOS, which would be stored in the internal memory of the video adapter (Video ROM). Updates are installed on it through the main BIOS of the computer.
While loading Firmware, you cannot turn off the PC. It is impossible to predict when electrical problems will occur. Therefore, use an uninterruptible power supply if you have one.
Before flashing an NVIDIA video card, find out its specifications and the installed BIOS version. This can be done using the CPU-Z program. Find it online, download and run. You need information from the Graphics Card section.
- Device model (“Name”);
- Its identifier (“Device ID”);
- Type, size and frequency of video memory (“Memory Type”. “Memory Size” and “Memory Clock”);
- Bus Width;
- Video adapter core frequency (“CPU Clock”);
- Current BIOS version (“Version BIOS”);
- ). NVIDIA is not always listed there. She has many partners who create models of this brand - ASUS, Gigabyte, MSI, Palit.
Specifications will be required when choosing Firmware. Current programs can be found on the manufacturer's official website. If they are not there, write the request “Firmware for video card” in any search engine. For example, the “techpowerup” service is suitable. Download software that is created specifically for a specific graphics card model. Focus on its characteristics and the current BIOS version. The Firmware file must be in .rom format. Do not download anything from questionable resources.
The update is only available for video adapters with a single GPU. If there are two of them, the software installation may end badly. Usually the quantity is indicated in the model name.
- Update NVIDIA drivers;
- Prepare a flash drive or memory card (needed to boot via DOS);
- Create a backup copy of the old Firmware. To do this, in the CPU-Z program, click on the arrow-shaped button (it is located next to the BIOS version), select “Save to file” and specify the path to the folder. This way you can always return to the previous version of the software.
Overclocking and optimization
The best thing is to download and install a universal program for overclocking video cards of any model, MSI Afterburner. With its help, you can set the necessary memory and core frequency parameters, as well as the PowerLimit value and fan speed.
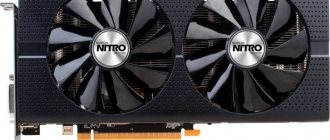
Overclocking the RX 560 for mining from the manufacturer Sapphire will not be difficult, even for a user unfamiliar with coin mining. The Sapphire TRIXX program will safely and easily increase the performance of your video card. Perhaps not all cards have programs for such settings, but there is always universal software.
The Sapphire TRIXX program cannot harm the video card. In the worst case, using this program the card may go into reboot mode. It will simply reset all settings to factory settings. But when flashing the BIOS it is no longer so safe. If you configure the card incorrectly, it can turn into a brick, although many miners say that in this case you can bring the RX 560 back to life. But it's worth trying and taking risks for the sake of increased productivity. To see for yourself which program can help with overclocking, let's start with standard programs.
The Sapphire TRIXX program can be found on the Sapphiretech . The program is updated frequently and constantly improved. To understand what to do first, it was decided to determine at what frequency the processor and memory operate, and how this changes the hashrate value when mining coins.
Initially, the frequencies were set to 1216 for the graphics chip and 1750 for the memory.
After changing the values to 1330 MHz for the processor and 2000 MHz for the memory, the RX 560 received a 5-6% in mining speed. And with these settings it does not go into reboot.
In addition, to ensure the operation of the video card, it was decided to increase the fan speed.
After these settings, the card works stably and does not overheat.
Enabling the video card in Device Manager
Another alternative to using BIOS is Device Manager. The system utility will allow you not only to turn on the desired video card, but also to update the drivers.
- Open the properties of the My Computer shortcut.
- Select “Device Manager” on the left.
In the list presented, expand the line “Video adapters”. If your laptop has two video cards, they will appear here. Right-click on the one you need and select “Enable” in the context menu. This is where drivers are updated or installed.
If the action is performed on a desktop PC, then you will additionally need to switch the monitor cord: from the built-in video card to an external one or vice versa. Before doing this, be sure to turn off the power to the components.
These are all the ways to enable the built-in and discrete video card on a computer or laptop. The BIOS is the main system that controls the operation of its constituent elements, but at the same time, there are much simpler methods for turning on and switching GPUs: a program from the manufacturer or Device Manager.
What is needed for the firmware?
Video cards from laptops cannot be flashed directly. The situation is the same with integrated graphics chips. They simply do not have their own BIOS, which would be stored in the internal memory of the video adapter (Video ROM). Updates are installed on it through the main BIOS of the computer.
While loading Firmware, you cannot turn off the PC. It is impossible to predict when electrical problems will occur. Therefore, use an uninterruptible power supply if you have one.
Before flashing an NVIDIA video card, find out its specifications and the installed BIOS version. This can be done using the CPU-Z program. Find it online, download and run. You need information from the Graphics Card section.
- Device model (“Name”);
- Its identifier (“Device ID”);
- Type, size and frequency of video memory (“Memory Type”. “Memory Size” and “Memory Clock”);
- Bus Width;
- Video adapter core frequency (“CPU Clock”);
- Current BIOS version (“Version BIOS”);
- ). NVIDIA is not always listed there. She has many partners who create models of this brand - ASUS, Gigabyte, MSI, Palit.
Specifications will be required when choosing Firmware. Current programs can be found on the manufacturer's official website. If they are not there, write the request “Firmware for video card” in any search engine. For example, the “techpowerup” service is suitable. Download software that is created specifically for a specific graphics card model. Focus on its characteristics and the current BIOS version. The Firmware file must be in .rom format. Do not download anything from questionable resources.
The update is only available for video adapters with a single GPU. If there are two of them, the software installation may end badly. Usually the quantity is indicated in the model name.
- Update NVIDIA drivers;
- Prepare a flash drive or memory card (needed to boot via DOS);
- Create a backup copy of the old Firmware. To do this, in the CPU-Z program, click on the arrow-shaped button (it is located next to the BIOS version), select “Save to file” and specify the path to the folder. This way you can always return to the previous version of the software.
Let's go!
The procedure may seem complicated, but following our instructions everything will go smoothly. You need:
- Install the latest driver from AMD, everything in it is optimized for mining;
- Enable calculation mode.
- Apply the atikmdag-patcher patch so that the driver does not complain about non-original bios;
- Find out the video memory manufacturer and make a copy of the original BIOS via GPU-Z;
- Modify the BIOS via Polaris Bios Editor;
- Flash the modified BIOS via AtiWinFlash;
- Enjoy big income!
For AMD Radeon RX4xx and RX5xx video cards, the procedure is the same. Reflashing the timings increases hashrate on all algorithms that depend on video memory speed, for example, DaggerHashimoto and CryptoNight.
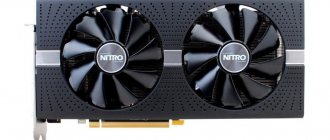
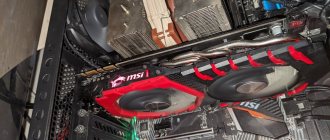
As an example, we took the Radeon RX480 8Gb from MSI of the GamingX line with memory chips made by Samsung and we will measure its performance on the Ether. Without overclocking and without flashing, it turns out to be 24Mh/s.
After overclocking the video memory all the way, the card produces 27Mh/s - 3Mh/s more.
Install the correct driver
Install the latest driver from AMD and enable compute mode. This way you optimize your video cards for mining and get greater stability and high hashrate.
Restart your computer after installing the driver.
Apply the patch
Run atikmdag-patcher.exe to disable the BIOS checksum check in the driver. If this is not done, the driver will not be able to recognize your video card.
Make a backup copy of the original BIOS
Launch GPU-Z and do two things:
- Find out the video memory manufacturer. This information will be useful if your card's BIOS contains settings for different manufacturers.
- Make a copy of the original BIOS: click on the arrow, select “Save to file...” in the drop-down menu and save the file to a convenient place, for example, on your desktop.
Modify the BIOS
Open the Polaris Bios Editor program. In the upper left corner, click on “OPEN BIOS” and select your file that you just saved.
The program allows you to change frequencies, voltages, thermal package and temperature limits of the video card, as well as edit video memory timings.
In the bottom right area, the “Timing Strap” column displays timings for each frequency - long combinations of letters and numbers. Each frequency has its own meaning. You can change them in one of three ways:
- Click on the “ONE CLICK TIMING PATCH” button. The application will automatically select the necessary timings. We recommend this method for beginners.
- Copy the timing from the frequency below and apply it to the frequency above. For example, take the timing from 1500 MHz and set it to 1625 MHz, 1750 MHz, 2000 MHz.
- Find on the Internet a specific value that is most effective for your memory. The most dangerous way. There is a risk that your card will refuse to work with such timings.
Save the modified BIOS into a separate file after changing the timings.
Flash a new bios
Run AtiWinFlash with administrator rights.
- Select the desired video card if you have several.
- Click on "Load Image" to select the new BIOS.
- The “Program” button will flash a new file into the BIOS of your video card.
After flashing, be sure to restart your computer.
You are awesome!
Congratulations! You did it!
Our test RX480 8Gb now produces 29Mh/s without memory overclocking versus 24 at full stock and 27 after overclocking.
Try increasing the memory frequency further to get 30-31Mh/s.
Characteristics and relevance of purchase
At the beginning of 2022, there was a colossal increase in the capitalization and price of cryptocurrencies, this led to a shortage of video cards and most people bought everything that could mine, including 560 series cards. A year later, the cryptocurrency rate fell sharply.
If you are just going to buy video cards for mining, we recommend looking at the more powerful options of the RX 5600/5700XT series. This RX 560 series cards have been used to mine ETH and ZEC coins . The attractive price and the possibility of overclocking become additional advantages. The income from these video cards is minimal.
The technical specifications of the RX 560 can be divided into two versions based on memory capacity 4GB and 2GB . Card parameters may vary slightly depending on the manufacturer: MSI RX 560, ASUS RX 560, Gigabyte RX 560, etc.
For the RX 560, Ether is the most profitable option , and when choosing a card for a farm, choose the version with 4 GB. This is the best option and costs only a little more than the RX 560 2GB.
Specifications :
- core bus frequency – 1175 MHz. (after overclocking – 1275 MHz );
- GPU frequency – 4000 MHz. ;
- RAM type – GDDR5 ;
- power consumption – 60 W.
The graphics processor of the latest generation cards requires very little power to operate. Demand for video cards increased from miners in January-December last year. From the Radeon RX 560, mining Ethereum coins requires 80 W. These figures were mainly achieved thanks to the updated BIOS. It independently controls the consumption of electrical energy. You can edit the BIOS by setting lower voltage parameters for the graphics core and memory, and also change the timings to increase the hashrate. After correct flashing, the card will consume no more than 50 W in mining.
The hashrate value can be increased by 15% by overclocking the GPU and RAM. The manufacturer's warranty is provided for 3 years.
Which model to choose for mining
The video card may differ in performance depending on the device manufacturer. Each algorithm has its own requirements, for example, Ether is efficiently mined if the card has Samsung memory installed. Memory chips from this supplier heat up less and handle overclocking well. Graphics adapters with Hynix memory develop a decent hashrate, but are hotter.
The amount of RAM is necessary for the ever-increasing size of the DAG file, so a card of 2 will be irrelevant for mining on the Ethash algorithm. Big Ethereum is no longer mined even by four gigabytes. If the RX 570 can still reach up to 20 Mh/s on a reduced Dag file, then the hashrate of the 560 is almost zero. But the RX 560 4GB, unlike the two-GB one, works great on other coins of this algorithm.
GPUs with a reduced amount of RAM were used to mine coins that do not require RAM, like Zcash, Hush, but due to the release of new ASICs based on this algorithm, the profitability is negative.
The Saphire Radeon RX 560 Pulse video card in the description contains the words Mining Edition, which means that it is designed for mining and developed by the manufacturer taking into account all the necessary parameters. If you install a modified BIOS or set acceleration parameters in the PhoenixMiner executive file, this card shows the best mining performance. Video cards from ASUS are designed for the gaming community and the manufacturer pays much attention not to power consumption and overclocking capabilities, but to other parameters and backlighting with a fan. You can choose a card from Gigabyte without overpaying for unnecessary solutions. But, only the Saphire Radeon RX 560 Pulse model has additional power, which allows it to sustainably overclock. Cards of this line are very durable and can work without breakdowns for several years.
Chinese manufacturers also released the RX 560, specially adapted for mining, but it is virtually impossible to find such a card in Russia, and the guarantee is dubious. The secondary market is also overflowing with offers of already assembled farms, but you need to choose such cards with a specialist and look at the time worked. The best option is if it is about 6 months from the date of purchase.
What is needed for the firmware?
Video cards from laptops cannot be flashed directly. The situation is the same with integrated graphics chips. They simply do not have their own BIOS, which would be stored in the internal memory of the video adapter (Video ROM). Updates are installed on it through the main BIOS of the computer.
While loading Firmware, you cannot turn off the PC. It is impossible to predict when electrical problems will occur. Therefore, use an uninterruptible power supply if you have one.
Before flashing an NVIDIA video card, find out its specifications and the installed BIOS version. This can be done using the CPU-Z program. Find it online, download and run. You need information from the Graphics Card section.
- Device model (“Name”);
- Its identifier (“Device ID”);
- Type, size and frequency of video memory (“Memory Type”. “Memory Size” and “Memory Clock”);
- Bus Width;
- Video adapter core frequency (“CPU Clock”);
- Current BIOS version (“Version BIOS”);
- ). NVIDIA is not always listed there. She has many partners who create models of this brand - ASUS, Gigabyte, MSI, Palit.
Specifications will be required when choosing Firmware. Current programs can be found on the manufacturer's official website. If they are not there, write the request “Firmware for video card” in any search engine. For example, the “techpowerup” service is suitable. Download software that is created specifically for a specific graphics card model. Focus on its characteristics and the current BIOS version. The Firmware file must be in .rom format. Do not download anything from questionable resources.
The update is only available for video adapters with a single GPU. If there are two of them, the software installation may end badly. Usually the quantity is indicated in the model name.
- Update NVIDIA drivers;
- Prepare a flash drive or memory card (needed to boot via DOS);
- Create a backup copy of the old Firmware. To do this, in the CPU-Z program, click on the arrow-shaped button (it is located next to the BIOS version), select “Save to file” and specify the path to the folder. This way you can always return to the previous version of the software.