When purchasing a video card, most users pay attention only to such characteristics as capacity, bus width and memory type. The purchase, depending on the price category, pleases with high performance and stable operation in the target direction. However, time passes and new games are released that run noticeably slower and at lower graphics settings. After this, users begin to look for ways to increase the performance of the system’s graphical heart and come across information about memory and core frequencies. About, how to properly overclock a video cardwithout damaging it, we will talk further.
Radeon Performance Monitoring
In programs that show FPS in games, we mentioned Radeon performance monitoring. The AMD Radeon Software Adrenalin 2020 Edition update only enhances monitoring capabilities. It is very easy to use and replaces many programs.
Go to Settings > General , and find the Performance . Drag the Show metrics overlay slider to the On . To quickly enable or disable it directly in the game, you can use the keyboard shortcut Ctrl+Shift+O .
More precise settings allow you to disable indicators that you do not need. There is fine adjustment of the position, transparency of the window and its size.
Broadcast Radeon Adrenalin games
You no longer need to install third-party applications to stream. Now you just need to log in to the streaming service by going to Radeon Settings > Settings > Accounts . Additional settings for quality, speed and number of frames are available in the General .
To start broadcasting, in the Broadcasts , select the streaming service and configure additional parameters, click the Start live broadcast .
Record video from Radeon screen
As in the previous version of Radeon Settings, here you can easily record video from your computer screen in Windows 10. But before recording, it is recommended to go to Settings > General and configure the location where the media will be saved and specify the recording options.
Specify the main parameters: recording quality, audio capture and see the main hot keys. By default, recorded video is saved in the location C:\Users\Username\Videos\Radeon ReLive .
Saving overclocking results in MSI Afterburner
In order for the current video card overclocking settings to work every time you start MSI Afterburner, you need to enable the “Apply ovecloking at system startup” option, which is located at the very bottom of the program window.
You also need to go to the settings and on the “Basic” tab, enable autoloading of the MSI Afterburner program.
In addition, it would be a good idea to save the current overclocking settings of the video card as a profile. To do this, click on the “Save” button, double-click on the profile and click “Apply”.
If necessary, graphics card overclocking profiles saved in MSI Afterburner can be activated using key combinations or automatically when launching games. To do this, go to the program settings and go to the “Profiles” tab.
Here you can specify key combinations for each of the 5 profiles, as well as select 2D and 3D profiles. The 2D profile is a profile that will work in normal mode, and the 3D profile is a profile for games and other 3D applications.
Preparing to overclock your video card using MSI Afterburner
To overclock the video card we will use the MSI Afterburner program. This is free software developed by MSI and based on the RivaTuner program. The MSI Afterburner program allows you to overclock any modern video cards from NVIDIA and AMD, starting from NVIDIA GeForce 8X00 and AMD Radeon 3000. You can download this program from the official MSI website or on the Guru3d website.
Installing MSI Afterburner should not pose any difficulties. Just agree to the license agreement and install.
At the stage of selecting components, we do not change anything and continue the installation.
Once the installation of MSI Afterburner is complete, you will be prompted to install RivaTuner Statistics Server. We agree and install.
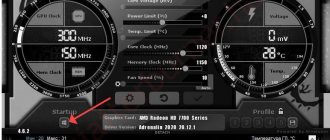
After installing and launching MSI Afterburner, you should see an interface similar to the one in the screenshot below.
If in your case the MSI Afterburner interface is different from the screenshots, then you can change it in the settings. To do this, click on the settings button, go to the “Interface” tab and activate the “Default MSI Afterburner v3 skin” option.
You also need to enable all compatibility properties in the settings. To do this, go to the “Basic” tab and check the boxes as shown in the screenshot below. After this, you can close the MSI Afterburner program settings and proceed directly to overclocking the video card.
We also need the FurMark program to overclock the video card. This is a free video card stress test that can be downloaded from the official website. Installing FurMark is also not difficult, just run the installer, agree and install.
After launching FurMark, you will see a window similar to this.
FurMark has graphics settings and a “GPU Stress test” button that starts testing.
⇡#Test participants
The following video cards took part in performance testing:
- AMD Radeon VII (1800/2000 MHz, 16 GB);
- AMD Radeon RX Vega 64 LC (1677/1890 MHz, 8 GB);
- AMD Radeon RX Vega 64 (1546/1890 MHz, 8 GB) - only in power, temperature and noise tests;
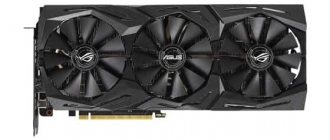
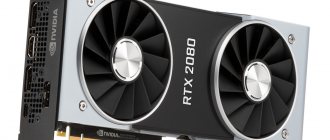
- NVIDIA GeForce RTX 2080 Ti Founders Edition (1350/14000 MHz, 11 GB);
- NVIDIA GeForce GTX 2080 Founders Edition (1515/14000 MHz, 8 GB);
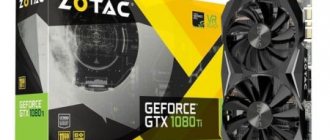
- NVIDIA GeForce GTX 1080 Ti (1480/11000 MHz, 11 GB).
GPU Voltage Tuner
Description: This program allows easy GPU voltage adjustments on GPUs with volte rra-based voltage regulators and it uses the award-winning and criti cally acclaimed RivaTuner for these adjustments.
WARNING! By using this program, you agree that the author is NOT responsible for ANY consequences as a result of using this program. You, the user, are liable for any damages occur. Be a smart overc locker and monitor those temperatures and voltage levels!
Compatibility: Most GT200 GPUs are supported, some G92 GPUs, and all RV770/790 GPUs above 4870, and several custom PCB boards. If you aren't sure, just try it and see if it works
Requirements: — RivaTuner (v2.24 is the minimum version) — A compatible GPU with volterra-based voltage regulators — Latest GPU drivers — A modern Windows-NT based operating system (XP and above). Both x86 and x64 are supported. — Microsoft(R) Visual C++ 2008 Runtime (x86), can be found here: https://www.microsoft.com/downloads/d. d-074b9f2bc1bf - Microsoft(R) .NET Framework v2.0 (minimum), can be found here: https://www.microsoft.com/downloads/d. D-AAB15C5E04F5
Instructions: First, you need to put the full path to RivaTuner in RivaPath.txt (with a trailing backslash []).
I designed this program with automation in mind, so most settings should already be correct. But if they aren't you can correct them. For example, in the GPU Information section, if the selected voltage is not the “3D” performance voltage, please select the correct one. You can change the “Current GPU #” drop-down to anything you want, it's for your information. What you set under “GPU Voltage Tuning” for “Number of GPUs” will affect which GPUs' voltages get set. Again, it should be automatically detected. Voltages available range from 0.8625v to 1.6000v, so be careful what you set!
If all of the voltage VIDs are displayed as “0xff”, then you selected a non-existant GPU under “Current GPU #”.
* Note: Do not have RivaTuner running prior to running GPU Voltage Tuner, it will refuse to work properly. * Also, if you are unsure whether the automatically detected and selected vo ltage is correct, you can check by loading up a full-screen game with GPU-Z or RivaTuner logging the GPU voltage in the background. If it is incorrect, simply select the correct load voltage.
Credits: ——— AgentGOD — coding this program, duh