What is hard drive mining?
How to mine Chia Network coin?
What is the idea and purpose of the coin?
How to register and launch the Chia miner, input, output, trading?
How to choose the right components for Chia Network mining?
What is CHIA? As a company, Chia was founded in 2022 to develop better blockchain and smart transaction platforms. And the Chia Network is designed to improve global financial and payment systems. Chia should be the first enterprise-level money. Chia has been using a new blockchain consensus algorithm since Bitcoin. Algori (Proof of Space and Time).
The official website of the Chia coin is chia.net
Don't let your video card sit idle, find out how to mine cryptocurrency on your home PC. Now let’s look at how to mine on an ssd.
Downloading, installing and setting up the Chia Blockchain miner
Let's figure out how to mine on a hard drive.
Download the Chia Blockchain miner
To download the Chia Networks miner, go to the main page of the chia.net website and download the current miner.
Chia Blockchain Download Link
The Windows operating system must be 64 bit.
Run the installation file.
Allow start_full_node.exe communication on all networks
Allow start_full_node.exe to communicate on all networks.
You will see a welcome window; for ease of use, you can switch the language to Russian in the upper right corner and create a new private key.
We recommend the Binance exchange to all our visitors as the most reliable, liquid and accessible exchange for mining and trading cryptocurrencies.
Build a PC for mining on video cards, expand the incoming flow of money.
Create a new Chia private key
Chia Blockchain login window
By clicking on “CREATE A NEW PRIVATE KEY”, after 20 seconds you will see 24 words, you need to write them down, recording their serial number. They will be used to back up your wallet, as well as log into your Chia Blockchain.
Creating a new Chia wallet
Creating a Chia wallet
After clicking Next, you will need to wait a while until the installation process is completed. If you see another window asking you to allow start_farmer.exe for all networks, do so.
Allow start_farmer.exe communication on all networks
After this, the Chia Blockchain window will load, in which the Chia miner is built-in.
Chia Blockchain
The main program window has the following menu items:
- Full node - in this section we can see the status of the node, hash headers of completed blocks, connections.
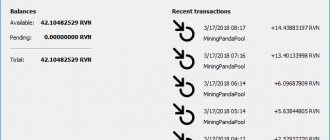
- Wallet - in this section we will see the balance of our wallet in XCH, make a transaction, see our wallet address and transaction history.
- Allotments are allocated space on your hard drive. The plots are used for farming and generate income in chia. Here we add areas for marking where we will mine.
- Farm - an overview of our farm. Here the marked areas from which we receive Chia coins are displayed.
- Trading - coin trading and trading history.
- Keys - here you can see your private key with a public fingerprint.
Chia coin can also be mined on pools. More on this in a separate article. Synchronization to a node is currently about 12 hours from the first launch.
Popular mistakes
- Let's talk about the pitfalls that inexperienced users most often stumble upon.
- Don't forget to set the power supply to maximum performance. If the computer goes into hibernation, the process will have to start again. The same goes for power outages.
- The path to the storage and temporary folder cannot be written in Cyrillic, the program only understands the Latin font.
- Be sure to create a separate directory on the disk, you can’t just write Disk C, the program won’t understand you
- Always run the Chia node as administrator.
If a failure occurs, first try restarting the plotting, and if that doesn’t help, delete the program folder in Windows/Users and then start the process again.
We have listed the simplest mistakes made by novice miners; let’s move on to more complex cases.
RuntimeError: Unknown exception error occurs for various reasons. It can be:
- Russian letters to indicate the path to the directory.
- Placing a folder for temporary files on the same disk with the operating system.
- Incorrect distribution of iron resources.
An error often occurs due to insufficient memory on the plotting disk. Carefully calculate the allowed number of rafts, otherwise you may see the message RuntimeError: bad allocation . On a 1TB SSD, you can create a maximum of 3 sections at a time.
If you did not listen to our recommendations and still checked the “Disable bitfield field” checkbox, then it is quite possible that the error Caught plotting error: Bitfield plotting not supported by CPU . Uncheck this box and everything will be fine.
It is recommended to check finished sections for integrity using PowerShell. Open the program and specify: C:\Users\ “Username” \AppData\Local\chia-blockchain\app-1.1.2\resources\app.asar.unpacked\daemon\
And then rewrite the path, indicating the drive and name of the folder in which the generated rafts are located. If there are no errors, everything is in order, the “broken” area needs to be reseeded, otherwise it will not produce a harvest.
If there is no synchronization, try deleting all available connections in the program interface. They will automatically update and areas synchronized with the network will be highlighted in green. In principle, you can start creating new rafts before the synchronization of your node is completed. To speed it up, try opening port 8444 on your computer and your router.
What are plots (Plot) and how to create them (Plotting)
Choosing a plot size
The plot size can be selected from k=32 to k=35. This is a feature of hdd mining.
| K-size | Temp. Size (size of temporary files) | Final Size (final size of the raft) |
| K=32 | 332 GiB (356.5 GB) | 101.4 GiB (108.9 GB) |
| K=33 | 589 GiB (632.4 GB) | 208.8 GiB (224.2 GB) |
| K=34 | 1177 GiB (1263.8 GB) | 429.8 GiB (461.5 GB) |
| K=35 | 2355 GiB (2528.7 GB) | 884.1 GiB (949.3 GB) |
Table of memory requirements for plotting
When choosing a plot size k=32, you need to have 332 GiB (gigibits) or 356.5 GB (gigabytes) on the temporary directory, we will talk about the sizes below, and the final volume of the raft will be 101.4 GiB or 108.9 GB (gigabytes) on the final catalogue.
You can choose any plot size. Unless, of course, the size of your SSD disk or the so-called temporary directory allows this. The best option is to choose the minimum raft size. At the moment it is size k=32.
What size should the temporary directory be (or ssd disk for seeding plots):
- For a size of 101.4GiB (k=32, tempory space: 239Gib) - the disk size must be at least 340.4 GiB or 365 Gb.
- For a size of 208.8GiB (k=33, tempory space: 521Gib) - the disk size must be at least 730 GiB or 790 Gb.
- For a size of 429.8GiB (k=34, tempory space: 1041Gib) - the disk size must be at least 1471 GiB or 1580 Gb.
- For a size of 884.1GiB (k=35, tempory space: 2157Gib) - the disk size must be at least 3042 GiB or 3267 Gb.
How to convert Gigibits to Gigabytes?
To get the usual gigabytes (GB) from gigibits (GiB), you need to multiply gigibits (GiB) by 1.074.
Selecting the number of plots for parallel sowing
How to choose the right number of plots?
From the table above you can see that 101.4 GiB or 108.9Gb is the size of the final raft that will be placed on the hard drive. 239Gib is the size of the construct files that will be created on your temporary SSD directory. After which they will be archived in 108.9Gb. At the time of creating the raft, you will need to have the sum of these values. Those. temporary file and final. In the table above, in the column “Temp. Size" this amount is indicated for each size. If you chose the plot size k=32, then you need to have 356.5Gb of free disk space to create one raft. Everything should be clear here, if not, ask your questions in the comments.
Next, divide the SSD size by “Temp. Size" of the selected plot size. Which SSD is better to choose will be discussed below. For example, we have a 2 TB NVME SSD, divide 2000/356.5 = 5.61. Due to the fact that the rafts will not be built synchronously, we can indicate the number 6, this is the number of rafts that will be sown in parallel.
To automate seeding, we open additional options and name each queue separately.
Adding a section to the queue
We will start constructing one raft; after seeding the first one, seeding of the next of the six in our case will begin. So we launch six tasks, giving each subsequent task a queue name - Plot1, Plot2, Plot3, Plot4, Plot5, Plot6 with the necessary parameters. Thus, we will have six rafts sown in parallel, then the next six rafts, until your hard drive runs out of space or your turn.
Example : If you have a 1 TB hard drive, you can seed it with 9 sections of 108.9 GB each.
What is better to choose, sow in parallel or add a plot to the queue? It is better to choose a queue, so you can manually allocate resources and set the queue you need for continuous seeding. This is a more flexible and professional option.
Add a temporary directory (SSD or SSD NVME disk)
What is a temporary and final directory?
When adding a new directory, we are asked to select a temporary directory and a final directory. For temporary directories, it is advisable to choose SSD or MVME M.2 drives. Since the speed on these drives is much higher than on HDDs, you can also use HDDs. Areas will be formed on them that will later be transferred to the HDD.
You can choose two SSDs if the first one runs out of space.
The Plotting speed on various drives can be seen in the graph below:
Plotting speed
You can see that on NVMe SSD drives the plotting speed is several times faster.
Select the final directory (HDD disk)
This is your hard drive on which the graph (rafts) will be stored. The larger this disk is, the better. We will talk about choosing hardware or components for Chia mining below.
power unit
Each installed drive in a CIA mining rig consumes energy, so you need to pay attention to its supplier. On average, each conventional storage unit consumes up to 40 W after connecting to CHIA mining, and a solid state storage unit consumes up to 3 W. Even a large farm with 20 elements can be powered by a 600 W unit, but it’s better not to take risks.
Take it with a reserve so that later you can connect another HDD and seed it additionally, increasing your income. You will need SATA or Molex splitters, since conventional power supplies rarely have the ability to connect more than 10 devices.
Launch of Chia mining
After selecting the raft size, temporary and final catalog, click CREATE SITE.
Create a site
After clicking CREATE SITE, the process of creating a site and simultaneously synchronizing the node will begin. Once the node is synchronized and at least one plot has been created, Chia mining will begin. In the FARM tab, you can see the number of farms and the estimated time for the block of your capacities. For finding a block, you receive coins.
Selection of hardware and components for Chia mining
To mine the Chia Network (XCH) coin, it is advisable to have a powerful PC, which we will look at exactly and for what purpose using an example.
Selecting HDD, SSD, M.2 for Chia Network (XCH) mining
When choosing hardware for chia mining, you should start with hard drives and SSDs, because... Because of them, the configuration of the rest of the hardware will be affected if you buy from scratch. If you already have hardware, then read on to understand what drives you can install on it.
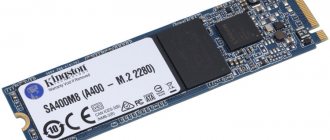
Selecting an SSD for the temporary directory
As you have already seen in the table above, the speed of creating rafts from a regular SSD and NVME M.2 differs several times. For a temporary directory, it is better to choose an NVME M.2 drive of 1TB or higher. The bigger, the better. The optimal size now is 2 TB. The drive must have a PCIe 3.0 or PCIe 4.0 interface (see which interface your motherboard supports, see the motherboard specifications). The write and read speeds between these interfaces differ by half.
The best option for a temporary directory would be an NVME SSD with the following characteristics:
- Form factor : M.2 2280.
- Memory cell type : 3D-NAND TLC. TLC is preferable, otherwise the disk may quickly fail.
- Interface : PCIe 3.0 x4 or PCIe 4.0 x4. Depending on the selected interface, you will need to look at the motherboard, or look at your motherboard, and from there select the drive interface. More on boards later.
- Volume : from 1Tb, optimally 2Tb. There is a big shortage of hard drives right now, so you can take two or four 500 GB drives and combine them into a raid using an adapter.
- Write speed : the higher the better.
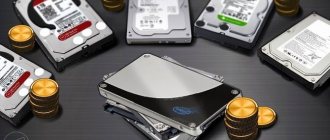
Choosing a HDD for Chia mining
Preferably a server HDD with a capacity of 10 TB or more. If you have many smaller drives, you will need enough adapters and power cables to connect to the motherboard. Pay special attention to the warranty period. In general, there is nothing more to add regarding HDD. And look at the connection connector, if you have a home PC, you need a SATA III connection interface.
Choosing a motherboard for Chia Network (XCH) mining
If your choice fell on M.2 with PCIe 4.0 x4 interface, you need motherboards for Ryzen, this will be the X570 or B550 chipset. These motherboards support PCIe 4.0 x4. See the official website for final specifications for the board.
If you are interested in the PCIe 3.0 x4 interface, cheaper boards based on the B450, B350, X470 chipset will suit you. The main thing is that there is an M.2 connector.
If you already have a computer and it does not have an M.2 connector, you can buy a PCIe adapter to M.2.
Best motherboards for Chia mining:
- Asus Prime X570-Pro motherboard.
- Motherboard Gigabyte X570 Aorus Ultra (sAM4, AMD X570, PCI-Ex16).
These are expensive boards, but they support dual M.2 on a PCIe 4.0 interface.
Choosing a processor for Chia mining
To form one raft, ideally use 2 processor threads. Processors from AMD are best suited for this task. These are six-core Ryzen 5, eight-core Ryzen 7, twelve-core Ryzen 9. The number of cores and threads must be selected based on the size of your temporary directory.
Example: If your temporary raft is 2 TB, you can raft 6 rafts in parallel. For each raft you need to allocate 2 processor threads, and 12 threads are needed. Six-core Ryzen 5 and eight-core Ryzen 7 can handle this task.
Best option:
- Ryzen 5 3600x
- Ryzen 7 2700x
- Ryzen 9 3900x
If you use temporary directories of 4TB or more in size, you already need to look at AMD Threadripper with 24, 32, 64 cores.
Choosing RAM for Chia mining
Just like with the processor, each raft requires 4Gb of RAM. Based on the number of rafts that you want to create in parallel, the amount of RAM is selected.
Example: If your temporary raft is 2 TB, you can raft 6 rafts in parallel. For each raft you need to allocate 4 GB of memory, in total this will be 24GB for creating rafts, 2-4GB for the system. In total, you need to take 32GB of RAM.
Choosing a power supply for Chia mining
The hard drive consumes about 11W of electricity. Motherboard with processor from 100 to 150 watts. A 500W power supply may be enough for you. The only thing worth paying special attention to is the number of SATA ports. It is better to take a modular power supply, to which you can purchase additional SATA port cables. Or use Molex to SATA adapters or SATA splitters.
PC for chia mining
A home computer is suitable if it has 1 hard drive or solid-state drive with a capacity of 512 GB or more. But you should not count on tangible profits from such activities. Although the coin is new, it has already managed to increase its difficulty, and therefore, instead of using your PC, it is better to ask yourself how to assemble a farm for mining CIA. Its effectiveness will be much higher, and therefore can already be considered as an alternative way to earn money. A profitability calculator will help you find out how much your equipment will bring.
Chia coin mining profitability. How to calculate profitability?
To calculate the profitability of the Chia coin, you can use a calculator from the Chia Network company itself.
Chia Calculator
Indicate how many rafts can fit on your hard drives, how to calculate this is written above. And also in the Exchange Rate field, indicate the cost of the Chia coin (XCH).
See the price of the XCH coin at the link - https://coinmarketcap.com/currencies/chia-network/
We calculate the profitability of mining Chia coin
Preface.
The Chia blockchain was launched last month, and it is in the testing stage, Chia coins cannot be bought anywhere, at the moment they can only be mined (farmed).
Here is a news article about Chia Coin.
The Chia Coin blockchain was created by BitTorrent developer Bram Cohen with the goal of eliminating the shortcomings of Bitcoin and even replacing it in the future. For now the Bitcoin network is not decentralized, because most of the power is concentrated around a small group of people, mainly of Chinese nationality.
Presumably, Chia Coin can be mined even on smartphones and tablets with a large amount of built-in NAND storage (built-in storage, or additional SDcard).
The practice of mining Chia Network coins on hard drives (Photo report)
Everything that was described above is a purely theoretical part, so that you have an idea of how to start mining coins on hard drives. Now let's move directly to mining on hard drives, I will tell you about my configuration, how much time it took to create rafts and what computer resources are loaded when creating rafts.
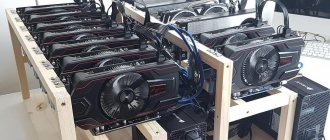
Assembling a farm for mining CHIA
Components for assembling a CHIA coin mining farm
We assemble the farm in an old system unit from the distant 2000s. What components were purchased for the Chia mining rig?
- Processor : Ryzen 7 2700x. The most affordable, powerful octa-core processor on the market. The cooler is included.
- Motherboard : MSI B450 GAMING PLUS MAX. This board is not expensive compared to other models and is well suited for mining on video cards. Read how to set up a motherboard for mining on video cards on our website.
- RAM : HyperX DDR4 32GB (2x16GB) 3200Mhz Predator. There was a good price for this memory model. 32GB is the minimum that should be for our configuration.
- SSD NVME for temporary directory : ADATA XPG Spectrix S40G RGB 3D TLC NAND 2TB M.2 (2280 PCI-E) NVMe x4. What did you manage to buy? Added on 08/19/2021 - the resource of this disk ends approximately when 350-400 k-32 rafts are seeded.
- HDD : 2×12 Tb Seagete.
- SSD : Apacer Panther TLC 120GB 2.5. SSD for Windows 10 operating system.
- Power supply : CHIEFTEC Proton 650W. Inexpensive modular power supply. It will be possible to connect more Sata ports to connect hard drives.
Step 1 : We assemble the farm and install the Windows 10 operating system via a USB flash drive. We connect all hard drives and make sure that they are visible and working normally. This can be done in Disk Management through Administration. Control panel - Administration - Disk Management. If there are problems with this, write in the comments.
Let's start Chia mining. Creating parcels
Step 2 : Disable all updates and install the high performance profile, disabling all sleep modes and turning off the monitor. If there are problems with this, write in the comments.
Step 3 : Go to the Chia Network website and download the latest version of Chia Blockchain. We install and create a private key; read how to do this in the theoretical part.
Step 4 : In Chia Blockchain, go to the Sites tab and click the “Add Site” button. Select the size 101.4GiB (k=32, tempory space: 239Gib). We have a 2TB temporary directory. Therefore, it will be possible to run 6 threads. Read above in the theoretical part of the material to see how this is calculated. In our case, we choose the number of plots 6. Select “Add site to queue”. Click “Hide additional options”:
Select the number of plots
- Maximum RAM usage: 3390 MiB.
- Number of threads: 2
- Number of baskets: 128
- Queue name: arbitrary
You can make 6 threads of 6 queues. There will be 36 threads added to the queue at 101.4GiB. A maximum of 119 sections can fit on a 14 TB hard drive. When 36 plots are planted, you will need to make another queue, or immediately make a queue for 119 plots. And click the “CREATE SITE” button.
Queue of Chia seeding plots
After the node is synchronized and the site is created, CHIA mining will begin. Synchronizing a node lasts about 8 -10 hours at the moment, creating a site in our configuration lasts about 17 hours.
Prospects.
The founders of the Chia Coin cryptocurrency plan to cooperate with most exchanges so that they can trade and withdraw their coin, and they also want to issue shares of the project on the stock markets.
For investor-miners, there is now an opportunity to jump onto the last carriage of the departing train and start mining Chia Coin on their hard drives, as many have already taken up this business on a huge scale, expecting that the cryptocurrency rate will grow rapidly at each stage of the project’s development .
You can buy Chia Coin here.
Farm for mining CHIA COIN
How computer resources are used when seeding a Chia raft
Monitoring resources when sowing Chia
Usage of computer resources when seeding Chia
Mostly the processor, RAM, and hard drive of the temporary directory are used. At different stages of creating a raft, different system resources are used to varying degrees.