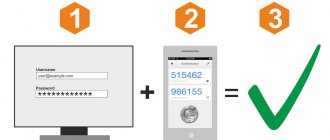
A security token is a physical or digital device that provides two-factor authentication (2FA) for a user to verify their identity during the login process. It is typically used as a form of identification for physical access or as a method of accessing a computer system. A token can be an item or card that displays or contains user security information and can be verified by the system.
Security tokens can be used instead of or in addition to traditional passwords. They are most often used to access computer networks, but can also provide physical access to buildings and act as electronic signatures for documents.
How do security tokens work?
The security token provides authentication to access the system through any device that generates the password. This could be a smart card, USB key, mobile device or RFID card. The device generates a new password each time it is used, so the security token can be used to log into a computer or virtual private network by entering the password generated by the token into the prompt.
Security token technology uses a device that generates a random number, encrypts it, and sends it to a server with information to authenticate the user. The server then sends back an encrypted response that can only be decrypted by the device. The device is reused for each authentication, so the server does not need to store username or password information, making the system less vulnerable to hacking.
What is Security Token Offering (STO)
Security Token Offering (STO) is widely believed to be the next evolutionary step after the Initial Coin Offering (ICO) boom, shaping the industry's direction towards a more regulated and transparent market. However, STO and ICO are two different mechanisms for attracting investment, intended for different situations.
First of all, STOs involve the issuance of digital assets in full compliance with the requirements of securities legislation. This should provide a higher degree of protection for investor rights and reduced regulatory risks for token issuers. In addition, STOs target a different target audience - only professional (accredited) investors can participate in such placements.
This category, according to US law, includes persons who meet at least one of the following requirements:
- Annual income of more than $200,000 for an individual or $300,000 for a married couple, maintained over the past two years and projected in the current year in which the individual plans to invest;
- Net assets in excess of $1 million, which does not include the value of real estate in which the person permanently resides;
- An organization that has assets in excess of $5 million, such as a venture capital or endowment fund;
- A company whose members are all accredited investors.
In addition, there are a lot of technical details that an investor needs to know to properly participate in an STO, and organizers need to know to raise funds. In particular, when conducting an STO in the US, issuers must take into account the Securities Act of 1933, namely several of its provisions: Regulation D, Regulation A+ and Regulation S. These describe various scenarios under which companies can offer securities to investors ( security tokens).
Types of Security Tokens
Several types of security tokens are used to protect various assets and applications. These include the following:
- One-time passwords (OTP) . One form of digital security token is one-time passwords. They are only valid for one login session, meaning they are used once and never again. After initial use, the authentication server is notified that the OTP should not be reused. OTPs are typically generated using a cryptographic algorithm from a shared secret key consisting of two unique and random data elements. One element is the random session ID and the other is the secret key.
- Disabled tokens . This is a form of digital security token that is not physically or logically connected to the computer. The device can generate OTP or other credentials. A desktop application that sends a text message to a smartphone that the user must enter when logging in uses a disabled token.
- Connected tokens . A connected token is a physical object that is directly connected to a computer or sensor. The device reads the connected token and grants or denies access. YubiKey is an example of a connected token.
- Contactless tokens . Contactless tokens form a logical connection to a computer without requiring a physical connection. These tokens connect to the system wirelessly and allow or deny access through that connection. For example, Bluetooth is often used as a method for establishing a connection with a contactless token.
- Single sign-on (SSO) software tokens . SSO software tokens store digital information such as a username or password. They allow people who use multiple computer systems and multiple network services to log into each system without having to remember multiple usernames and passwords.
- Programmable tokens . A programmable security token repeatedly generates a unique code, valid for a specified period of time, often 30 seconds, to grant access to the user. For example, AWS Security Token Service is an application that generates 2FA codes required by information technology administrators to access some Amazon Web Services cloud resources.
Authorization and authentication for everyone, part 2
Translation of the second part of the article “Authorization and Authentication For Everyone”.
In the first part, we looked at the basic terms and also elaborated on the topic of delegated access. Let's continue to figure it out.
Login problem
After OAuth 2.0 provided the ability to access third-party APIs, app creators also wanted their users to be able to log in with other accounts. Let's take an example. Let's say the HireMe123 application wants the MyCalApp user to be able to log into HireMe123 using the MyCalApp account - despite the fact that he does not have an account in HireMe123 itself.
But, as already mentioned, OAuth 2.0 is about delegated access. This is NOT an authentication protocol. However, this has not stopped people from trying to use OAuth 2.0 specifically for authentication purposes, and this has caused problems.
Issues with using access tokens for authentication
If HireMe123 believes that a successful call to the MyCalApp API using an access token means that the user can be considered authenticated by HireMe123, we run into problems. The point is that we have no way to check whether an access token was issued for a given person.
For example:
- Someone could have stolen another user's access token.
- The access token may have been received from another client (not HireMe123) and inserted into HireMe123.
This problem is called confused deputy. HireMe123 does not know where the token came from or who it was issued for. Let's remember: authentication is checking whether the user is who he says he is. Just because HireMe123 can use an access token to access the API does not give him any reason to believe that the user is who he says he is.
As mentioned, this did not stop anyone and people continued to use OAuth 2.0 and access tokens for other purposes (i.e., for authentication). Because of this, it quickly became apparent that there was a need to formalize authentication on top of OAuth 2.0 to allow logins using third-party applications while preventing security breaches.
OpenID Connect
This led us to a specification called OpenID Connect (OIDC).
OIDC is a specification on top of OAuth 2.0 that tells how to authenticate users. OIDC standards are developed by the OpenID Foundation (OIDF).
OIDC is an identity layer for authenticating users using an authorization server.
You remember that the authorization server issues tokens. Tokens are encoded pieces of data to transfer information between different parties (such as an authorization server, application, or API). In the case of OIDC and authentication, the authorization server issues ID tokens.
ID tokens
ID tokens provide information about the authentication event and identify the user. ID tokens are for the client. They have a fixed format that is understandable to the client: the client can extract identifying information from the token and thus authenticate the user.
OIDC declares a fixed format for ID tokens −
JSON Web Token (JWT)
JSON Web Tokens (JWT, sometimes pronounced "jot") are made up of three URL-safe string segments connected by dots.
JWT header
The first segment of the token is the header. It might look something like this:
eyJhbGciOiJSUzI1NiIsInR5cCI6IkpXVCJ9
The token header is a JSON object containing the signature algorithm and token type. It is encrypted using the base64Url algorithm (binary data represented as text).
In decrypted form it looks something like this:
{ "alg": "RS256", "typ": "JWT" }
JWT payload
The second segment of the token is the payload. This segment might look like this:
eyJzdWIiOiIxMjM0NTY3ODkwIiwibmFtZSI6IkpvaG4gRG9lIiwiYWRtaW4iOnRydWUsImlhdCI6MTUxNjIzOTAyMn0
This is a JSON object containing claims—sentences about the user and the authentication event. For example:
{ "sub": "1234567890", "name": "John Doe", "admin": true, "iat": 1516239022 }
This segment is also base64Url-encrypted.
Crypto segment
The last segment is the signature or encryption data. JWTs are signed so that they cannot be modified in transit. When the authorization server issues a token, it signs it with a key.
Upon receiving the ID token, the client verifies the signature (also using the key).
(When using an asymmetric algorithm, different keys are used for signing and verification. In this case, only the authorization server has the ability to sign tokens.)
Don't worry if this all seems confusing. The details of how things work should not bother you or prevent you from effectively using the authorization server with token-based authentication.
Statements
Now that we know the anatomy of a JWT, let's focus on claims - those very sentences from the token payload segment. As their name suggests, ID tokens provide identifying information, which is contained in statements.
Authentication statements
Let's start with suggestions regarding the authentication event. Here are some examples of such statements:
{ "iss": "https://{you}.authz-server.com", "aud": "RxHBtq2HL6biPljKRLNByqehlKhN1nCx", "exp": 1570019636365, "iat": 1570016110289, "nonce": "3yAjXLPq8EPP0S", ... }
Required authentication statements in ID tokens include:
- iss (issuer): the party generating the JWT, i.e., the authorization server;
- aud (audience): list of JWT recipients. For ID tokens, this is the client ID of the application receiving the token;
- exp (expiration time): time in Unix Time format, defining the moment when the token becomes invalid (expiration);
- iat (issued at time): ID token issuance time (also in Unix Time format).
The nonce binds the client's authorization request to the resulting token. This is essentially a cryptographically random string that the client creates and sends along with the authorization request. The authorization server places a nonce in the token, which it sends back to the application. The application checks whether the nonce in the token matches the one sent with the authorization request. This way, the application can verify that the token came from the exact location it was requested from.
Statements of identity
Statements also include suggestions about the end user. Here are some examples of such statements:
{ "sub": "google-oauth2|102582972157289381734", "name": "Kim Maida", "picture": "https://gravatar[...]", "twitter": "https://twitter.com/ KimMaida", "email": " [email protected] ", ... }
Standard profile statements in ID tokens include:
- sub (subject): unique user identifier (required);
- email;
- email_verified;
- birthdate (date of birth).
So we've had a crash course on the important specifications (OAuth 2.0 and OpenID Connect). Now let's see how you can apply this knowledge at work.
Authentication using ID tokens
Let's take a look at how OIDC authentication works.
Note. Please note that this is a simplified diagram. Depending on your system architecture, you will have several other threads.
The entities we are considering are the browser, the application running in the browser, and the authorization server. When a user wants to log in to a system (log in to an application), the application sends an authorization request to the authorization server. User login and password are checked by the authorization server. If everything matches, the server issues an ID token for the application.
The client application then decrypts the ID token (JWT) and validates it. The verification includes verification of the signature, as well as statements:
- issuer (iss): was the token issued by the exact authorization server from which we were waiting for a response?
- audience (aud): Is our application the recipient for whom the token was issued?
- expiration (exp): Has this token expired?
- nonce: Can we bind this token to the authorization request we sent?
Once we have established the authenticity of the ID token, the user is considered authenticated. We also have access to identity statements so we know who our user is.
So the user is authenticated. Time to interact with the API.
API access using access tokens
We already talked a little about access tokens above - when we looked at how delegated access works using OAuth 2.0 and authorization servers. Now let's look at all this in more detail. To do this, let's return to our scenario with HireMe123 and MyCalApp.
Access tokens
Access tokens are used to grant access to resources. Thanks to the access token issued by the MyCalApp authorization server, HireMe123 can access the MyCalApp API.
Unlike ID tokens, which OIDC defines as JSON web tokens, access tokens do not have a clearly defined format. They are not necessarily JWT. However, many access token solutions still use JWTs because this format allows for validation.
Access tokens are not transparent to the client
Access tokens are intended for the resource API and it is important that they are not transparent to the client. Why?
Access tokens may change at any time. They should have a short expiration time so that the user can receive new ones frequently. They may also be re-released to allow access to different APIs or with different rights. There should never be any code in a client application that relies on the contents of an access token. Such code will be too fragile and almost guaranteed to break.
Access to resource API
Let's say we want to use an access token to call the API of a single page application. How does this happen?
Above we discussed the authentication process. Let's assume that the user is logged into our JS application in the browser. This application sends an authorization request to the authorization server, requesting an access token to call the API.
Then, when our application wants to interact with this API, we attach an access token to the request header, like this:
# HTTP request headers Authorization: 'Bearer eyj[…]'
The authorized request is sent to the API, which validates the token using middleware. If everything matches, the API returns data (for example, JSON) to the application running in the browser.
This is all well and good, but we mentioned above that OAuth solves the problem of excessive permissions. How does this happen?
Delegation with scope
How does the API know what level of access to give the application? This is determined by setting scopes.
Scope "restricts what an application can do for the benefit of the user." It does not allow you to grant rights that the user no longer has. For example, if a MyCalApp user is not allowed to create new corporate accounts, the scope ensures that HireMe123 does not allow the user to create new corporate accounts either.
Scopes delegate access control to the API or resource itself. The API is responsible for ensuring that scopes match user rights.
Let's look at this with an example.
I use the HireMe123 app. HireMe123 wants to access the third party MyCalApp API to create a calendar event on my behalf. The HireMe123 application has already requested an access token for MyCalApp from the MyCalApp authorization server. This token contains important information:
- sub: (my user ID in MyCalApp);
- aud: MyCalAppAPI (this token is created to access the MyCalApp API);
- scope: write:events (scope assumes that HireMe123 can use the API to write events to my calendar).
HireMe123 sends a request to the MyCalApp API with an access token in the authorization header. When the MyCalApp API receives this request, it sees that the scope is set to write:events.
But MyCalApp contains calendar accounts for hundreds of thousands of users. Therefore, to ensure that this request from HireMe123 will only concern my rights to create events in my account, the MyCalApp API middleware must check not only the scope, but also the sub - subject ID.
In the context of delegated authorization, scopes define what exactly an application will be able to do on behalf of the user. This is a subset of user rights as a whole.
Consent check
Remember when we said that the authorization server asks the user HireMe123 if he agrees to allow HireMe123 to use user rights to access MyCalApp?
This dialogue looks something like this:
HireMe123 may ask for a variety of rights, for example:
- write:events (event recording)
- read:events (read events)
- read:settings (read settings)
- write:settings (write settings)
- etc.
In general, you should avoid granting permissions for purely user actions. Scopes are for rights delegated to applications. But if your authorization server has functionality for role-based access control (RBAC), you can set different scopes for different users.
Using RBAC, you can set different rights for different user groups on the authorization server. After this, the authorization server will be able to include user roles in scopes when issuing access tokens.
Results
We have covered a lot of material, but this is not even close to everything that could be considered. However, I hope you find this short course on identity, authorization, and authentication helpful.
Security Token Benefits
While it is true that passwords and user IDs are still the most widely used form of authentication, security tokens are a more secure option for protecting networks and digital systems. The problem with passwords and user IDs is that they are not always secure. Attackers continue to improve methods and tools for cracking passwords, making passwords vulnerable. Password data can also be accessed or stolen in a data breach. Additionally, passwords are often easy to guess, usually because they are based on easily discoverable personal information.
Security tokens, on the other hand, use a physical or digital identifier that is unique to the user. Most forms are relatively easy to use and convenient.
Changing the PIN code on a token
To ensure information security, each token has a password - a PIN code.
By default, the token has a standard PIN code:
- The default user PIN is 12345678;
- The default administrator PIN is 87654321. The administrator PIN gives the right to use additional functions: unlocking the user PIN, setting PIN parameters, etc.
It is recommended to change the standard PIN code to a unique one. To do this, follow these steps:
- Connect the token to your computer and open the Rutoken Control Panel. In the window that appears, click the Enter PIN code... button.
- Next, enter the default token PIN for the user or administrator.
- After this, the Change... button will become available in the PIN Code Management block. Click on it.
- In the window that appears, enter a new PIN code. displays the strength of the PIN code. Confirm the new PIN and click OK.
Security token vulnerabilities
While security tokens offer many benefits to users and organizations, they can also have disadvantages. The main disadvantage of physical security tokens is that they are susceptible to loss or theft. For example, a security token may be lost while traveling or stolen by an unauthorized party. If a security token is lost or stolen, it must be deactivated and replaced. In the meantime, an unauthorized user holding the token could gain access to sensitive information and systems.
Sergey Vorobyov
Internet entrepreneur, SEO and SMM specialist, E-commerce, webmaster, blogger.
Understanding interchangeability
To avoid potential security dilemmas, IT security professionals need to understand what an NFT is. The concept of non-fungible tokens is not entirely simple. Most articles on NFTs tend to be mostly scientific hype rather than a simple, holistic definition of NFTs.
First, let's understand the concept of "fungibility." As defined by Investopedia, “fungibility is the ability of a good or asset to be easily exchanged for a similar one.” Let's take physical currency as an example. One dollar bill can be easily exchanged for another without any consequences for the owners. Although the banknotes have different serial numbers, they are functionally the same and can be exchanged if desired. Non-fungible assets - even if they are similar or nearly identical - are not fungible. Imagine two cars, a wreck after an accident and a new one, just rolled off the factory assembly line. The cars seem to be similar, but not the same; in this case, the exchange will affect both sides and will be completely unequal.
In the digital payments industry, Bitcoin is fungible. Although they have unique tokens, one Bitcoin is functionally identical to the other. Meanwhile, NTFs are unique digital assets. People cannot duplicate them or directly exchange them with other assets of equal value.
About passwords
They have become modern classics. The main advantage of passwords, which makes them so common, is their ease of use. But our forgetfulness, transmission using unsecured channels, their typing on the keyboard, predictability and many other aspects call into question our security. The problem of encryption is also acute. Let's look at a 256-bit cryptographic key. If you use a pseudorandom number generator, the resulting password will have good statistical properties. What are the combinations that people choose to protect their data? In many cases, passwords are words from the dictionary or something important to them (their name, date of birth, etc.).
You just need to read the news about the latest hack of a large website or company’s database and see what combinations people choose. Very often there are numbers in a row, starting with one, or a combination of name and year of birth. This is definitely very bad. It is for such cases that the use of tokens is provided. After all, they will be able to protect data at the highest level using the recommended parameters, when it will be difficult for attackers to simply guess a password. After all, the token code will be compiled according to all the rules of cryptographic protocols. As an example, consider authentication. Due to the fact that the “any one of a thousand” principle will be implemented, even if the attacker intercepts traffic or the database disappears from the server, the criminal’s chance of success is so unlikely that it can be called non-existent. Besides, you can forget the password, but the key cannot. After all, it will be stored on the token.
JWT structure
As shown on the official website (with a convenient sandbox), JWT consists of three parts, separated by a dot:
- header (red)
- payload (purple)
- signature (blue)
JWT Structure
The header and payload are essentially transmitted in clear text, although they look like strange characters. This is base64 format, if you insert the characters into any online decoder, you will get the source.
Here is the third part - the hash, or signature, is precisely the feature that guarantees the authenticity of the token. You cannot get the “source” from it, only the other way around: you can get the signature from the source. What the application does is this is how the authenticity of the token is verified.
The components of the payload are called claims. They can be registered (consisting of 3 letters, for example iat - “issued at”), public and private.
The big picture
- The client enters his login and password.
- The server checks them, and if they are correct, sends a JWT token in the response.
- Next, the client sends a JWT token with each subsequent request to the server in the Authorization header
- The server checks the JWT token for authenticity.
- And sends a response.
The big picture
Managing NFT Market Opportunities
The NFT market is already starting to cool down. Average prices over three weeks fell by more than 50%, as did sales volumes. However, it is unlikely that a dysfunctional structure will completely collapse. Despite the media attention, the NFT market has been growing steadily over the past year. It will likely remain a source of long-term value through extensive asset retention.
The rapid rise and fall of NFTs, coupled with their robust value proposition, means businesses shouldn't ignore this security risk. Naturally, you should be aware of other threats.
To reliably protect assets, the company will have to fight back not only tokens.
Learn more
Learn Identity video series in Auth0 Docs is the lecture portion of Auth0's new engineering recruiting training course, presented by Chief Architect Vittorio Bertocci. If you'd like to see how Auth0 does it for yourself, it's completely free and available to everyone.
The OAuth 2.0 and OpenID Connect specifications are complex, but once you become familiar with the terminology and have a basic understanding of identity, they are useful, informative, and much more readable. You can read them here: The OAuth 2.0 Authorization Framework and OpenID Connect Specifications..
JWT.io is a resource about JSON Web Token that provides a debugger tool and a directory of JWT signing/verification libraries for various technologies.
OpenID Connect Playground is a debugger that allows developers to explore and test OIDC calls and responses step-by-step.
Resources and what next?
We've covered a lot of material, and we haven't even come close to covering everything there is in the field of authentication and authorization. I hope this was a useful article on identification, authorization and authentication.
I'm currently working on a few additional blog posts that go into more detail about JSON web tokens and authentication and authorization for JavaScript applications.
If you want to learn more, much more, on these topics, here are some helpful resources for you:
Is it possible to find out someone else's access code?
So, you are interested in how to find out the token of another person, for example, a friend on VK. We already wrote at the beginning that this is impossible. At least in a legal or official way. This information is considered private and is reliably protected by the social network’s security system.
If you know how to hack, go ahead! But you must understand that you are committing an offense. With all the consequences. On the Internet you can find a lot of ways to find out another person’s VK token, both working and not. We are against illegal actions, and therefore we will not recommend anything here. We mentioned this only for the sake of completeness.
Other features
In addition to the options already discussed, this device can perform other tasks assigned to it. Among them:
- Encryption/decryption of data using a/symmetric algorithm.
- Generation and verification of digital signature.
- Data hashing.
- Generation of encryption keys.
To complete the image of a token, it can be represented as a “black box”. So, during cryptographic operations, data is received as input, converted in the device itself (a key is used for this) and transmitted to the output. Tokens have quite a lot in common with microcomputers. Thus, information is supplied and output using a USB port, the device has its own RAM and long-term (and also protected) memory, as well as its own processor.
Access to resource APIs
Let's say we want to use an access token to call an API from a single page application. What does it look like?
We covered authentication above, so let's assume the user is logged into our JS application in the browser. The application sends an authorization request to the authorization server, requesting an access token to call the API.
Then, when our application wants to interact with the API, we attach an access token to the request header, like this:
# HTTP request header Authorization: 'Bearer eyj[…]'
The authorized request is then sent to the API, which validates the token using middleware. If everything checks out, the API returns data (for example, JSON) to the application running in the browser.
This is great, but there is something that could happen to you right now. We previously stated that OAuth solves problems with unnecessary access. How is this solved here?