One of the important elements necessary to ensure stable operation of mining farms is the use of a reliable, fast and easy-to-manage operating system.
Hive OS , a Linux operating system based on the Ubuntu distribution, optimized for cryptocurrency mining, is well-deservedly popular among miners Linux miner hive OS is both a set of programs and a service for monitoring your rigs. This review describes what Hive OS is, how to install, configure and use it for mining.
The long-awaited release of Hive OS 2.0 has been released, which means it’s time to take a closer look at the new, user-friendly system interface. Everything has changed, not just visually, but the functional part has also undergone major changes. Many useful features have been added to simplify the work of ordinary users with the system.
- Hive OS official website: https://hiveos.farm
- Promotional code for crediting 10 USD to your Hive OS balance: MINING-CRYPTO (specify during registration)
How to burn Hive OS 2.0 for mining to a flash drive?
You can download the system image on the developers’ website at https://hiveos.farm/, where you need to follow the Install and select the desired distribution.
There are currently two current versions of this system:
- Bleeding Edge is the latest version, which may contain bugs;
- Stable - stable and reliable version.
You can download both distributions from the official website directly as an archive or via torrent. To record the distribution, you need to use a USB flash drive with a capacity of at least 8 gigabytes or an SSD disk.
The second option is preferable, the flash drive wears out quite quickly after hive os, and the removable disk works faster. You must extract and burn the hive os to a storage device.
Installing hive OS on a hard drive is possible, but the system can work perfectly straight from a flash drive or SSD drive, provided the device has a sufficient speed.
When creating an image in Windows OS, you will need the Etcher , which can be downloaded from etcher.io. It is a very user-friendly open source program that comes in versions for Windows 32/64, macOS and Linux. It provides guaranteed recording quality and no failures due to read errors in subsequent work. Instead, you can use HDD Raw Copy Tool, Win32 Disk Imager, Rufus or similar utilities.
In the Etcher image burning utility, select the system image unzipped after downloading, check the recording path and click the Flash . It is necessary to understand that all information located on the USB-fash will be destroyed .
Burning the image will take 10-15 minutes, the process of preparing the flash drive can be monitored in the program window:
After preparing the media, Etcher will check the integrity of the recording:
At the end of the check, the application will display a success message:
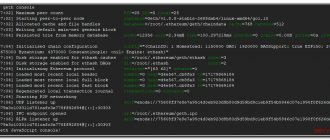
This flash drive can now be inserted into a free port of the assembled rig and run it . First, in the BIOS of the motherboard of this computer, you need to set the option to start from a USB flash drive. After turning on the rig, the system will automatically configure the equipment and prompt you to enter a user ID with a password.
To obtain this data, you need to register on the hiveos.farm website (get an account) and create a worker.
Debunking myths about Chrome OS
Many people think that they know everything about the Chrome OS system without ever using it: “Well, I know Chrome, but here in the OS there is only a browser, everything is clear.” But in fact, even the words “browser only” already contain an error.
In 2019, I bought a Google Pixelbook (not as my main device, but as a mobile addition to my desktop). Then I traveled with it all over Russia, having put it to good use, and since then I have looked at many stereotypes about Chrome OS as outdated myths. And when the day before yesterday the news “Google is creating its own Arm processor for Chromebooks” appeared, I again saw the same set of stereotypes in its online discussions. Therefore, I decided that since I know more, I need to share it with Habr.
Myth 1: Nobody needs Chromebooks
Before diving into the technical features, let’s figure out whether there’s anything to discuss here at all. I regularly see comments that Chrome OS has failed and Google is supporting a dead project, so there’s nothing to talk about.
Shtosh, let's look at the hard numbers of statistics. According to IDC, Chromebooks outsold MacBooks in 2020:
In general, while we on Habré are arguing about “Linux or macOS,” another OS may leave both of these systems combined behind. (Technically, Chrome OS is also Linux, but in a everyday context I think it makes sense to separate them. As the English saying goes, “knowledge” is understanding that a tomato is a fruit, and “wisdom” is not putting it in a fruit salad.” )
Of course, there are important nuances here. For example, this: a significant portion of Chromebook sales comes from Western schools. Because such laptops are easy to administer, they are quite secure, and the hardware-undemanding OS saves school budgets. So from the point of view of “what the user chooses for his money,” MacBooks can stay ahead.
But in any case, it is a mistake to call the system a “failed”; it has not only gained significant popularity, but is also growing further. Time works on her side, because over the years there are more and more popular cloud services - Figma, Miro, Photopea and so on.
But cloud IDEs have not become mainstream (yet?), so on Habré a “browser OS” may seem like a whim. And here we move on to the next question: is it really “browser only”?
Myth 2: Chrome OS is “just a browser”
Now the main thing: the idea that this entire OS is limited to one Chrome.
This is not true for three reasons.
The first reason is you: there is already a “living wage” of the user OS out of the box.
A file manager, an analogue of Notepad, a media player, a photo viewer, and the Camera application are included.
That is, you can, for example, copy a movie from a flash drive to a disk using a file manager, and then watch it on a plane using a video player. What kind of “one-browser system” is this if neither a browser nor the Internet is needed for this use? True, if you want to watch a movie with subtitles, then the standard video player will no longer help with this; its capabilities are quite basic.
Here is a real case from my practice. He was the host of the Mobius online conference (for mobile developers, I note that we will hold it again in November). And it was necessary to show the audience some things on the conference site on air. The question arose: can I, sitting in the studio with a Chromebook, duplicate an image from it via a wire to our control room, so that I can see the site on my laptop, and it will be shown to the audience in the frame? It turned out that it’s quite possible: support for “external screens” here is similar to that in other operating systems; it’s easy to create at least several desktops, even mirroring one. That is, there is enough system stuff here, which is usually not included in the browser’s powers.
The second reason: Chrome OS has support for Android applications.
In general, there are questions about this functionality; they will be discussed below. But technically, this is what happens: you can run thousands of non-browser applications. Be it a Chinese tutorial, a photo editor, or a game. My Pixelbook can transform into a tablet, which is good for reading comics and playing games like Angry Birds:
And if the standard video player lacks some advanced features like support for subtitles, you can go to Google Play, install the Android version of VLC and open your video file with subtitles in it. So you are not limited by the capabilities of pre-installed software.
The third reason: many Chromebooks support Linux applications.
There are also difficulties here, which I will write about below. But the fact remains: it is possible to use a huge number of regular desktop applications on Chrome OS.
Returning to the video playback example, you can install not only the Android version of VLC, but also the Linux version. And that’s not even the biggest thing: it’s even possible to run a full-fledged IDE on Chrome OS. I don’t guarantee that everything will work perfectly in it, but the fact itself is indicative - if it’s possible to deal with a project of such complexity, then even more so with some Visual Studio Code.
Specifically, Android Studio (Google's IDE for Android applications) not only runs on Chrome OS, but even officially supports this OS. Now let’s remember that you can install Android applications on Chrome OS, while they are just about to add this to Windows. And what happens: here you can code an Android application on a laptop and immediately install it on the laptop itself, while this cannot be done in other OSes. And the system, which is usually looked upon condescendingly, suddenly turns out to be more powerful than others in this matter.
Well, there is a terminal here. The basic console commands familiar to Linux work. Familiar console applications too - you can use at least Git, at least vim, at least some ImageMagick. And the Linux “everything is a file” approach is followed: if you are actively sitting in the console, then you work with everything there as if it were files. Very different from the browser approach, where you don’t think about files at all.
Flying in the ointment
The words about “just a browser” have long ceased to be true, but does this mean that we should abandon the usual OS and make Chrome OS our main system? Unfortunately, it is not for everyone; it will suit only some people. Because the question is not only whether it is possible to do something in a certain OS - it is also important whether it will be convenient. And here many difficulties arise that can spoil the blood.
Here, three completely different approaches coexist in one system - the web (where everything is a website), Linux (where everything is a file) and Android (where everything is an application). And the interaction of these approaches is not at all seamless: sometimes even the clipboard between the browser and the Android application does not want to work normally. You feel that the world has cracked into three plates, a fissure is smoking, and you have to jump back and forth across this fissure.
And you also feel that the web component is primary, while others were added later and are inferior in convenience. If there are three ways to do the same thing - in a browser, an Android application and a Linux application - then the first one is the best choice, but the others are more difficult. For example, many Android applications are not designed for a laptop screen and look strange on it (and sometimes my laptop gets very hot). And Linux applications are launched using containerization, which imposes its own limitations: in the same Android Studio, a smartphone emulator was unavailable for a long time (I don’t know how it is now). And they are not so integrated into the Linux/Android system. In general, there are many factors that degrade UX.
Also, when you go outside the browser, be mentally prepared for any sudden setback. Here's an example: in Linux applications, I can't switch the keyboard layout using a hotkey. But you can alt-tap into the browser window, switch the layout, alt-tap back to the Linux window again and write what you want. That is, you can live, but it’s an annoying little thing. Back in 2019, I found the corresponding issue in the bug tracker and put a star (there are already more than a hundred of them). And now, all these two years, I’ve been watching how this issue has been postponed (about the only thing that happens in this issue is that the expected decision date is changed to a later date).
In general, if you actively use Chrome OS outside the browser, a lot of things will inevitably come up: some are minor inconveniences, and some tasks will turn out to be completely impossible. And whether you want to deal with this is up to you. A week ago I complained that Linux is often unfriendly to the user, but Linux has many supporters - so Chrome OS, I think, also suits a certain category of people.
Myth 3: A Chromebook without the Internet becomes a brick
Essentially, a continuation of the previous myth: if the OS offers to do everything on the Internet, what to do when there is no Internet? What's the point of buying a laptop that is bricked without Wi-Fi?
And here I have two answers: one “technical”, and the other “in life”.
Technical answer
Since Linux/Android applications do not stop running offline, it is technically possible to do almost everything that can be done in other operating systems without the Internet. Either consume content or create it.
Another question is whether it will be convenient to do your favorite offline activities there. The answer depends on what they are. Watching movies is rather convenient. Editing films is rather inconvenient.
Answer in life
How do I personally feel in practice with a Chromebook when I find myself outside of Wi-Fi? Do I feel the pain of “why did I choose Chrome OS”? No.
Well, for starters, I usually just distribute the Internet from my phone and move on with my life (it’s especially convenient to distribute from a Google Pixel smartphone to a Pixelbook, they have a synergy similar to that of iPhones and Macs). Therefore, I simply rarely find myself completely without the Internet.
Even when I find myself (for example, on a train), it is not the capabilities of the Chromebook that are more limiting, but my own lifestyle. I can’t watch a movie on the train, not because of technical impossibility, but because I stopped downloading them for offline viewing a long time ago: I’m too lazy to bother for the sake of one suitable occasion a year. And I would hardly load it onto another laptop either.
And the main thing for me personally is this. If I find myself without the Internet with any laptop, then I’m immediately cut off from work video calls, from Google, from instant messengers, from JIRA, from streaming, from Habr, from a million other things. Therefore, I can neither fully work with him nor properly rest. And if I happen to be offline on a train, then no matter what laptop I have with me, it’s usually easier for me to read a book from a Kindle or listen to cached music from my phone.
That is, to everyone who says “a Chromebook without the Internet turns into a brick,” I have this question: does another laptop not turn into a brick at all? What do you all do that you don’t need the Internet for days on end?
I mainly use a laptop for simple tasks suitable for a browser. I think on another laptop I would also do them in the browser. And I don’t know how another OS would have helped me in the absence of the Internet.
Myth 4: Chromebooks are cheap, low-power devices
It is often considered that all Chromebooks have very weak specifications. So no matter how you support Linux applications, the system is still not suitable for serious tasks.
This myth is not entirely groundless. Indeed, since Chromebooks are often purchased as a simple surfing device, many of them are simple and cheap. But considering all Chromebooks to be like this is already a misconception, because there are also noticeably more advanced ones.
Let's say my Pixelbook has 16 gigabytes of RAM and a 512 gigabyte SSD. And in general, it is “premium”: thin, light, with a high screen resolution, and high-quality assembly. Feels like a MacBook Air, but costs less.
The only thing is that the processor is weak: such a thin laptop was made without a cooler at all (as in the same Air) and therefore with a low-power Intel CPU. Well, Google is now working on its own Arm processors - if it turns out something like M1, it will be great.
And not everyone knows, but in addition to Chromebooks, there are also “Chromeboxes” - nettops on Chrome OS. Since there are fewer problems with cooling than with laptops, among them, if desired, you can also find a model with a Core i7.
If you need 64 gigabytes of RAM, Chrome OS is probably not enough for you. But reducing the entire system to “budget junk for schoolchildren” is also wrong.
conclusions
Myths have been destroyed, but what now? What constructive conclusion can you draw for yourself? How do you know if Chrome OS is right for your needs and should you consider it when buying a laptop?
There is experience from IT specialists who have tried to use the system as the main one. For example, Android developer Juhani Lehtimäki is such an innovation enthusiast that he tried to do this back in 2019 and described the results. They turned out to be like this: “Right now the system is still not ready for such use, but it is actively developing and should be ready later. I’m moving to Linux for now, but I’ll be back.”
Also, the system seems to be suitable in cases where work requires not an IDE, but simply a code editor and/or console. But here it’s better not to rely on my words and google what exactly the specialists in your profile wrote, probably some of them have already tried it.
And for myself I realized this. At this point I would absolutely not want Chrome OS on my main work computer. But for an assistive mobile device, the system suits me much better. Then you can mainly use the browser, but at the same time know that if you suddenly need to open a file of an atypical format, this can be done using applications. And in such a scenario, when the Linux part is there as a “back-up plan”, but you do not encounter it all the time, the problems associated with it are not annoying.
Finally, a minute of advertising. In the text I already mentioned our Mobius , and in addition to it, this fall we will hold a whole series of IT conferences for a variety of specialists: from Java developers to testers. So I advise you to pay attention: there will almost certainly be a conference with reports that are interesting to you.
How to register on the hiveos.farm website, create an account and wallet?
To use OS Hive, you must go through the registration procedure and create an account protected by a password and, preferably, two-factor authentication .
Promotional code for crediting 10 USD to your Hive OS balance:
MINING-CRYPTO (use during registration)
To do this, follow the Sign In to https://hiveos.farm/:
To register Hive, you must enter name information, desired login, email address, select the desired time zone and create an account password.
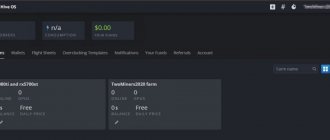
After registration, a window will appear that displays the login, the status of the farms and the current balance in the user’s account ( in this case one farm ):
To ensure protection against hacking, it is advisable to install two-factor authentication through the “account” menu, where you need to move the corresponding slider to the right :
To create a worker ( rig ID ), click on the farm field in the main window of your account, after which a window will appear that allows you to:
- create workers - IDs and passwords for each rig;
- track work statistics;
- create wallets containing information about the addresses where the cryptocurrency mined during mining will be transferred;
- create flight sheets that contain a mining configuration that can be used on any rig;
- create overclocking profiles for different algorithms and rigs;
- in the activity tab track actions with your account;
- in the access tab, track authentication actions in the account of other users ;
- use billing to process payments for your account (necessary when managing more than three rigs);
- configure your personal account.
If you forgot your hive os password , no problem, enter your email address and they will provide you with a recovery token and a link to change your password.
A more serious problem will be the loss of the two-factor authentication code; be sure to save the 2FA connection code on paper or electronic media.
To create a worker in the farm window, click the plus in the white square:
Select adding a worker from the drop-down list:
In the pop-up window, configure the new worker in accordance with the rig to which it will belong:
After this, a window will appear in your account with the rig ID , password FARM_HASH data :
The rig ID and password for it need to be rewritten; they will be needed to activate it during the first boot.
To further work with the rig, it is necessary to create wallets that will save information about the addresses to which coins will be transferred during mining. To create them, click on the name of the farm ( at the top left of your personal page https://the.hiveos.farm/farms ) and select the wallets menu. On the page that opens, activate the add wallet button:
In the window that appears, select the name of the coin from the drop-down list, enter the corresponding address of your wallet and give it a name (in this case - Monero ).
All created wallets can be monitored and, if necessary, edited in the wallet menu of each farm.
To configure mining for a specific pool, use the flight list menu (they act as BAT files in Windows), in which you select from the drop-down lists:
- mining algorithm (coin):
- the desired wallet (address where funds from mining will be transferred);
- a pool and the servers closest geographically (ping) are selected;
- miner program;
- the name of the selected configuration (flight sheet) is specified.
After setting up the configuration, click the create flight sheet button in the lower right part of the rig settings window.
How to choose the right miner in Hive OS?
Choosing the right miner involves using an application that will be compatible with the installed equipment and will provide the most efficient and reliable mining.
Hive OS has many built-in miner programs, which are selected separately for each flight leaf of the farm by selecting them from the drop-down list:
To start mining two currencies in Hive OS in the flight sheet with the corresponding wallets, you must use Claymore Dual Ethereum Miner :
If you want to simultaneously use mining on a video card and on a processor, you need to click on the add miner button at the bottom right of a specific flight sheet:
In the fields that open, set the configuration for the coin that will be mined on the processor: pool, wallet, miner.
In the miner configuration menu, you can set fine overclocking settings, similar to the commands that are used in the BAT file for overclocking. Miner Configuration button in the corresponding flight sheet and add the necessary commands to the miner configuration override field:
To save the settings, click the button to apply the changes made. After creating the sheet, you can check that all settings are correct:
If desired, you can change the configuration of flight sheets by clicking on the ellipsis button on the right side of their window and selecting the Edit :
When you click on the miner configuration line, a window appears in which you can edit the existing template and edit commands for fine-tuning the miner in its configuration field.
An example of entering overclocking parameters for mining Monero as a second coin on the processor:
After making changes, you need to save your changes using the update button:
To mine Metaverse in Hive OS , create a new flight sheet and select an ETP :
Then configure the wallet in the standard way ( enter the address and assign a name ), select a mining pool and a miner program. If you want to carry out dual mining, select a second coin and configure the configuration of its wallet and pool. If solo mining is carried out, then in the menu of the second coin select Don't use dual :
After this, you need to remember to press the button to create a flight sheet.
To mine Lyra2z on Hive OS, select the appropriate coin, for example, ZCoin ( XZC ) and create the corresponding flight sheet:
When reconfiguring to another algorithm, production must be stopped. There is nothing easier than stopping a rig in Hive OS, click on the pickaxe icon on the dashboard and select the “stop miner” option.
Done, you can start reconfiguring. To start/stop from the command line window, use the value: miner start/stop, if you need to reboot or stop the system, use
- reboot - reboot;
- sreboot - force a reboot;
- sreboot shutdown - stop.
How to choose software?
When choosing software, first of all, focus on your own needs and equipment - the platform must be compatible with your current devices. However, a more effective choice would be a universal platform compatible with both rigs and ASICs. This way, if your farm consists of two types of devices, you don't have to purchase two separate systems.
Universal software will be suitable for your entire farm (don't forget to make sure that your video card or ASIC models are in the list of supported hardware). Apart from this, consider the features of the software and its cost.
Each platform mentioned in this article has its pros and cons, but Hive OS seems to be the most versatile and user-friendly option. The system is suitable for both rigs and ASICs, and allows you to combine AMD and NVIDIA cards in one rig. In addition, it has many useful functions, and their list is regularly updated.
How to activate the rig and synchronize the start of mining?
The rig starts automatically after loading it from a flash drive. After automatic configuration of the system, a window will appear inviting you to add a rig (worker) profile to your account, set his name and password, get his ID and enter them into the computer you are setting up ( this data can be obtained immediately after creating an account ).
The system will prompt you to press enter to use the default api.hiveos.farm
You must press enter, then enter ID and password . After this, activation of the system for mining is completed and you can work with the rig remotely from your personal account window .
Overclocking AMD and NVIDIA video cards, main mistakes
To overclock video cards in Hive OS, use the overclocking profile menu on the farm page (https://the.hiveos.farm/):
By clicking on the add OS profile button, many different profiles can be created to suit each coin.
To make it easier to find the profile that is most suitable for the mining algorithm for a particular coin, you can give it an appropriate name:
You can enter overclocking parameters by clicking on the pencil icon in the line of the selected profile. A window appears in which you can change core and memory frequencies , set the fan speed , and set a consumption limit:
For AMD , a template is used that is more suitable for these types of cards:
Overclocking parameters are set in the same way as in Windows, but when setting the memory frequency of Nvidia cards, you need to set values twice as high as in Windows. When overclocking AMD cards, power consumption limits can be changed by selecting core state values.
- For AMD video cards, you can also set the memory status index (1 – maximum savings, 2 – maximum efficiency).
- The main mistakes when overclocking a rig are setting the overclock too high or the core voltage too low (for AMD video cards). It must be taken into account that mining with different algorithms requires the use of individual overclocking settings, each of which can be set in its own overclocking settings configuration.
If you decide to mine with hive os amd cards, sometimes problems arise during startup and during the mining process. Most often they are associated with custom BIOS firmware of GPUs, undervolting and the presence of video cards of different models in the same assembly.
Sometimes, hive os errors during the mining process occur due to incorrect operation of farm components (motherboard, risers).
But in general, according to developer statistics, the number of reds and greens using the latest hive os update is approximately the same.
Advanced commands
Status/Diagnostics
agent-screen log - show logs of different parts (you can use log1 and log2) of the Hive agent
hello - “say hello” to the server: to update IP addresses, settings, etc. (usually performed at startup)
net-test - test and determine network connection
timedatectl - show time and date of synchronization settings
top -b -n 1 — show a list of all processes
wd status — show status and watchdog hashrate log
AMD
amd-info - show information on AMD cards
amdcovc - show power data for AMD cards
amdmeminfo - show memory data for AMD cards
wolfamdctrl -i 0 —show-voltage — show the voltage table for AMD video cards #0
Nvidia
journalctl -p err | grep NVRM - show latest Nvidia video card errors
nvidia-info - show extended data for Nvidia cards
nvidia-driver-update - update Nvidia drivers
nvidia-driver-update 430 - download and install the latest driver from the 430 series.*
nvidia-driver-update --nvs - reinstall nvidia-settings only
nvidia-smi - show data on Nvidia cards
nvtool --clocks - show core/memory clocks for all Nvidia video cards
Equipment
gpu-fans-find - Rotate GPU fans from first to last card to make it easier to find the GPU you need. You can specify the card number, then the fans will start on it. If the worker starts correctly, it is quite easy to track which card corresponds to which bus. For example, if the GPU0 card has bus 01:00.0 and you need to find it, use the gpu-fans-find 0 command. This command will spin up the fans on only that card for a while. And so on, following the example.
sensors - show voltage/temperature readings of the motherboard and card
sreboot wakealarm 120 - turn off the power supply and start after 120 seconds
/hive/opt/opendev/watchdog-opendev power - emulates pressing the power button using OpenDev watchdog
/hive/opt/opendev/watchdog-opendev reset - emulation of pressing the restart button using OpenDev watchdog
Upgrade / Installation
disk-expand -s - expand a Linux partition to fill the remaining disk space
hpkg list miners - list of all installed miners
hpkg remove miners - remove all miners
nvidia-driver-update --remove - remove all downloaded Nvidia driver packages except the currently installed one
selfupgrade —force — forced upgrade; this will help in a situation where selfupgrade reports that the Hive version is up to date, but in fact it is not
How to control the rig, the main nuances after setup?
After activation, working with the rig is carried out through the web interface in the user’s personal account on the Hive OS . Control is carried out by clicking on the worker corresponding to the rig. The main control buttons are displayed at the top of the worker window:
They allow you to do the following:
- manage power:
- manually set network parameters for communication with the rig, including working via VPN;
- execute Linux commands;
- start mining;
- work with the rig console;
- work with the miner;
- use watchdog;
- control temperature and fans.
Mining is turned on by pressing the rocket button, after which you can select the desired flight sheet:
After selecting it, click the apply button, and the rig will begin mining in accordance with the specified configuration:
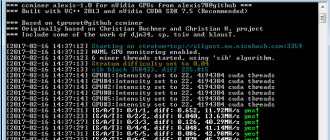
The rig's menu will display information about its status, including information about each video card, their temperatures, hashrate, stability and other important parameters:
If you have upgraded your equipment, but do not know how to remove a worker on Hive OS, or for some reason you are not satisfied with working in the hive, log into your account. Double-click on the farm name to open the worker settings. The miner removal button is in the right corner next to the farm name.
The system will ask you to confirm the seriousness of your intentions, type yes and click confirm.
Once the worker is removed, you can create a new equipment configuration. To delete the farm completely, go to the advanced settings, the “Delete farm” button is located at the bottom, the process is similar to deleting a worker.
Please note that after deleting the farm, all data on video card settings, flight sheets and wallets of the coins you have chosen will be eliminated. We'll have to create everything again.
To configure hive os wifi, you need to enter the wifi command and enter the ssid and pass to connect to the router. If problems arise, open the flash drive with the hive via Windows and find the configuration file to enter the name and password of the wireless network. But a cable connection is still more reliable; mining on Windows or hive os wifi is not a good idea.
Hive OS analogues, their features and advantages: top 4
The profitability of crypto mining depends not only on the computing power of the equipment.
The owner of a GPU farm needs to optimize the mining process. And here a lot depends on the operating system. Novice miners usually use Windows; it is a fairly simple and convenient platform with a large range of supported software and a convenient graphical interface. If a miner has one small rig and constantly sits at home, then he seems to be doing well.
However, in fact, Windows is not the most optimal, although not the worst, option for a mining operating system. At least when compared with regular LINUX, on the basis of which it is more difficult to start mining digital coins. However, why bother yourself, there are already ready-made versions of Linux, tailored specifically for mining.
Probably all users who are more or less interested in crypto mining have heard about the Hive OS operating system. This is the best mining operating system based on Ubuntu. But there are many alternative options. The topic of our today's review is analogues of Hive OS, their features and advantages.