I periodically have to install and configure nodes for various cryptocurrencies. It’s not difficult to do this, but there are small nuances everywhere that you need to pay attention to and remember how to act. Today I will tell you how to install and launch nodes of popular cryptocurrencies - bitcoin, ethereum, dash, litecoin, cardano.
If you have a desire to learn how to build and maintain highly available and reliable systems, I recommend that you take the online course
“Administrator Linux. Professional" in OTUS. The course is not for beginners; to enroll you must pass.
Introduction
In general, I described my attitude towards cryptocurrencies in a separate article. I'm just providing this for reference for those who might be curious. Today we will consider exclusively the technical side of the process.
The installation of a cryptocurrency node itself is not very difficult. You need to run a few simple commands in the server console. I will share some of my thoughts on this matter, since I have studied this topic a lot and gained some experience.
The biggest problem in this matter is suitable hardware. Low-cost virtual machines don’t support cryptocurrency nodes at all. And currencies such as ether or bitcoin also require a very large disk space - 300-600 GB. You need a dedicated server in the low or mid-price segment. It's best to buy in Europe, it's cheaper there. My link will provide servers with Russian-language support. If you don’t need it, you can buy it directly from Hetzner or somewhere else, it will be cheaper. A raid controller is not required there, since the node will not store any unique information. In the event of failure, it can be raised without problems on a new hardware.
General principles of payment gateway operation
Option 1
Suppose we have a unique invoice (invoice, order) presented to the client for payment, and the client will pay in bitcoins.
Let's start by converting the original account currency (USD for example) into BTC. This is a trivial task and we will not consider it. Further. The de facto standard is the generation of a new unique Bitcoin address for each order (aka invoice, aka invoice, aka order). It is expected that only our client will transfer funds to this account, only 1 time, and only a strictly specified amount (more is possible, no one will be offended, but not less). That. When funds arrive at the specified Bitcoin address in the required quantity, the order is considered paid. Briefly, the chain is like this:
- order in the system ->
- generate a unique Bitcoin address corresponding to the order ->
- show it to the client ->
- We are waiting for payment to the address ->
- the order is closed (cancellation upon expiration or receipt of BTC and counting the fact of payment)
When bitcoins arrive at an address, you have options to credit the unconfirmed or confirmed balance. There is a small chance that the transaction will be rolled back, and this could be either due to the fault of the payer (who is actually an attacker) or due to circumstances beyond his control.
If you have the opportunity to “take away” the provided product or service from the client in the event of a reversed transaction, I recommend setting off the unconfirmed balance. This will mean an almost instantaneous payment process for the client (as opposed to an hour of waiting, for example). And if some transactions are found to have been withdrawn in the end, ask the client for a repeat payment, threatening to take away the service/product.
Don’t expect that such fraud will immediately overtake you en masse; transaction rollbacks are very rare, and it is unrealistic to “manually” stimulate such a rollback (for which, by the way, the attacker has no guarantee of success) for technically unsavvy clients (as opposed to chargebacks on credit cards).
Another example when an unconfirmed balance can be counted is if it takes more than one hour to prepare a customer’s order (for example, a customer’s shopping cart is being processed and is being prepared for shipment by a courier service). There is plenty of time to double-check the balance before sending the goods.
For other cases, you can enter a certain threshold, above which you must expect a confirmed balance (for example, 0.25 BTC). For maximum reliability, make it zero.
After closing the order, you can leave the bitcoins at this address until required, or for convenience, transfer them to a single “aggregation” wallet of the merchant. Be careful, in the latter case you can compromise such a commercial indicator as “turnover”, because The payment transaction can be tracked by every paying customer. For transfers, you will need to create, sign and broadcast transactions using the private keys of the addresses.
A few words about the order lifetime.
If your product or service is strictly pegged to its fiat currency equivalent (for example USD), then the typical order lifetime is 7-15 minutes due to exchange rate volatility.
Option 2
Suitable when you do not issue invoices for payment, and the user’s account contains a certain single balance, which he replenishes and from which he spends. Here you will need to generate a Bitcoin address for the user and show it to him, asking him to top up for any amount. In this case, it is necessary to monitor the address for incoming transactions and replenish the user’s internal balance if available. In this case, I recommend counting only confirmed transactions (from 3 blocks and above).
- generating an address for the user ->
- monitoring transactions to address ->
- replenishment of the internal account in the presence of incoming transactions
System requirements for a cryptocurrency node
Blockchain size
I immediately draw attention to the most important thing. Carefully monitor the size of the blockchain of the currency whose node you will be setting up. Buy a server with a large margin, as the blockchain of some cryptocurrencies can grow rapidly. A recent example is ether. Before the new year, if I’m not mistaken, its blockchain was less than 100 GB, and now it’s something like 500 GB. All my nodes collapsed because of this, and I had to urgently resolve the issue with free space.
Disk performance
Next you need to pay attention to disk performance. A cryptocurrency node is a huge number of small, often very small files, the number of which can amount to millions. I will go into detail about this later when we install Cardano. Now I will give universal advice. If you have regular SATA drives, then one drive can normally support one node. If you install 2-3 cryptocurrency nodes, it will be bad; over time, the server may freeze due to the huge iowait.
These are very conditional examples, because different nodes load the system differently. Ether is the most, Bitcoin is the least, the rest are about the same.
Processor and memory
I run nodes in virtual machines. I usually stick to these parameters. For the Etherium node I allocate 4 processor cores and 8 gigabytes of memory. For bitcoin 2 cores, 8 memory. For all others, 2 cores, 4 GB of memory. If there is free memory, then it is better to give everyone 8.
operating system
I will be installing cryptocurrency nodes on Ubuntu 16 . Although I don’t really like this system, it’s the easiest way. Typically node developers announce support for this particular system. There are always ready-made assemblies and installation scripts for it. With another version of Linux you will have to spend more time.
The easiest option is to use ready-made docker images. I don’t know if they are easy to find for all cryptocurrencies and how relevant they are. I myself do not use Docker in this case, because the installation is very simple and the extra layer in the form of Docker is not needed. If you really need Docker containers for cryptocurrency nodes, you can build them yourself if you know how to work with Docker.
Installing an Ethereum node
Please note that I do everything under the root user. It’s better to run nodes under a separate user, but I don’t want to overload the article with information on how to create a user, run an application on his behalf, etc. In any case, the article is not for beginners. I provide general information with links. If necessary, you can carefully configure everything yourself in combat mode.
Adding the ethereum repository
# add-apt-repository -y ppa:ethereum/ethereum
Update the list of repositories
# apt update
We install the ether node directly.
# apt install ethereum
Then you can either connect the node to a real network, or run it on a test one for some of your purposes - testing, development, etc.
Starting a working Ethereum node:
# geth console
Starting a test node:
# geth --testnet console
In the home directory of the user from whom you are running the node, a .ethereum folder will be created, which will store all information on the node, including the blockchain itself. It makes sense to create a separate user for these purposes.
The node can be launched with parameters, passing them in the form of command line switches. For example like this:
# geth --cache=4096 --rpc --rpcaddr 0.0.0.0 --rpcport 8545 --rpccorsdomain "*" --rpcapi "web3,personal,admin,debug,db,net,eth,miner,rpc,txpool"
For a description of the keys, see the official go-ethereum documentation on Github. By the way, there is also a link to the original installation manual.
By default, the standard ether node runs directly in the console. You need to run it as a process in the background. You can write service in systemd, but I'm not a big expert in this. I followed the simplest and most obvious path - launch the node in screen . In order for it to rise after the server boots, add it to /etc/rc.local before exit 0:
screen -dmS geth /usr/bin/geth --verbosity 3
Don't forget to specify the launch keys you need. Now let’s check how our node works, whether it can be controlled via json rpc requests. Let's say we launched a node with the following parameters:
# geth --cache=4096 --rpc --rpcaddr 0.0.0.0 --rpcport 8545 --rpccorsdomain "*" --rpcapi "web3,personal,admin,debug,db,net,eth,miner,rpc,txpool"
In the next console we check whether everything has risen normally:
# netstat -tulnp | grep geth tcp6 0 0 :::30303 :::* LISTEN 1177/geth tcp6 0 0 :::8545 :::* LISTEN 1177/geth udp6 0 0 :::30303 :::* 1177/geth
Everything is fine. Sending a test request:
# curl -X POST -H "Content-Type: application/json" --data '{"jsonrpc":"2.0″,"method":"web3_clientVersion","params":[],"id":67}' localhost:8545
You should get something like this in response:
{“jsonrpc”:”2.0″,”id”:67,”result”:”Geth/v1.8.8-stable-2688dab4/linux-amd64/go1.10″}
Everything is working. Figure out what to do next with this yourself or give the server to the developers. They will be building another application or exchange for cryptocurrency.
What is Wrapped Bitcoin (WBTC) and what is it for?
The content of the article:
- What is wrapped Bitcoin and how does it work?
- Wrapped Bitcoin - a bridge connecting Ethereum and BTC
- What are the advantages of WBTC?
- How secure is WBTC?
- What is the WBTC token economy?
- How to buy WBTC?
- Price dynamics
- Conclusion
WBTC is an innovative addition to the popular cryptocurrency.
Wrapped Bitcoin is a method of transferring BTC to the Ethereum blockchain. Wrapped Bitcoin is an ERC-20 token. Its goal is simple and clear - to provide liquidity to the first cryptocurrency in the Ethereum ecosystem, and therefore DeFi.
What is wrapped Bitcoin and how does it work?
For any user starting to use BTC in decentralized finance applications, the most important disadvantage is the lack of a bridge connecting BTC to Ethereum. WBTC tokens solve this problem by providing BTC liquidity to other DeFi protocols.
Wrapped Bitcoin involves holding the cryptocurrency in reserve through a BitGo trust. The amount of WBTC in circulation is publicly disclosed to ensure maximum transparency.
Wrapped Bitcoin - a bridge connecting Ethereum and BTC
The advantage of BTC is that it has a much higher market capitalization and liquidity than any other cryptocurrency on the market.
Although DeFi pools accept many altcoins as collateral, the use of highly liquid tokens ensures that trading operations are fast and less vulnerable to the effects of volatility.
What are the advantages of WBTC?
The biggest advantage of Wrapped Bitcoins is that it combines the strengths of Bitcoin and Ethereum. While Bitcoin has a huge user base and a huge liquidity pool, Ethereum provides a powerful technology platform. The most important utility feature of Ethereum is smart contracts, which facilitate complex transactions.
Connecting BTC to the Ethereum ecosystem also simplifies the operation of exchanges, wallets and payment services. Typically, these services should run two separate nodes: one for BTC and one for ETH. When working with WBTC, you can only get the job done using an Ethereum node.
Thanks to the Ethereum blockchain as its backbone, WBTC transactions can also be completed much faster.
How secure is WBTC?
The main blockchain of WBTC is Ethereum, which also ensures the security of WBTC. It is protected by Ethash's proof-of-work mechanism.
What is the WBTC token economy?
Announced on October 26, 2022, Wrapped Bitcoin was officially launched on January 31, 2022. WBTC does not follow a predetermined release schedule. Every time a user buys or sells their tokens for Bitcoin using the merchant and custodian system, WBTC tokens are minted or burned automatically.
One wrapped Bitcoin is always backed by one Bitcoin. Therefore, the number of WBTC in circulation is always equal to the number of Bitcoins in the BITGO Trust reserve. According to the latest available data, the supply of WBTC is over 94,000 tokens. The total value of these tokens exceeds US$1 billion.
How to buy WBTC?
Many official merchants support trading with Wrapped Bitcoin. Some of these sellers force the buyer to undergo KYC checks. If you want to purchase WBTC anonymously, you can use decentralized exchanges.
To buy WBTC, you must first fund your wallet with BTC. At the time of purchase, Bitcoins are debited from the BTC wallet and WBTC are credited to the WBTC wallet. The transaction involves two different wallets.
Creating interconnection between major crypto protocols is a necessity for the entire DeFi economy to thrive. In this sense, WBTC brings great benefits by connecting the two largest blockchains Bitcoin and Ethereum.
Price dynamics
WBTC or Wrapped Bitcoin was available for over $3,476 on February 5, 2022. By May 16, 2022, it had risen to a price of US$8,238 and reached US$12,954 by the end of June. At the end of 2022, it fell to $7,429. Until August 2022, it remained below $10 thousand.
By August 9, 2022, each WBTC token was available for $11,752. Its prices began to rise rapidly in November 2022 with the rise in the price of BTC. Each WBTC is currently available for over $19,360.
Conclusion
WBTC is poised to become one of the most successful cryptocurrencies in the Ethereum ecosystem. The combination of Bitcoin's liquidity and Ethereum's technological advantage will help solidify Wrapped Bitcoin's position as one of the leading names in the cryptocurrency world. Additionally, WBTC will move forward with the growth of both Ethereum and Bitcoin.
Installing a bitcoin node
We will continue to install cryptocurrency nodes. Let's move on to setting up a Bitcoin node. Let’s perform a few preparatory steps so that we can immediately launch the node with the necessary parameters. Create a folder for the node in your home directory:
# mkdir ~/.bitcoin
Let’s draw something like this config for it:
# mcedit ~/.bitcoin/bitcoin.conf printtoconsole=1 testnet=1 txindex=1 rpcuser=btcuser rpcpassword=btcpass rpcport=8332 rpcbind=0.0.0.0 rpcallowip=0.0.0.0/0 datadir=/mnt/bitcoin
Let's start installing the node. Connect the repository and update the list:
# apt-add-repository ppa:bitcoin/bitcoin # apt update
Install the bitcoin node service:
# apt install bitcoind
We launch the node with the previously specified config in service mode:
# bitcoind -daemon
Here you don’t need to do anything to automatically launch a node, as was the case with ethereum. A Bitcoin node out of the box can work as a service. Let's check if it started.
# netstat -tulnp | Grep Bitcoind TCP 0 0.0.0.0.0.0.0.0.0.0.0.0.0.0.0:* Listen 5405/Bitcoind TCP 0 0 127.0.1:8332 0.0.0.0.0.0.0.0 bitcoind tcp6 0 0 ::1:8332 :::* LISTEN 5405/bitcoind
Port 18333 listens to the blockchain. This is the default setting. 8332 - rpc port for interaction with the node. Everything is the same as with ether.
If you need to stop the node, run in the console:
# bitcoin-cli stop
The command will only work if you have rpc configured. If not, then the only way to turn it off is this:
# pkill -9 -f bitcoind
You can check the operation of a bitcoin node, for example, with the following command:
# bitcoin-cli getblockchaininfo
Now let’s add the node to startup. To do this, let's create an entry in crontab.
# crontab -e
Add the line:
@reboot bitcoind -daemon
That's all. The Bitcoin node is ready to go. Let's move on to the next cryptocurrency.
BTC wallet and pool.
Before you start setting up the ASIC for mining (we will try to show everything using the example of Antminer S9), you need to prepare. Of course, you must have a computer or laptop from which you will carry out all manipulations; it must be connected to the same network as the ASIC. Take care in advance of the wallet where the mined coins will arrive, and select a pool. I think there is no need to talk about things known to everyone, the BTC wallet is created on the largest exchange Binance, there is also a very convenient and powerful pool for mining with daily payments with a minimum commission.
The Bitcoin wallet is generated in the Fiat and Spot section.
Find BTC in the list and click on Enter.
A window will open with the wallet address, do not forget to select the correct network as indicated in the screenshot below.
Next, go to the Pool section on the Binance exchange.
On the main page of the pool, we can see all the important information for setting up and connecting ASIC using the SHA-256 algorithm.
Create an account for the pool and select the desired algorithm.
- Pool1: stratum+tcp://sha256.poolbinance.com:443 supports BTC/BCH and Smart Pool
- Pool2: stratum+tcp://bs.poolbinance.com:3333 only supports BTC
- Pool3 stratum+tcp://sha256.poolbinance.com:8888 supports BTC/BCH and Smart Pool
Assigning a “worker” name: mining account + dot + miner ID.
The coins will come to the pool wallet, you can personally transfer them to the internal BTC wallet of the exchange (it’s most convenient to do this from a mobile application), and use spot trading to exchange Bitcoins for other cryptocurrencies so that there is diversification, while waiting for pump rates. Using P2P trading, withdraw funds to your card. Read more here.
Installing a DASH node
Let's install a DASH cryptocurrency node. First we install the necessary dependencies:
# apt install dirmngr
Download the latest version of the node. To do this, go to https://github.com/dashpay/dash/releases/ and look at the latest release number. After that, copy the latest release to yourself. At the time of writing, the latest version of the node was v0.12.2.3.
# wget https://github.com/dashpay/dash/releases/download/v0.12.2.3/dashcore-0.12.2.3-linux64.tar.gz —no-check-certificate
Unpack and copy the binaries to system folders.
# tar -zvxf dashcore-* # mv *-[0-9].[0-9][0-9].*/bin/* /usr/bin
We create a directory for the node files and draw a config for it. We will launch with the testnet parameter.
# mkdir ~/.dashcore # cd ~/.dashcore && mcedit dash.conf printtoconsole=1 rpcallowip=::/0 txindex=1 testnet=1 rpcuser=dashuser rpcpassword=dashpassword rpcport=8999
Launch the dash node.
#dashd
The node runs in the console, but the service does not work by default. To run it in the background, you need to use the screen utility. Everything needs to be done by analogy with the instructions for the ether node, which is described at the very beginning. Let's run it like this:
# screen -dmS dash /usr/bin/dashd
You can check the status of the node with the command:
# dash-cli mnsync status
That's all, the dash cryptocurrency node is installed and working.
Installing a litecoin node
Setting up a node for litecoin cryptocurrency is very similar to dash. Almost all the steps are the same, only the software version will be different. Install the necessary packages:
# apt install dirmngr
Next we go to the website https://litecoin.org. In the DOWNLOAD section, copy the link to Litecoin Core for Linux . Download the sources to the server.
# wget https://download.litecoin.org/litecoin-0.16.0/linux/litecoin-0.16.0-x86_64-linux-gnu.tar.gz —no-check-certificate
Unpack the archive and copy the binaries to the system folders.
# tar -zvxf litecoin-* # mv litecoin-0.16.0/bin/* /usr/bin
We create a directory for the node files and draw a config for it. We will launch with the testnet parameter.
# mkdir ~/.litecoin # cd ~/.litecoin && mcedit litecoin.conf printtoconsole=1 rpcallowip=::/0 txindex=1 testnet=1 rpcuser=ltcuser rpcpassword=ltcpassword rpcport=2339
Launch the litecoin node:
#litecoind
Let's check what started there:
# netstat -tulnp | grep litecoind tcp 0 0 0.0.0.0:19335 0.0.0.0:* LISTEN 2973/litecoind tcp6 0 0 :::2339 :::* LISTEN 2973/litecoind tcp6 0 0 :::19335 :::* LISTEN 2973/litecoind
Let's check the status of the litecoin node itself
# litecoin-cli getblockchaininfo
The node runs in the console, but the service does not work by default. To run it in the background, you need to use the screen utility. Everything needs to be done by analogy with the instructions for the ether node, which is described at the very beginning. Let's run it like this:
# screen -dmS litecoin /usr/bin/litecoind
The litecoin node is installed and configured. Let's move on to the next one.
Installing a Cardano node
Let’s now set up a node for the young cryptocurrency Cardano. I don’t know what’s interesting about it, but I’ve had requests to configure it. I suffered quite a bit with it, since the manual is not very clear and can’t be followed without any fuss. But in the end I learned how to cook it. There is an official installation guide on Github. I will customize according to it, but with some changes. The assembly command will be different; if you follow the instructions, it will not come together.
The assembly will go through a certain Nix package manager, which I personally saw for the first time. It must be installed, and under an unprivileged user. The nix installer does not work as root. There will be an error. Let's first add the cardano user.
# useradd -d /home/cardano -s /bin/bash cardano # passwd cardano # adduser cardano sudo # mkdir /home/cardano && chown cardano. /home/cardano
Log in as a new user and run the nix installer.
# su cardano # cd ~ # curl https://nixos.org/nix/install | sh
We execute the command in the console according to the instructions of the installer.
# . /home/cardano/.nix-profile/etc/profile.d/nix.sh
Let's create a config for nix and write a couple of parameters there.
# sudo mkdir -p /etc/nix # sudo mcedit /etc/nix/nix.conf
Add the following lines:
binary-caches = https://cache.nixos.org https://hydra.iohk.io binary-cache-public-keys = hydra.iohk.io:f/Ea+s+dFdN+3Y/G+FDgSq+ a5NEWhJGzdjvKNGv0/EQ=
Let's start installing the Cardano node. We clone our repository and go to it.
# git clone https://github.com/input-output-hk/cardano-sl.git # cd cardano-sl
Switch to the master branch.
# git checkout master
We launch the assembly of cardano node from the sources.
# nix-build -A cardano-sl —cores 0 —max-jobs 2 —no-build-output —out-link master
We generate a script to launch the node:
# nix-build -A connectScripts.mainnet.wallet -o connect-to-mainnet
The node is assembled and installed. Let's launch:
# ./connect-to-mainnet
To automatically start cardano node after system boot, add a command to /etc/rc.local before the exit command.
screen -d -m -S cardano sudo -u cardano /home/cardano/cardano-sl/connect-to-mainnet
You can check the operation of the node by running the command locally:
# curl https://127.0.0.1:8090/api/v1/node-info —cacert /home/cardano/cardano-sl/state-wallet-mainnet/tls/server/ca.crt —cert /home/cardano/ cardano-sl/state-wallet-mainnet/tls/client/client.pem {"data":{"syncProgress":{"quantity":3,"unit":"percent"},"blockchainHeight":{"quantity ":1147025,"unit":"blocks"},"localBlockchainHeight":{"quantity":35183,"unit":"blocks"},"localTimeInformation":{"differenceFromNtpServer":{"quantity":-25400, "unit":"microseconds"}}},"status":"success","meta":{"pagination":{"totalPages":1,"page":1,"perPage":1,"totalEntries" :1}}}
This completes the node setup. Read the full documentation on the Cardano Wallet API here.
At the time of my last installation of the cardano node, I was faced with the fact that after a few days of operation, the node consumed all the free inodes and stopped working. The default value of the ext4 file system of 1,000,000 seemed not enough to her. I had to add a separate disk and at the time of creating the file system indicate the creation of 10,000,000 inodes. After a couple of months of operation, the node uses 2,300,000 inodes. Keep this point in mind if you work with a node.
Broadcast transactions
The result of creating and signing transactions is binary data (hex), ready to be pushed into the network. Until the network sees the transaction, consider there is no transaction. When the network sees a transaction, it is considered unconfirmed. The transaction is enough to transfer Bitcoin to one node, after which in a matter of seconds the transaction will be seen by most of the Bitcoin network. Some client nodes from the “Working with Addresses” section (through some of their own hardcoded endpoints), or any full node, can broadcast transactions. You can even broadcast a transaction manually by going to the provider’s special Bitcoin API page and entering the transaction into a special form. Canonically, a confirmed transaction is a transaction included in 6 or more consecutive blocks (or 1-3. Non-canonical, but faster). Transactions with zero (or insufficient) commission may remain unconfirmed for a long time (up to a month, in my experience). It is advisable to periodically retransmit such transactions.
Installing a NEO node
For Neo Node to work, you need .NET Core, which, to my surprise, is available for Linux. Let's put it:
# wget -q https://packages.microsoft.com/config/ubuntu/16.04/packages-microsoft-prod.deb # sudo dpkg -i packages-microsoft-prod.deb # apt install apt-transport-https # apt update # apt install dotnet-sdk-2.1
For other versions, the link to the deb package can be found on a separate page. In addition, we install several node dependency packages:
# apt install libleveldb-dev sqlite3 libsqlite3-dev libunwind8-dev
Download the latest version for your system from the page https://github.com/neo-project/neo-cli/releases and unpack it.
# cd ~ # wget https://github.com/neo-project/neo-cli/releases/download/v2.9.0/neo-cli-linux-x64.zip # unzip neo-cli-linux-x64.zip
Launch Neo node:
# dotnet /root/neo-cli/neo-cli.dll /rpc
The cli interface will open. You can enter the help command and see the current commands. This node cannot work as a service out of the box, so we launch it in screen and add it to /etc/rc.local for autoloading:
screen -d -m -S neo dotnet /root/neo-cli/neo-cli.dll /rpc
In its work, neo node uses the following ports:
Node operation monitoring
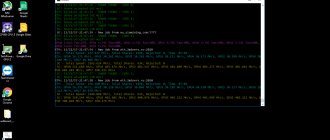
I’ll say right away that all my nodes worked stably and did not crash, except for Cardano. Because of this, we had to worry about separate monitoring of nodes. Zabbix came to the rescue. For monitoring, I used a standard service availability check via tcp port. Zabbix simply contacts the specified address and port and checks that the service accepts connections.
I’ll show you using a Cardano node as an example. On Zabbix server I added a data item:
I created a trigger based on this element:
Just finding out that the node has fallen is not enough. We still need to lift it back up. To do this, I made a simple restart script on the node itself.
#!/bin/bash sc=`pidof SCREEN` kill $sc screen -d -m -S cardano sudo -u cardano /home/cardano/cardano-sl/connect-to-mainnet
The script finds the pid of the screen session in which the node is running and closes it. After this, it starts the node again. Next, I created a separate action in Zabbix, which executed the specified script on the server if the trigger was fired.
Specifically with Cardano, this method worked successfully and node crashes were no longer noticed. It restarted successfully.
Online course on Linux
If you have a desire to learn how to build and maintain highly available and reliable systems, I recommend that you take the online course “Administrator Linux. Professional" in OTUS. The course is not for beginners; to enroll you need basic knowledge of networks and installing Linux on a virtual machine. The training lasts 5 months, after which successful course graduates will be able to undergo interviews with partners. What this course will give you:
- Knowledge of Linux architecture.
- Mastering modern methods and tools for data analysis and processing.
- Ability to select a configuration for the required tasks, manage processes and ensure system security.
- Proficient in the basic working tools of a system administrator.
- Understanding of the specifics of deploying, configuring and maintaining networks built on Linux.
- The ability to quickly solve emerging problems and ensure stable and uninterrupted operation of the system.
Test yourself on the entrance test and see the program for more details.
Receiving information from the Bitcoin network
The most “heavy” point. The classic solution is to raise your own reference Bitcoin full node, also known as canonical bitcoind. This will allow us to communicate with it via JSON-RPC. With it, we will be able to both receive information from the network and push transactions. What you should pay attention to:
- After installation, node synchronization may take a long time. Only after synchronization the node can be used.
- It will take up a lot of space. Already 40+ gigabytes.
- I personally don’t know what kind of request load it can withstand.
- Any problems with the crash/update will fall on your shoulders.
An alternative is a full node implementation in Ruby+PostgreSQL, Toshi. Non-canonical, but striving for full compatibility implementation. Please note, due to additional indexes, the database will take up 220+ gigabytes of space. Again, synchronization with the network is required. There may be other full node implementations (unknown to me). Another alternative
is to use the provider's public API. Receiving information from the network and broadcasting transactions will fall on his shoulders.
Currently there are:
- chain.com
- blockchain.info/ru/api (not recommended)
- www.blockcypher.com
- chain.so/api
- coinalytics.co
- www.blocktrail.com
- coinkite.com/developers
- other
Personally, I recommend connecting several solutions with fallover.