This week we updated the NVIDIA drivers in our catalog. All driver versions are CUDA 10 compatible. The following versions have been added:
- 410.93 - R410 stable line with long-term support
- 415.27 - R415 current stable branch
- 418.43 - R418 current beta branch To update drivers, just use the nvidia-driver-update utility.
After running a number of tests on a variety of hardware, we chose version 418.43 to be installed by default unless the 'nvidia-driver-update' option is specified. This version supports all the latest cards of the new NVIDIA RTX 20xx line, and, in addition, a drop of 2 or more times in the system load when mining on such algorithms as the x16 family, cuckoo and others was noted.
Hive OS driver update for AMD and Nvidia video cards
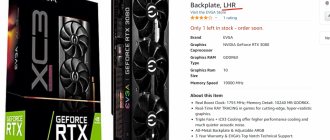
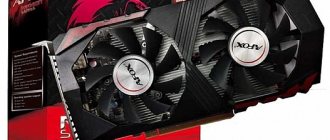
The Hive OS operating system, popular among miners, is based on Linux, and therefore includes drivers for this operating system, which need to be updated from time to time. For mining on video cards, updating drivers may be important, because... new versions of miners may not support older versions of drivers; stability or even hashrate in mining increases. Also, updating drivers will definitely be necessary for owners of new video cards, for example, Nvidia RTX 3000 series video cards and AMD RX 6000 series video cards, which were released quite recently. Moreover, updating HiveOS itself via the Web interface does not mean that drivers for video cards will also be updated.
In our case, the HiveOS version [email protected] (for December 14, 2022) is installed, with the version available for December 24. The driver for Nvidia video cards costs version 440.31 as of November 4, 2022, i.e. The driver in Hive OS has not been updated for more than a year.
Let's update Hive OS to the latest version and make sure that the driver for video cards remains unchanged. Only the version of the NBminer miner has changed from 35.0 to 35.2
Applying an overclocking profile
Now, in order to apply the profile you created, go to the workers tab and check the box on the left for those workers to which you are going to apply the overclocking profile. You should see a speedometer icon in the menu bar in the top right corner of the screen.
If you click on this speedometer icon, a window will appear in front of you, which will display the number of workers you have selected and a list of all your flight sheets. Select the overclocking profile you want to use and click on the " Apply " button. As a result, you should see a message stating that the overclocking command has been sent to the worker. After some time, your workers will have to apply the changes.
Perhaps overclocking video cards under HiveOS is not such a trivial task for a beginner, but we tried to describe the overclocking process in as much detail and clearly as possible for both AMD video cards and Nvidia GPUs. Although some miners always use the default settings and do not overclock the equipment, it seems to us that overclocking and undervolting is a good help for increasing the hashrate in mining or reducing the consumption of rigs. Often, thanks to overclocking and undervolting, it is possible to increase the hashrate while simultaneously reducing the consumption and temperatures of video cards.
Updating video card drivers in Hive OS
1 Update AMD and Nvidia drivers
The easiest and most reliable way is to rewrite the Hive OS image onto a flash drive with new drivers for AMD and Nvidia video cards. The latest stable image of Hive OS can be found on the official website in the Downloads section
How to write an operating system image to a flash drive can be read in this material
But this method has one significant drawback - it is a rare update. So, at the moment, the version [email protected] for November 5, 2022 is available for downloading the image. Those. the assembly proposed for recording an image on a flash drive contains drivers that are at least two months old.
Therefore, we will consider the second option for those who want to have the latest drivers on their rig or who do not have direct access to the mining rig in order to rewrite the image to a Flash drive.
2 Updating the Nvidia driver in the HiveOS operating system
HiveOS has a built-in driver update feature for Nvidia graphics cards. To use it, you need to go to the Web interface for managing the mining rig and launch Teleconsole
We wait for the Teleconsole setup process to finish, then click on Teleconsole in the line of completed commands
In the window that opens, click on the created link
A separate window opens, wait until the command line “ [email protected] ” loads and enter the command
| nvidia-driver-update --list |
The list of available driver versions is loaded:
Here you can select any available version of the Nvidia driver to update, then press Enter and the video driver update will begin
If the driver version you need is not in the list, you can specify the URL in the command to download and install the required driver version, for example, https://download.hiveos.farm/drivers/NVIDIA-Linux-x86_64-392.61.run
Next you are asked whether to remove the previous drivers or not. Type Yes and press Enter
Wait for the new drivers to be installed until the command line “ [email protected] ”
Type the EXIT to end the session with the console of your mining rig.
Now your mining rig will work with the new version of drivers
3 Update AMD driver in HiveOS
First, just like for updating Nvidia drivers, you need to run Teleconsole
On the command line, specify the command to download the AMD Installer
| wget https://raw.githubusercontent.com/CryptoLuigi/AMD_installer/master/amd_install.sh |
Next you need to allow access to run the program using the command:
| chmod +x ./amd_install.sh |
Only after this can you run the command itself to update AMD video drivers in HiveOS
| ./amd_install.sh |
From the list provided, enter the driver serial number, for example, 20 and press Enter
After installing the new AMD driver, issue the Exit to shut down the console.
Conclusion: when using HiveOS as an operating system for mining rigs, periodically update the drivers of AMD and Nvidia video cards so that the equipment works more stable and efficiently, especially if you are the owner of new video card models.
- Services
Subscribe to our Telegram channel @cryptoage and Vkontakte, be the first to learn news about cryptocurrencies.
Creating an Overclocking Profile
Each farm has its own individual overclocking profiles and they cannot be used in another farm. You have the opportunity to create an overclocking profile for the entire farm or for a specific worker. The profile of a specific worker will always have higher priority and will override the general settings for the farm. Thus, it is recommended to first set the optimal parameter values for the entire farm, and then (if necessary) configure each rig (aka worker) individually.
So, to create a new overclocking profile, simply go to the Overclocking Profiles for your rig, and then click the Add OC Profile . Now in the “Save Overclocking as Template” , name your new profile and click “Save” .
You have created an overclocking template that can be used by specific workers or your entire farm. You can always copy it and change it for different algorithms and miners. Although the template you create will be used for all your GPUs, the overclocking settings for Nvidia and AMD video cards are different. Keep in mind that you can have different sets of settings for different types of GPUs (Nvidia, AMD) in the same profile and if your worker runs on Nvidia and AMD, then the settings will be applied to each type of GPU individually.
To edit your overclocking profile, simply click on the plus icon located to the right of your profile name. In addition, you can use popular overclocking templates from other users by going to the “Popular Presets” and selecting your video card model from the list.
Hive OS 2.0 – how to configure and install
As you understand, in order to properly carry out the mining process, you need not only powerful equipment with a large number of calculations performed per unit of time, as well as cool software to improve the equipment, but also a modern operating system for such a task. And as you understand, a modern operating system should ensure the process is as stable, reliable and fast as possible.
One of such operating systems is hiveos farm, which has earned great trust in a large and friendly community of miners around the world. The Hive OS operating system is a certain assembly based on the same Linux OS, known to many people, based on the no less famous Ubuntu distribution, which is fully optimized to make cryptocurrency mining as simple as possible for the equipment and the person himself. A set of programs and monitoring service is Linux miner Hive OS, which definitely deserves your attention.
Download Hive OS 2.0
If you are interested in this program, then this article is written especially for you. In the article we will tell you what the Hive OS operating system is, as well as how to install it correctly on your hardware, and also how to configure it and use it for such an interesting process as cryptocurrency mining.
We write Hive OS 2.0 for mining onto a flash drive.
First of all, to start working with the hive os operating system, you need to go to the official website of the developers, which is located at the address where you should go to the program download page by clicking on the “Install” button and selecting the version of the distribution you need.
In total, this operating system at the time of writing this article has been released in several versions, firmware and other forms for different devices, but the most optimized and reliable version is the stable one, which is called Stable Version. You can be completely confident in this version, as it does not contain any bugs or errors.
You can hiveos download any version of the distribution, you can in different versions, including using a torrent or via a direct link in the form of an archive. Most importantly, to download this operating system, you need to purchase a flash drive or SSD with a capacity of at least 8 gigabytes.
As you understand, the most preferable option would, of course, be to use an SSD of at least 8 gigabytes, since a flash drive wears out easily during operation, and the reliability of SSD media has been tested over the years. You will need to unzip the file from hive OS, placing it on your storage device.
Of course, many people will say that it can easily be installed on a regular hard drive, but it is not always possible to install it instead of the main operating system, where there may be necessary documents that you do not want to part with. And besides, an SSD works tens of times faster than a hard drive. Thus, you will “kill two birds with one stone” - save the data you need on your main operating system, and also ensure the speed of your mining farm, which is very important for such a difficult task.
So that you can easily create an image when working in OS Windows, you should download a program called Etcher. You can actually download it by going to etcher.io. On the main page, select the version of the program we need and click on the “Download for Windows (x86|x64)” button. After downloading, install it on your computer.
The Etcher program is quite convenient for working with operating systems based on Windows OS, including Windows 32/64, macOS and Linux. It is completely open source and provides full functionality and incredible recording quality with no file reading errors in future work. Also, if for some reason you cannot install this particular software, then as an alternative you can use programs such as HDD Raw Copy Tool or Win32 Disk Imager, as well as Rufus and other similar utilities.
Then, in the program designed for burning the Etcher disk image, you must select your unzipped image of this operating system, having first checked the path for recording, and then clicking on the “Flash” button. At the same time, it is also worth understanding that all existing files on a USB disk or USD-flash will be completely erased without the possibility of recovery.
For the most part, recording an image will take no more than 15 minutes of your total time. All processes, including preparing the flash drive for recording, will be displayed in the program window itself.
Then the Etcher program will check the integrity of the recorded files on your selected device.
After the program finishes working, a message will appear indicating that the image was successfully written to your flash drive or SSD drive.
Now you can easily insert the rig you assembled yourself into the existing port in order to launch it. Pre-configure your computer's BIOS. You definitely need to install a special option to run from a flash drive. Several automatic checks will then occur to create the configuration for all your equipment. Ultimately, it should prompt users to enter a special identifier with a password to log in.
That is why before using this OS you should register on the hiveos.farm website. This is necessary to get an account and create a worker.
Registration on the website hiveos.farm.
In order to use this operating system, before setting up hiveos you should go through a short procedure of creating an account by registering an account and enabling two-factor authentication.
To register, you should log into the main page of the site at https://hiveos.farm/ and click on the “Sign In” button. Then you need to click in front of the sentence “don’t have an account yet?” Click on the “Register” button.
On the page that opens, you need to enter some information, namely your name, desired login, as well as the time zone of your place of residence and email address. Don’t forget about the password, which must have a high degree of protection so that no one can hack your account.
As we said above, for an increased level of protection you should get two-factor authentication, which will help you protect your account from unauthorized entry.
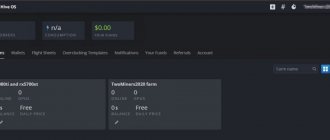
After you have been able to go through the registration procedure, you will notice a window where you can see your login, what status your farms have, as well as your personal account balance.
To create a special worker, which is also the rig ID, you need to click on the farm field in your personal account. After clicking, a special window will appear allowing you to:
- full view of all statistics for all time;
- creating wallets that contain special information about various addresses where the money earned through mining will actually be sent;
- creating walkers that contain data about all identifiers and passwords for them;
- creation of flight sheets, which contain complete information about the configurations for mining. The device configuration can be used in absolutely any rig;
- creating overclocking profiles for any existing algorithms and rigs;
- tracking any actions that have occurred with the account recently;
- tracking authentication actions in the accounts of completely different users;
- work with various payments on your account
- setting up the entire configuration of your personal account.
If suddenly for some reason you forgot your registration data, then it’s not a big deal - enter your email, after which you will be provided with a special recovery token, as well as a link to change your password.
To create a walker you need to click on the plus sign on a white background in a special window of your mining farms. You will see a pop-up list with items such as: “add worker”, “add wallet”, “trusted user”. As you already understood, you need to click on the “add worker” button.
After a new window opens, you will see a form in which you can see the fields required to configure the new worker.
Then a window will appear in your personal account with the rig ID, as well as the password and special data, which is FARM_HASH.
It is also worth remembering that all the data that you receive after creating a new walker must be written down and under no circumstances lost, as you will need it in the future. You will need them for the first time to perform activation during the initial boot.
In the future, in order for you to work with the rig, you should create special wallets that will contain a lot of interesting information, including addresses to which coins will be sent during mining in the future. To do this, you need to click on the name of your farm and select the wallet menu. In the new tab, you should activate one button called “add wallet”.
In the new window there will actually be a list of the names of this or that cryptocurrency, as well as the address of the wallet to which the name corresponds. The wallet name is also specified in the field below.
If you suddenly find errors in the created wallets, then this is not a problem, since they can be edited at any time in the wallets menu for each of your farms.
In order to set up your mining process for any pool, you use a special menu called “flight sheets”, where you can select some parameters from a drop-down list. For example, you can select algorithms for mining, wallets, pools, programs through which mining of a particular currency is carried out, or the selected configuration is set/selected. Once you have set up the entire configuration, you should click on the “create flight sheet” button, which will be located at the bottom right of the screen.
We choose the right miner for Hive OS!
At this point, we will try to install correctly a program that allows the user to mine without much difficulty. Actually, what does this mean, you ask? This means that you need to select software that will not only be compatible with this operating system, but also work on it correctly, ensuring speed and efficiency, as well as reliability during mining.
But the developers of Hive OS are quite thoughtful guys and have built into it several miner programs that you can select for absolutely every flight sheet of your farm from the available list.
For example, to start mining in Hive OS, you need to use Claymore Dual Ethereum Miner in the flight sheet together with wallets.
Also, if you have a desire, you can use mining simultaneously on both the video card and the processor of your equipment. To do this, you should click on the “add miner” button on the right at the bottom of the page. In the new field, you can actually set the configuration of the coin that you plan to mine on the processor. Parameters such as the pool, wallet, and miner used for this task are set.
It is also incredible that in the configuration menu there are some other “fine” settings for your equipment that allow you to be responsible for overclocking your processor or video card, applicable in files with the BAT extension. To do this, you should click on the special “Miner Configuration” button in the flight sheet, and in the other “configuration override” field you need to specify the commands necessary for this matter.
To save everything, you should click on the special “apply changes” button. And after creation, you will be able to control the correctness of all existing system settings. This is necessary for the correct operation of the entire mining process - allowing you to do mining not only without harm to your equipment, but also making it efficient.
If you need to change the configuration of flight sheets, then you should click on the special button with a picture of an ellipsis. From the drop-down list you need to select the “edit” button.
You can see an example of changing the entered parameters below:
- After you have made a change, you must save it using the “update” button.
- To mine Metaverse on Hive OS, you should create a completely new flight sheet with your chosen ETP coin.
- Then you need to configure the configuration of your wallet in the most usual way by entering the address, assigning a name, and also selecting a mining pool, as well as a miner program. If necessary, you can select a second coin, setting up the wallet and pool configuration in the same way. When conducting single mining, select “Don't use dual” as the second coin.
- If you need to reconfigure the algorithm, then stop mining. To do this, click on the shout button and select the “stop miner” option.
After this, you can reconfigure, and to start or stop from the command line, then use the miner start/stop value. When rebooting or stopping the system completely, you need to apply:
- reboot - reboot;
- sreboot - force a reboot;
- sreboot shutdown - stop.
Activating the rig and synchronizing the launch.
You can launch the rig immediately after you automatically boot it from the flash drive. And after the automatic configuration of the system, you will be able to notice a new window asking you to add a profile to your own account, setting its name and password, and also receiving an ID on the computer you are setting up.
After this, the system will prompt the computer owner to enter the rig ID and password using the api.hiveos.farm server. After this, you will be activated, and you can remotely manage it from your personal window.
The main mistakes when driving AMD and NVIDIA video cards.
To overclock a video card in Hive OS you must use the overclocking profiles menu on your farms page (https://the.hiveos.farm/). And in order to make it most convenient to find and identify coins, you need to give it a name. And to enter all overclocking parameters, you need to click on the pencil icon in the line of the selected profile. After this, a new window should appear where you can change various parameters in each card, up to the core frequency, the speed of the fans of your equipment, and also set a consumption limit. The most common mistakes people make are setting the video card to a huge overclock or using a lower core voltage. Also, the main mistake may be that standard settings are used for different algorithms, although each algorithm requires full individual settings with different overclocking parameters.
Conclusion. Pros and cons of Hive OS 2.0
Benefits of Hive OS 2.0
If you still want to download hiveos for mining, then you can experience the following advantages:
- convenient and understandable interface, which is completely localized for the Russian audience;
- high-quality use of all resources of your equipment, revealing hidden potential with the correct settings of the entire system configuration;
- accelerated installation, as well as quick start of the system, allowing you to avoid installing unnecessary components that slow down the operation of the entire system;
- full remote monitoring of the entire system, as well as full operation of the rigs immediately after the first launch;
- the operating system starts quickly even if you loaded it into a regular USB flash drive. In this case, the storage capacity should not exceed 8 GB;
- convenient system setup;
- works much faster than other operating systems that can be used for mining cryptocurrencies.
Disadvantages of Hive OS 2.0.
- You can only use a limited number of rigs in free mode (up to 3 pieces/1 equipment). For subsequent rigs you will have to pay $3 apiece;
- the implementation of rigami occurs entirely through third parties, that is, there is a high probability of possible hacking;
- if you use Nvidia video cards, you won’t be able to fully use the standard tools for editing power;
- Although the operating system is more or less mature, there are still some vulnerabilities that may attract hacking attempts.
But still, from the reviews it is clear that people are happy with this system, and public opinion is one of the most correct in our time.
Eliminating mining errors associated with incorrect installation or configuration of video cards
When setting up and operating mining equipment, various errors often occur.
This article discusses typical errors that occur during mining due to incorrect assembly of mining rigs or due to software errors.
Hardware errors leading to incorrect operation or absence of video cards in the task manager
At the hardware level, some common problems lead to errors in identifying video cards or to their constant crashes during operation. These include:
In all cases related to troubleshooting in the operation of electrical and radio equipment and computer equipment, you must remember that:
THE MAIN CAUSES OF MALFUNCTIONS IN ANY ELECTRICAL DEVICES ARE THE PRESENCE OF EXTRA OR LACK OF NECESSARY CONTACTS.
Software errors related to video cards leading to miner failures
If the operating system is configured incorrectly, driver installation fails, miners are incorrectly configured, or overclocked, errors occur, resulting in a failure to launch the miner program.
Errors caused by incorrect driver installation
As a rule, in mining farms with several video cards the following errors occur due to incorrect installation of drivers:
Error code 43 usually occurs when installing new drivers on the system, which the system itself can do during automatic installation of updates. In addition, drivers can be lost due to power failures, errors on the system media, exposure to viruses and other problems.
After such an update, error 43 may appear, and the hashrate of video cards may drop significantly. For AMD video cards, after installing the drivers, you need to use AMD-Compute-Switcher, and for Nvidia video cards, enable P0 state according to the method described in the article “Optimizing the consumption of Nvidia video cards during mining.”
If after applying the patcher and mod (for Windows 7) and rebooting the system, the error does not disappear, then perhaps the wrong BIOS was flashed on the video card, there was a failure when writing it, or the BIOS chip on the video card has failed. To resolve this error you need to:
If it is impossible to restore the working state of the video card by flashing the correct BIOS or switching the BIOS switch to reserve, you need to change the BIOS chip in a service center, or look for another cause of the problem.
Errors in miner configuration when specifying video cards
This type of error occurs when there is a missing or incorrect indication in the batch file to start mining of the video cards that should carry out the mining (both AMD and Nvidia).
For example, in the claymore dual miner program and other programs from this programmer, the NO AMD OPENCL found error sometimes occurs. It appears when you launch the mining program and indicates that no devices were found that support OPENCL technology. It may have different spellings in different programs, but its essence boils down to the impossibility of finding a device suitable for mining. If there are no hardware errors or problems associated with incorrect installation of drivers, the problem should be looked for in the miner configuration.
This error can also occur in other programs used for mining. For example, in the sgminer program a similar error is called clDevicesNum returned error, no GPUs usable. When starting the miner, a similar message appears:
[02:56:02] Started sgminer v0.1.1
[02:56:02] * using Jansson 2.11
[02:56:09] Specified platform that does not exist
[02:56:09] clDevicesNum returned error, no GPUs usable
[02:56:09] Command line options set a device that doesn't exist
Let us repeat once again that if the required video cards are displayed correctly in the device manager and do not have exclamation marks with error codes, then the BAT file is incorrectly configured. This happens on systems with different types of cards installed on the system (for example, integrated graphics card plus AMD graphics cards, or using AMD and Nvidia GPUs simultaneously and all three types of devices together). As a rule, to eliminate this error, you either need to correctly indicate the numbers of the video cards used in the miner, or indicate which platform (AMD or Nvidia) you need to use.
In sgminer (its various versions and similar programs such as cgminer), on mixed systems you may need to specify the --gpu-platform 1 or 2 option on the command line.
Usually, if the internal video card is not enabled, this miner works without specifying this parameter, but in this case, sometimes you may need to use the —gpu-platform 0 command.
Other errors that cause miners to malfunction
Let's look at other errors that sometimes occur when running mining programs:
WATCHDOG error: GPU hangs in OpenCL call appears when video cards are overclocked, low-quality risers, bad (very long) USB connecting cables. There is no need to squeeze all the juice out of video cards by increasing the frequency of memory and video cores, since downtime caused by overclocking will negate all income from such mining. The hwinfo program, which shows memory errors for AMD video cards, will help you understand where very high frequency values are set:
As a rule, when overclocking the memory, one of the video cards crashes, and when overclocking the core (or very strong downvolting), the computer freezes completely;
Conclusion
Mining requires certain knowledge related to the operation of computer technology and communication networks. This is necessary because knowledge of the basic functioning of radio equipment and communication channels makes it possible to independently understand the causes of problems and understand how they can be eliminated in the most rational way.
Knowing the basics of electrical circuits will help you avoid mistakes associated with placing excessive load on one line (for example, more than one video card per Molex line), which often leads to burnt contacts or failure of risers and video cards.
Understanding Ohm's law will help you avoid problems associated with using adapters from a SATA power connector to a riser, which is guaranteed to lead to burnt contacts and related problems.
The more a person knows, the more he understands that he knows very little or knows nothing... The process of searching for truth has a beneficial effect on human karma and gives life experience, for which, perhaps, we live...
Source
There are currently two ways to update RaveOS:
The first method is to download the RaveOS image with the new version and re-write it to a flash drive or ssd disk.
This is an understandable, but not fast way.
The second method is to update using the console. To do this: open the Actions , pause the rig longer, in the right corner, click on the Console .
Next, enter your username and password. By default, all rigs have the login root and password admin .
In the management console of the RaveOS rig, enter the command ( upgrade -b latest ). After this, your GPU rig will be updated to the latest version. If you need a specific version of RaveOS, then you can add the version number to which you want to upgrade to the upgrade -b xxx-xxx .
Security Settings
To protect against unauthorized access to your equipment, you must enable two-factor authentication. This means that when you try to log into the farm, you will first receive an email with a one-time password, which you will need to enter on the site after entering the main password and login.
Thus, in order to gain access to the farm, an attacker will first need to gain access to your mail. And this is almost impossible to do if you follow basic internet safety principles.
RaveOS - latest version
A new version is available for testing:
We are pleased to inform you about the release of new
BETA versions of RaveOS 1.0.25 BETA (8707-1983) and RaveOS 1.0.25 BETA (8708-1983)