Relatively recently, Google developers began to implement the Google Authenticator service, which speeds up and simplifies Internet surfing, working with websites, and registration processes.
This is a fairly easy-to-use application that provides the opportunity to use the full functionality of a particular site without registration.
In this article we will try to answer the question of what to do if an application is lost and how to restore access to sites in the event of a failure.
Principle of operation
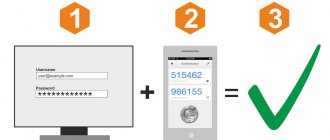
This service provides two-step verification for quick access to the site where you need to register.
The service is implemented in the form of an application for a mobile device based on Android and some other operating systems, which must be downloaded and installed before using the authenticator.
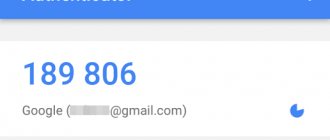
Such an application presents the user with a six or eight digit code to authenticate on a particular site, instead of standard credentials.
Moreover, after entering such a code, the user becomes authenticated in the system of a third-party site using his credentials from his Google account, that is, as a Google user.
Interestingly, the service is able to successfully generate such codes for third-party applications.
Important! The initial versions of applications for this service were distributed with open source code from the developer. But more and more new versions have recently become the intellectual property of the developer, that is, Google.
<Fig. 1 Application>
Setting up the Google Authenticator app on multiple devices
Google Authenticator can be configured to generate verification codes on more than one device.
- The Google Authenticator app must be downloaded on all devices that will be used.
- Open the verification page in two steps.
- If your account already has the Google Authenticator app set up, remove it to start setup from the beginning. If you haven't set up Google Authenticator yet, continue to the next step.
- Follow the instructions to set up verification in two steps, remembering to scan the generated QR code or enter the generated secret key on all managed devices.
- Make sure all devices are working correctly by entering the test codes for each one and clicking Test. Then click Save.
Google Authenticator does not generate application passwords . If, after enabling two-step verification, the application asks you to enter a new password, you must sign in using the application password.
Why is it needed?
Why is this application needed and what does it do?
To start using it, you need to download the application, install it and log in using your Google account credentials.
After this, the application should remain running in the background.
After entering a particular site, the application will generate a special code for you, which you will need to enter on this site (a special input window will appear in the browser).
After entering the code, you are automatically authenticated on the site with your Google account data.
The site will generate a digital key, which, also fully automatically, will be saved in the application you downloaded and will be used for all subsequent logins to this site.
From everything written above, it is clear that such an application will be especially useful for those who often work with many sites that require registration to access the full functionality of the service. This application allows you not to waste time on constant registration and authentication, not to remember a lot of passwords and logins, but at the same time use the full functionality of any site.
<Fig. 2 Use>
Method 1: Account Settings
You can restore Google Authenticator in case of loss using the internal account settings on a special page; you will also be able to deactivate codes from the old application, for example, if the smartphone was stolen.
Step 1: Account Recovery
To make changes to the settings without access to the old authenticator, the first thing you need to do is restore your Google account, following the corresponding instructions on our website. The easiest way to do this is to use emergency codes or confirmation using a temporary code to a phone number, but you may also need to contact support.
Read more: How to recover your Google account
Step 2: Connecting the application
- Open your account settings page using the link below and switch to the “Security” tab. Here you need to find the “Two-Step Verification” item.
Go to account settingsVerify using your current account password.
- Scroll down the page and in the “Authenticator Application” block, use the delete button if necessary. This will disable the previously added authenticator.
To add a new device, scroll down the window even further and in the section we marked, click “Create”.
- Specify the type of phone you want to use for verification and click Next.
- After this, a QR code will appear on the page, which must be scanned using your phone camera.
In the application, to do this, just select “Scan QR code” on the first page and point the camera at the computer screen so that the code is inside the red area.
- If you are not comfortable using this verification method, use the "Can't scan QR code" link to get a text version of the code.
On a smartphone, you can specify this character set in the “Enter setup key” section using the “Enter key” text field. In this case, you must specify an email address as the “Account Name” and be sure to set the value to “By time” in the “Key Type” block.
- Use the "Add" button to apply the information, and if everything was entered correctly, the authenticator will begin to create temporary codes for your account.
- Don't forget to be sure to return to the Google website and in the pop-up window you previously used in the last step of "Set up the Authenticator app" enter the code from the app you just activated.
When performing the described procedure, you should not hesitate, since at some intervals the Google website in the browser repeatedly requires confirmation with a password, while resetting all changes made but not saved.
Recovery
However, such an application stores codes generated by sites only in its memory, that is, the data is not uploaded to any servers.
Thus, they are stored only on a specific phone and only as long as the corresponding application is installed on it.
It is clear that this data can be lost when the application is uninstalled, when all phone settings are rolled back to factory settings, when the phone breaks down, which requires reinstalling the operating system, or when flashing.
Also, all saved data for accessing sites may be lost if the phone physically fails or is lost.
In this case, you completely lose access to authentication data on all sites where you have authenticated using the application.
The problem is that you won’t be able to access the site any other way (only if you create a new account), you won’t be able to simply enter your Google credentials, as they will not allow you to access the site. This is a particularly serious problem if the user has already performed quite a lot of actions in this account and needs to access the information in it.
However, some ways to return access to codes are still provided.
<Fig. 3 For PC>
Enable two-step verification on a new device
You can transfer all settings to a new phone, provided that you have a backup code. To do this, log into your account and launch a browser on your computer. Next follow 3 steps:
- Install Google Authenticator;
- Change authentication settings;
- Check your phone.
To change settings, open the Google Account page on your computer and log in using the backup code. Go to the "Security" section and select "Sign in". Click "2-Step Verification". Check the extension numbers in the Voice Message section. In the Google Authenticator section, click Change Number. Select your device.
Launch the app on your phone and select Scan Barcode. Take a photo from your computer screen. Receive the code and enter it on your computer. Save your changes.
Basic method
You need to understand that Google does not provide absolutely any methods for recovering data from the application.
This situation arises because passwords are not transferred to the developer’s servers in order to increase the security of using the application.
But such high reliability and security creates a problem.
You will have to resolve the issue with each site individually.
You will need to write a letter to the site's Technical Support or its Administration, describing the problem.
In some cases, this may require you to create a new, empty account.
A number of sites can immediately provide you with a backup code, with which you can log into the site using Google Authenticator. But some services may require you to prove that you are the right user. In this case, you may need screenshots from this site when you were still using the account to which you lost access, screenshots from your Google account, etc., and the Administration may also require some other evidence.
However, some services refuse to provide a backup code despite any evidence.
Most often, this happens with sites where credit card information is entered or payments are made in any other way.
<Fig. 4 Access code>
Contact Google Technical Support
Google technical support does not always respond individually, but in exceptional cases and with a correctly formulated request, you can expect help.
As for restoring Google Authenticator, there is no exact confirmation that this technique will work, but we recommend you try it.
- Sign in to your Google account using your user credentials.
- When prompted for a verification code, click on More Options.
- Go to Help > Contact Google.
- Next, you need to confirm your account membership by answering questions.
- Submit the completed form and wait for Google to respond.
Read more here.
What to do in the future?
The easiest way to avoid repeating this situation again is to write down all codes and keys for sites in a notepad - the service allows you to view them from the application menu.
An alternative way is to store pictures with QR codes of keys to sites in printed form (the application also provides the ability to view QRs). Then in the future, when entering the site, you will be able to enter the key for it or scan the QR once.
<Fig. 5 Receive the code>
An alternative option can be offered to iOS users.
In the case of these devices, it is recommended to back up password-protected data periodically.
Apple backup is designed in such a way that it even saves application codes, so after recovery the entire application code base can be restored.
« Previous entry
Change login with 2FA verification
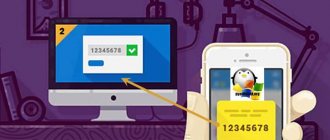
Before logging into our Google account, all we had to do was enter our password. Now everything has changed, one more step is needed. The first step, as always, is to set our password.
We will then need to take our mobile phone, open Google Authenticator and add the verification code that is currently displayed on the screen.
It's also worth noting that in Try Another Method, you will have access to other second steps that you have previously configured. In this case we will also have the possibility of voice and text messages.
As you've already seen, protecting our Google account with two-step verification is very simple. This process will happen exactly the same in other services like Dropbox, Microsoft Outlook and many others, just what we will need to configure is two-factor authentication and enable the authentication we want to use with the authentication app. We should also point out that there are other very interesting applications such as Latch from Eleven Paths and even Authy that will allow us to save the tokens of these 2FA authentications to the cloud. Google Authenticator stores tokens locally, which means that if we restore or replace smartphones, we will have to reconfigure all accounts.
How it works
After you have added your smartphone, you can try logging into your Google account through a browser on your PC. After entering your username and password, you will see a window with instructions on what actions you need to perform on your smartphone in order to log in. At the same time, the system will send you a login request to your phone. On your smartphone, you just need to confirm these actions and you will automatically log in to Google on your computer.
Using a smartphone as an authorization confirmation device is very convenient. But keep in mind that this method only works with an active Internet connection. Otherwise, you can always choose an alternative login option, for example, using a confirmation code from an SMS message.
What is two-factor authentication?
Two-factor authentication (2FA code) is a method of confirming a user’s access rights to the account of a particular web service using a one-time password system.
Setting up 2FA is the inclusion of additional factors for logging into the system. For example, using SMS, fingerprints using a special device or a six-digit Google Authenticator (GA) code, which we will talk about in this material.
What is a six-digit GA code? It is a one-time password that is constantly generated within 30 seconds. During this time, you will need to have time to enter it into the field when entering the exchange or other systems where you have 2FA protection. This six-digit code is generated even when the Internet is turned off.
There are several options for the practical implementation of this account protection method. In this review, we will look at setting up a special application for generating random Google Authenticator codes. This program was developed to protect Google accounts, but is widely used on cryptocurrency exchanges and other resources.
The Google authenticator is used as a second level of protection when logging into your personal account or withdrawing funds from the trading platform, and on some exchanges even when creating orders.
The program installed on your mobile device creates a six-digit digital password every 30 seconds. To confirm your login or other transaction, you must enter it in the request form. If the code passes the validity check, your access rights are confirmed. The procedure for activating Google Authenticator is identical for all web resources.